The Rustoration Build Off

GoldenMotor.com

MotorbikeMike

Dealer
Dec 29, 2007
477
3
18
Sacramento
Hi Silverbear, well, as I was looking at your tank, 2 things come to mind (other than "Well Done buddy"!)

First being I like it crosswise better, a more traditional look and might allow to carny some lil tidbit on the rest of the rack.

Second being, use leather belting, straps with buckles, Traditional, sustainable, easy and cool looking, with little to no abrasion on your tank.

Mike
 

pre-war Schwinn

New Member
Nov 15, 2009
109
0
0
73
Los Angeles 90039
zip ties qualify, in fact, my "Raw Kit" Instruction Manual asks for zips to be used on the CDI instead of threaded screws during assembly. that way they may be 20 second fire safety straps. A gasoline fire will melt them the burnig tank is released from the rack, falls away,and then rolls into the gutter, saving the rest of the paint and the seat from fire damage LOL
check into bulldog collars for some studded straps and buckle's
I used the top door salvaged off of a computer back-up battery-case, it is constructed of Armored Steel, I drilled the four hole's for my "teardrop tank" into this lightweight High Grade steel door, while drilling the fourth hole, using a Millwakee Hole Shooter, I slipped, thus I drilled a hole in my thumb to match. It needed a full roll of paper towels to absorb the blood I just put the roll on my thumb and laid over them and waited as the hole shot blood for an hour. then self sealed........ I placed a matching 1961 California license plate on each side of this racked tank and zip tied them to my frame,
Since You are Pioneering the Girl's bike build You might try a tank mounted to the handle bars too.
Or a flat tank that rides under the rack allowing for use of the rack for othar things there is one made for the schwinn style pre-war racks that would set a fine example for Ya
Your tank resembles a Soup Can he he.wee.
 
Last edited:

silverbear

The Boy Who Never Grew Up
Jul 9, 2009
8,325
670
113
northeastern Minnesota
Thanks for the feedback on the tank. I looked at the stainless steel hose clamps at Lowes last week and may use them. I wanted to figure out the final mount first in order to know what size hose clamps to use. On the other hand the zip ties hold it very securely and if the tank is painted black they kind of disappear visually. If I cover the tank in leather then I may go with leather straps if I feel it holds the tank tightly enough.
I also tried it cross wise instead of lengthwise and didn't like how it stuck out beyond the sides of the seat... seemed like on this bike that it looked better lengthwise unless the tank was smaller. if anything I would try a bigger can yet so that I had a larger volume of gas. Also, my brother thought lengthwise and I figured why not, since he usually doesn't show that much interest in what I'm doing, but has with this old Elgin. On some bikes I think the tin can look wouldn't work, but on this one I like it. It seems straightforward, basic and kind of industrial looking, something like the early motorcycles in that way. I think I'll leave it as it is until the rest of the bike has come together and decide then what looks best when I can see it as a whole. As for having more room on the rack, there is so little that I don't care about that... just in what looks right to me. I'm sure some will look at the bike and think, "what the **** is that?" While others will like it very much. As the Irish say, "it is as it is". One thing is for certain, it will be different.
SB
 

pre-war Schwinn

New Member
Nov 15, 2009
109
0
0
73
Los Angeles 90039
when researching tanks I noticed that Radiator overflow tanks are cool and fuel overflow tanks too. they come in stock sizes and can be had on ebay I think they legitimize a build and look like old MOON tanks that dragsters used in the 1960's
I opted for the over the motor set up I think it is gravity fed and wish to be sure I have that gravity going for me Outboard motors use a pump in the fuel line to prime up the fuel.
very old cars like my 1927 Bugatti have a pump too it looks like a beer pump that mounts outide the car on the left so the driver can pump gass manually on steep hill climbs He He
P.S. well done buddy
I need to gas up my bik I will put a Pot leaf on my tank
 
Last edited:

BarelyAWake

New Member
Jul 21, 2009
7,194
21
0
Maine
YAY!!1! *dances*

Mine shiftkit showed up yesterday at work and it was all I could do to not bail out early and flee home to mess around with it lol, this thing has been holdin' me up a lil as I needed it to figure out where the forward motor mount needs to be. Not that I didn't have other stuff to do ofc, but it's a pretty major step. Can't fault the guys o'er at SBP tho - Murphy pounced the opportunity and no sooner than I managed to save up me shiny pennies, they were sold out. Once they restocked it was here in about four days - not bad considering I'm in the middle of nowhere heh.

So whilst I was waitin' and unable to make screaming death noises on my fenders (something 'bout housemates and 4am pfft), I cracked open the new Grubee yesterday morning jus' to see wassup. Sure 'nuff the intake, exhaust, and transfer ports are beggin' for the ol' Dremel. Lotsa pitting and casting flash to get rid of to say the least o_O

(click thumbnails to view)


Gettin' there lol - still need to actually polish them but hadta throw it
all back together so I didn't get crap in the motor while I fitted the jackshaft;


and the Rollfast becomes a three piece crank;


and the jackshaft fitted to the motor;


I must say it's a pleasant change of pace switching from the sloppy engine kit to the stuff made by SBP - everything's machined so well! The HD freewheel bearing is a freakin' work of art, all the bolt holes line up perfectly and the bearings seat so well it's almost needful to press them. Im geek 'nuff I did just sit there for awhile and spin the freewheel bearing jus' cause it made me giggle...

Tease me 'bout that and I'll ban you o.o

lol - I'm kidding...

mebbe
 
Last edited:

silverbear

The Boy Who Never Grew Up
Jul 9, 2009
8,325
670
113
northeastern Minnesota
when researching tanks I noticed that Radiator overflow tanks are cool and fuel overflow tanks too. they come in stock sizes and can be had on ebay I think they legitimize a build and look like old MOON tanks that dragsters used in the 1960's
I opted for the over the motor set up I think it is gravity fed and wish to be sure I have that gravity going for me Outboard motors use a pump in the fuel line to prime up the fuel.
very old cars like my 1927 Bugatti have a pump too it looks like a beer pump that mounts outide the car on the left so the driver can pump gass manually on steep hill climbs He He
P.S. well done buddy
I need to gas up my bik I will put a Pot leaf on my tank
Your bike is lookin' good! Yes, the overflow tanks as you suggested look like a viable option.
You've changed your exhaust pipe... was there a problem with the other one? I wonder how many of us at this forum are old guys like us? Quite a few I think. Maybe we're in our second childhoods or something. Actually I'm still in the first one... kinda draggin my feet on growing up as I can't see much future in it.
SB
 

silverbear

The Boy Who Never Grew Up
Jul 9, 2009
8,325
670
113
northeastern Minnesota
YAY!!1! *dances*

Mine shiftkit showed up yesterday at work and it was all I could do to not bail out early and flee home to mess around with it lol, this thing has been holdin' me up a lil as I needed it to figure out where the forward motor mount needs to be. Not that I didn't have other stuff to do ofc, but it's a pretty major step. Can't fault the guys o'er at SBP tho - Murphy pounced the opportunity and no sooner than I managed to save up me shiny pennies, they were sold out. Once they restocked it was here in about four days - not bad considering I'm in the middle of nowhere heh.

So whilst I was waitin' and unable to make screaming death noises on my fenders (something 'bout housemates and 4am pfft), I cracked open the new Grubee yesterday morning jus' to see wassup. Sure 'nuff the intake, exhaust, and transfer ports are beggin' for the ol' Dremel. Lotsa pitting and casting flash to get rid of to say the least o_O

(click thumbnails to view)


Gettin' there lol - still need to actually polish them but hadta throw it
all back together so I didn't get crap in the motor while I fitted the jackshaft;


and the Rollfast becomes a three piece crank;


and the jackshaft fitted to the motor;


I must say it's a pleasant change of pace switching from the sloppy engine kit to the stuff made by SBP - everything's machined so well! The HD freewheel bearing is a freakin' work of art, all the bolt holes line up perfectly and the bearings seat so well it's almost needful to press them. Im geek 'nuff I did just sit there for awhile and spin the freewheel bearing jus' cause it made me giggle...

Tease me 'bout that and I'll ban you o.o

lol - I'm kidding...

mebbe
Boy, that's some nice goodies you've got there. You're going first class, Bud! Someday I'm going to spring for that shift kit if I ever get out of debt. Looks like a really good way to go. I'll be interested in your reactions once you're riding it. You'll be interested in your reactions, too! Ha. Next motor I'm going to have to get out the dremel tool for some clean up work on the ports. I haven't done that yet and when the time comes will be asking for some help. I know you have pictures there, but I want to be absolutely sure of what I'm doing before I screw things up. Seems kind of dumb not to spend a half hour prepping the motor if it makes a difference in how well it performs. Cost is nothing but a little effort, right? Well, what's next?
SB
 

silverbear

The Boy Who Never Grew Up
Jul 9, 2009
8,325
670
113
northeastern Minnesota
I realized last evening that an Elgin motorbicycle is nothing new... I'm not breaking new ground after all. I found these photos of a 1920's Elgin with Elgin motor, apparently not an afterthought, but came that way. I'm guessing it is friction drive. Too bad Elgin didn't continue down this path of motored bikes as they made 2 cycle outboard engines for boats for some years with success. We might have had another fine American tradition like Indian and Harley Davidson.
SB
 

Attachments

BarelyAWake

New Member
Jul 21, 2009
7,194
21
0
Maine
Bah - don't sweat it silverbear, a port n'polish is easy if ya have a Dremel. Just don't nick the cylinder walls, round over the manifold/cylinder faces, or open 'em up too much and yer golden. It's far, FAR simpler than what you've done with yer fenders lol

These are the lil things that make all the difference between an engine that purrs and another that *****es and moans, it's just some minor effort and takes no monies at all - yet it seems so many will neglect such simple things, buy hundreds of dollars of bolt-on, performance doodads and wonder why they get smoked by the scruffy guy w/grease under his nails. Sure, ofc I'm gonna buy a tuned pipe and a good carb - but what good are those if it's gotta get past alla the crap in the above pics? :p

But yeah... that's one of the things that's slowin' me down, I gotta actually save up summore loose change fer a expansion chamber and carb. Fortunately other than some odds and ends like a chain and more paint, I've gotten just about all the bits and pieces I need to actually assemble this thing.

Oh right - in case anyone's wonderin', no - I'm not actually tryin' to make the Rollfast a speed demon... more "correcting" what I think are the shortcomings with these kits. Any actual power increase will be eaten up by this build's extreme weight, I bet my Schwinn would still smoke it lol


edit: Those Elgin motorbicycle pics are sweet man - I'm defo checkin' em out summore :D
 

weekend-fun

New Member
Jun 21, 2009
999
0
0
San Carlos CA
lol you guys are making awsome! progress and i....well I need to get started ;)
School has been in the way, but I finally got some free timw and I am gong to go put and work on the bike!


Any advice one a new paint scheme and info on a painting a gas tank and engine???

Awsome rides!
 

silverbear

The Boy Who Never Grew Up
Jul 9, 2009
8,325
670
113
northeastern Minnesota
lol you guys are making awsome! progress and i....well I need to get started ;)
School has been in the way, but I finally got some free timw and I am gong to go put and work on the bike!


Any advice one a new paint scheme and info on a painting a gas tank and engine???

Awsome rides!
As has been suggested elsewhere on this forum, Dupli-Color engine enamel is a really good pain to use both for your engine and for your gas tank. Google the company and you'll see what colors are available. You can buy it at Napa, but you might need to order the color you want. I use this paint for my whole bike. It has ceramic in it and is resistant to gasoline. Of course they also sell the primer. Get the crank loose yet?
SB
 

BarelyAWake

New Member
Jul 21, 2009
7,194
21
0
Maine
weekend-fun - fer groovy paint schemes I'd recommend googling old 50's bikes and pick out a pattern you like, there's a bunch to choose from... and silverbear is right on the money about dupli-color engine enamel - that stuff is ossum!


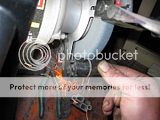
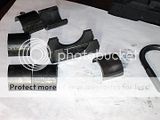
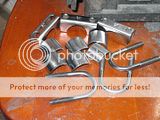
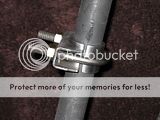
...and this mornin's progress - the jackshaft from SBP relies on three pipe clamps to act as rear engine mounts as it takes o'er that job from the motor (actually two, one is for the chain tension/raising & lowering rear of engine)... but I was a lil concerned about crimping my seat post tube should I over tighten them in my enthusiasm. It may be ol' pre-war steel, but I still didn't wanna chance it.

So I ordered oversized pipe clamps when I placed my order, grabbed a hunk of crusty steel pipe and;

(click thumbnail to view)


When I get into work today I'll spot weld these badboys together, brush 'em up a lil and paint 'em - I think they outa do the trick. It's not much progress I'll admit, but every lil bit counts I figure lol
 

silverbear

The Boy Who Never Grew Up
Jul 9, 2009
8,325
670
113
northeastern Minnesota
As has been suggested elsewhere on this forum, Dupli-Color engine enamel is a really good pain to use both for your engine and for your gas tank. Google the company and you'll see what colors are available. You can buy it at Napa, but you might need to order the color you want. I use this paint for my whole bike. It has ceramic in it and is resistant to gasoline. Of course they also sell the primer. Get the crank loose yet?
SB
Yes, every little bit of progress counts for sure. Your fabrication efforts will pay off down the line later on in peace of mind that you've done things just about as well as you know how. Sometimes it is the seemingly little things which make all the difference. Just like your time spent porting... nobody will see or know, but you will and the motor will, too.
Not a bunch of progress here, but some. Yesterday I drove to the big city (Frederick, Maryland) to a shop called Bicycle Escape which came highly recommended. Nice people there interested in my 39 project and who found three axle nuts for my Worksman front wheel (one spare). A buck fifty well spent. At Wallyworld I picked up a thick gel seat cover (sixteen bucks) and a tube of glazing putty for the fenders/guards work. The little in frame tank is painted and now mounted on the bike... not a big change, but another little step toward being done. Last evening I took apart my seat, repainted the springs/hardware and stitched the elk hide back on with the get padding inside. Wow, what a difference that makes. It was already pretty comfy before the gel, but this is going to be the best seat ever. I have nice wide Worksman seats on my Americans, but this is better yet. Thanks for the tip, Barely. The pedal chain guard is in primer, but doesn't look so good. I need to do more sanding, puttying, priming before giving it a final coat. If I don't put this bit of extra effort in to it now I'll always be wondering why I didn't do a better job of it. I'm not being a perfectionist as it won't be by a long shot, but it has to be pretty good or why strip down and repaint? Besides, I see this as practice for the fenders and skirt guards. Still have that bent stay to deal with, too. Of the original three of us, I will still probably come in last done. Which is OK since it is winter anyway. I have gel handgrips coming in the mail and will cover them in elk hide. I hope it will slip over the throttle tube OK. That's about it. Nothing much new to take pictures of. The Worksman wheel with drum brake looks good on the bike. Need to make a little brake stay out of something in the junk box. This bike is gettin' heavy...it's my "iron horse".
SB
 

pre-war Schwinn

New Member
Nov 15, 2009
109
0
0
73
Los Angeles 90039
I tallied up the amount of time it had taken me to build this old bike from scratch it took 30 days
I may put the pipes back on again since they are a factory item and perfect. they even match the size tubing to create a thru line. I pulled them from an electric bike by Schwinn the street series Chopper deluxe Electric one
Problem is my chopper looks naked without them,Im 59 now and had once been a " Picker" a Pick Your part type experimenting daily and making my living at it for my whole life. Tonight I was able to show off my build to my older brother .who appreciated the fact that it is as old as him July 16 1948 and that he thought I'd bought it.
I have here a shop I created to look like the ones on TV that Hot Rod on sundies I did it my whole life but build wise. I too started from scratch on it and did not need extra karma to get parts.. I have it saved up. I traded a guitar for them that I had in my trunk while buying a stripped frame
Pipes OK ,I can use them as my chain guard too. I tighten both chains together with my special droputs that face the rear. It took three days for my chains to loosen up and crank over. I am skimming the whitewall because I only installed one gasket on my sprocket. I had to grind off my rear mounts extra metal and screw it on with SS bolts On the front I had to bend the pipe to clear my pedal and shave my mount and screw the front mount the same as the rear. thats the extent of my fabrication. chains and mounts LOL
 
Last edited:

weekend-fun

New Member
Jun 21, 2009
999
0
0
San Carlos CA
As has been suggested elsewhere on this forum, Dupli-Color engine enamel is a really good pain to use both for your engine and for your gas tank. Google the company and you'll see what colors are available. You can buy it at Napa, but you might need to order the color you want. I use this paint for my whole bike. It has ceramic in it and is resistant to gasoline. Of course they also sell the primer. Get the crank loose yet?
SB
I am getting at that today dance1

i have been really busy latley, specily since I got in some trouble:-||
Thanks for the advice SB!
 

silverbear

The Boy Who Never Grew Up
Jul 9, 2009
8,325
670
113
northeastern Minnesota
Had to take the bike outside anyway, so here's a couple update photos. First is the pedal chain guard and in frame tank before primer, second is bike with 'new' used Worksman front wheel and little in frame tank in place and last is the seat. Really like the seat. It is definitely worth redoing an old seat like this. I have about twenty dollars in it. The stitch is called a 'saddle stitch' and uses two needles. Leather is elk hide, scraps left over from making moccasins.
SB
 

Attachments

MotorbikeMike

Dealer
Dec 29, 2007
477
3
18
Sacramento
Hello Rust-Lovers!!! Today, instead of making 4 or 5 posts about this little Cleveland Welding bike I built in early '05 I will just give you the link to it.

I dunno where i have the build on the Green Cleveland, and if I cannot find that build I can write it up again.

I wrote this up on my website to show off her bike, but also to give people a clue what an old bike can be made into.

Enjoy!

Mike

Circa 1955 Cleveland Welding Motorbike
 

silverbear

The Boy Who Never Grew Up
Jul 9, 2009
8,325
670
113
northeastern Minnesota
Silverbear, I agree with motorbikemike, I also think you should mount that tank crossways, right behind the seat!! It'll give it the right 'look'! ;)
Maybe you guys are right, I don't know. I'll do this. I'll make another tank (drinking some V8 right now) and another cradle with the idea of it going cross wise. If it looks better, then that's how it will be. I can always use the other one on something else. I've also been looking at coffee cans... a little shorter but more stout. I know a small tank would look better, but it sure would be nice to have a half a gallon of gas for longer rides. Question... do you think it would be wise to use a tank liner inside to protect against rust? I've been wondering about that, especially if I go to the trouble of covering it in harness leather. Thanks for your input. It helps a guy think things through.
SB
 

silverbear

The Boy Who Never Grew Up
Jul 9, 2009
8,325
670
113
northeastern Minnesota
Hello Rust-Lovers!!! Today, instead of making 4 or 5 posts about this little Cleveland Welding bike I built in early '05 I will just give you the link to it.

I dunno where i have the build on the Green Cleveland, and if I cannot find that build I can write it up again.

I wrote this up on my website to show off her bike, but also to give people a clue what an old bike can be made into.

Enjoy!

Mike

Circa 1955 Cleveland Welding Motorbike
Nice ride, Mike! Between that and Bairdco's Colson I'm looking at 24 inchers differently. Wouldn't that be sweet with an built in tank? I suppose it wouldn't hold much, but it sure would look good. How did she like it?
SB