For China girl engine it is not necessary to cut bottom tube, It is your bike and build it the way you want. What I or others say is not always the way you want or like. LOL. Help is always good, its like why didn't I think of that, and you could always save the old girls frame for another build, or maybe instead of hole bikes just look for frames. That is a good video........Curt

You are using an out of date browser. It may not display this or other websites correctly.
You should upgrade or use an alternative browser.
You should upgrade or use an alternative browser.
Cranbrook Springer Forked BTR YD100 Replica Build (without fabrication)
- Thread starter Nightster
- Start date
Nightster
Well-Known Member
For China girl engine it is not necessary to cut bottom tube, It is your bike and build it the way you want. What I or others say is not always the way you want or like. LOL. Help is always good, its like why didn't I think of that, and you could always save the old girls frame for another build, or maybe instead of hole bikes just look for frames. That is a good video........Curt
I understand, someday I’ll go for a four stroke motor and need more of a defined loop and bottom plate.
thanks again curt
been practicing my welding in my free time, sheet metal and steel tubing. And it still needs practice but getting better
Nightster
Well-Known Member
BTW, I was cruising eBay last night and found a 49cc China doll engine kit for $28.98, with tax $30.79.
as soon as I bought it, I thought of this website and buying another one lol. I went back to buy another one and they were already gone.
don’t know if I will use this motor on this build or not but I have one ordered
I believe it’s the upgraded motor with 8 mm bolts

as soon as I bought it, I thought of this website and buying another one lol. I went back to buy another one and they were already gone.
don’t know if I will use this motor on this build or not but I have one ordered
I believe it’s the upgraded motor with 8 mm bolts
Full Set 80cc Bike Bicycle Motorized 2 Stroke Petrol Gas Motor Engine Kit Set | eBay
Lubrication Oil: Oil for 2-stroke Petrol Engine (or Oil for 10W/40.10W/30). Promote your bicycle performance by refitting! Maybe you need a new engine for more wonderful riding experience! As to this item, it adopts first-rate steel material, of great strength and hardness for endurance.
www.ebay.com
Nightster
Well-Known Member
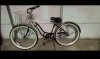
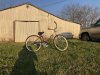
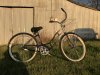
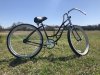
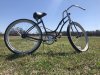
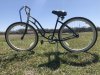
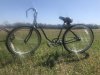
Well I got the bike!
the only identifying mark besides the serial number, is this sticker low on the seat post. 100th Anniversary Edition. But if it is, it’s missing the gas tank and the springer forks. It definitely does not have the stock forks on it. it has a hole on part on the frame where I believe a fake gas tank was once mounted.
anyway I believe it to be a 1995.
Attachments
-
 4EEB8010-52EA-4C27-9CB9-E1850EBBA9DB.jpeg163 KB · Views: 228
 -
 132BC0DC-806D-4A8F-95AB-0D13F35E136A.jpeg169.6 KB · Views: 252
 -
 1B62BE55-C42F-4B54-A105-308524F740C5.jpeg164.9 KB · Views: 273
 -
 912D3EE7-DC21-4F13-8DE1-DC3327AD8014.jpeg156.9 KB · Views: 241
 -
 B7F57E05-A713-4652-AA11-DEF272BF16D4.jpeg85.1 KB · Views: 234
Nightster
Well-Known Member
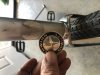
What is the serial #? I think all the style forks are 1"..............Curt
TY50512705
hope it is 1”
Nightster
Well-Known Member
You should be able to pull the handle bars and measure the top of the tube, remove the big top nut, measure the OD with caliper..........Curt
will do when I get off work today
Nightster
Well-Known Member
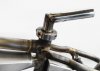
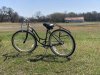
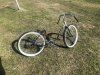
Got her all stripped down with the exception on the reflector on the steering head. About to remove that and check the head size.
she’s looking different already but the seat has to move back for sure
thinking about cutting the top bar and supports off before heading over to my girlfriends house this evening. Do you all think the one bar is enough support? no plans to ride at this point.
she’s looking different already but the seat has to move back for sure
thinking about cutting the top bar and supports off before heading over to my girlfriends house this evening. Do you all think the one bar is enough support? no plans to ride at this point.
Attachments
Nightster
Well-Known Member
Be careful it could bend easy...........Curt
will do, thanks... I’ll pick up some tubing this weekend. Just gotta figure out how to put a roughly 33° Bend in the top tube
I usually plug one end of the tube and fill it with tightly packed sand. Pour a little sand in as you tap the side of the tubing with a hammer then ram the sand down hard with some round bar. Repeat until full and cap the end when your finished.
This will keep it from crushing when you bend it.
You may want to buy some round bar if you don't have any. It always comes in handy for using as a sleeve when joining two pieces of tubing.
The trick is to find something round that you can bend the tubing over to give you the right bend you want. Just so long as it doesn't crush when your bending. Get the tubing longer than what you want so you have the leverage to bend it. Clamp it in a vise if you can.
Hope this helps. The bike is looking good.
Steve.
Nightster
Well-Known Member
I usually plug one end of the tube and fill it with tightly packed sand. Pour a little sand in as you tap the side of the tubing with a hammer then ram the sand down hard with some round bar. Repeat until full and cap the end when your finished.
This will keep it from crushing when you bend it.
You may want to buy some round bar if you don't have any. It always comes in handy for using as a sleeve when joining two pieces of tubing.
The trick is to find something round that you can bend the tubing over to give you the right bend you want. Just so long as it doesn't crush when your bending. Get the tubing longer than what you want so you have the leverage to bend it. Clamp it in a vise if you can.
Hope this helps. The bike is looking good.
Steve.
Thanks Steve
And I appreciate the info. I think leverage will be the key for sure. The 1” tube I cut off is roughy .077” thick. I’m guessing I can find something comparable at Home Depot.
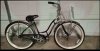
she’s coming along, seat and pedals gone too. Need to remove the chain, sprockets, etc.. also.
a little more grinding and then I can rough up the whole finish.
here’s where I finished tosay
Attachments
Nightster
Well-Known Member
I also wanna angle the seat post at 90° towards the back, then 90° up again. How much of the seat post do I need to leave inside the center tube? Well I need to get some more 7/8” round tubing to add to it?
or I think I’ve seen them online but I can’t remember where.
or I think I’ve seen them online but I can’t remember where.
Nightster
Well-Known Member
found this on sportsmanflyer, but that obviously is not The correct Picture
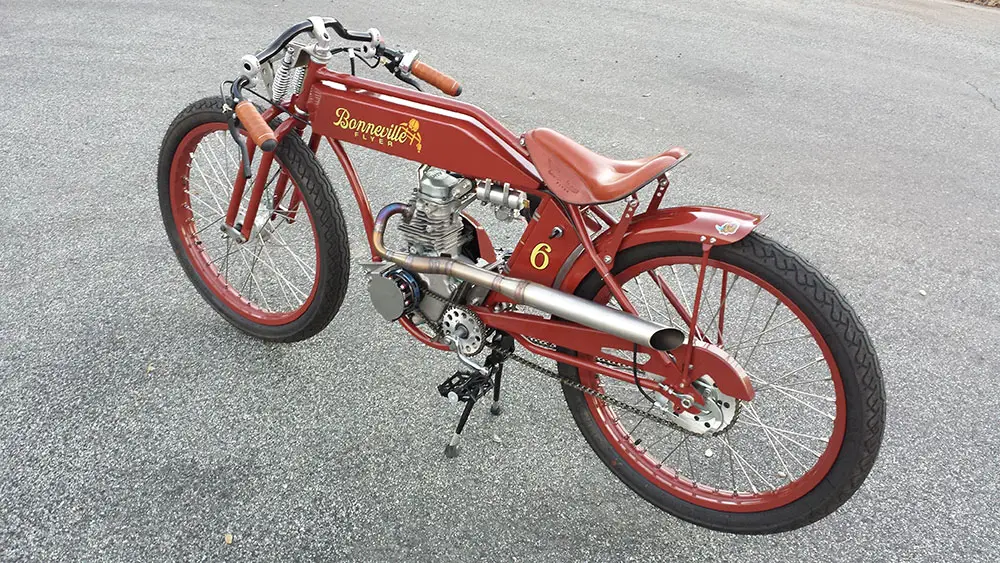
Is this it in this picture? If so I need to order that for $30
Is this it in this picture? If so I need to order that for $30