Bike builders that have machine tools/shops

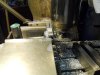
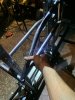
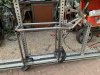
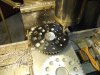
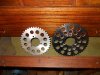
Another two beer session. Had to shorten the OAL by .450". Fitted a 1/16" slitting saw in the arbor, touched off, and dialed down. Right and left pass and done. Nice thing about parting off material with a slitting saw, is it is a one and done with a nice clean cut face.
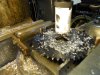
Spot faced and tap drilled four equidistant holes for M6x1 SHCS. I should have taken photos but I was using WD040 as cutting lube and messy. Though it is a fine cutting fluid for aluminum.
Tom
 
Today was going to be a finish.
I knew I had taxy duty for Mona today but didn't think it would be all day. It was.
Guess I forgot or they went deeper for a bone marrow biopsy specimen.
Got home just to start making Bavarian fried sauerkraut and smoked sausage.
Tom
 
Repeat sorta. Today was going to be a finish. Ha!
Three beer day cause I got in the shop early and damik I ain't done YET!
Flipped the brake arm anchor and spot faced the underside clamp flanges to accommodate M6x1 nuts. That's done.
Mounted up the anchor endwise in the mill vise and split it on the center line with slitting saw. First photo.
All holes that had threads got tapped. Put a bolt thru the brake arm mount and tried to seat the anchor and it don't go.
Clamping flange interferes with the drive sprocket. Chit! Original design was a two bolt per side clamp flange, overkill.
Tomorrow, mill the clamping flanges to one draw bolt per side width which will allow it to clear the drive sprocket.
Tom
 

Attachments

  • DSCN0041.JPG
    DSCN0041.JPG
    74 KB · Views: 184
  • DSCN0043.JPG
    DSCN0043.JPG
    94.9 KB · Views: 195
  • DSCN0044.JPG
    DSCN0044.JPG
    67.3 KB · Views: 203
Is that strut or kindorf ? Repurposing material makes sense to me, my trailer is built from warehouse racks and parts of conveyors, it has hauled everything possible in the 20 years I've had it.
Repurposing material is getting more difficult with all the chinesium everywhere. The two 3ft perforated box tube pieces I can still return to Home Depot for $23 each. What a ripoff.

Running a hub motor; you’re looking at the massive battery box.
 
Home Depot's metal prices are not too kind. I finally found out where the metal supply in our area was and make the 12 mile one way trip to buy there. We are fortunate to have one and the gas and driving is compensated for by the savings. Also the benefit of picking through the cut off section {crops} is great.

How big will the battery be?

Steve.
Nice. Steel is crazy expensive locally if it’s not from their scrap pile which is also worth the 12 mile drive.

The battery will be a 72v48ah to start like this one. Going to play with weights to see how the bike handles with a bigger one. I could install as big as 120ah depending on battery type.
 

Attachments

  • E4716EE7-B87E-46B5-B311-11DFFEBC1C8D.jpeg
    E4716EE7-B87E-46B5-B311-11DFFEBC1C8D.jpeg
    102.7 KB · Views: 202
How much do think it will weigh? Will you trailer it or ride out to riding locations? Other than the road I live on I have to trailer mine to ride, the state route at the end of the road is a two lane with very little shoulder, everyone drives like they are racing AMS.(Atlanta Motor Speedway)
 
Thinking of Tony01's current ride, you can visualize what is being fab'd.
Some of the battery box/frame build details have been omitted for brevity I assume. For ten tears, I made weld fab fixtures to make similar tubular framing Tony has shown us. The head alignment part of the weld jig, I like.
Thanks for sharing Tony01
Tom
 
Greg, it’s gonna be about 160. I ride everywhere. Charge at high power on car handles all over town. I’d be racing on that route too.

yeah Tom, what’s being fabbed is something without glass. Bought a lot of basic tools for this, couple of work surfaces, really cheap. HF tubing notcher is a POS that hasn’t let me down. Lot of measuring and aligning, ensuring accuracy to the cad model. Still gotta figure the swingarm. Very difficult build, need more tools again :D
 
Last edited:
Hi Tony glad to see you're still building. First frame from scratch is a big step, but I know your work and skillset and see you started with the basics of a solid jig. You are on your way and I know we will enjoy the build as it progresses.
Are you staying busy with building battery packs?

Rick C.
It’s like you said Rick, “need to build”. Building batteries is the most mundane work which is beginning to slow down. I can fit a few more tools in my space if this frame stuff takes off. A gas bike frame would be an interesting project, likely far easier. Someday.
 
Like your thinking and hope you do get some work from your efforts. Last scratch frame I did was my Simplex and that's a duplex frame, not recommended as a first round tube frame project for sure. Using DOM seamless tubing isn't cheap I have about 50 ft of 1" heavy wall that was purchased about three years ago, glad to have it, way more expensive now.

I soldered connectors for an upgrade on my hybrid after lunch today an found that small task tedious! Big battery pack sounds more like real work.

Though all my recent bikes are electric projects I still like the gas bikes too.

Rick C.
 
To improve hill climbing ability, I had two ways to go.
Larger drive sprocket or larger Transfer/Reduction sprocket. 44t rear sprocket is stock, and because of the heavy duty brake arm mount, the largest drive sprocket that would clear the B.A.M. was a 46t sprocket. Not much of a gear down.
The only alternative gearing option was a larger reduction drive sprocket. Stock sprocket is a 42t. I ordered a Browning 35a48t and have machined it mount on the reduction drive hub. Plus 24 weight reduction holes. Next trick is getting the red Loctite secured flat head screws loose. Heat will help.
Tom
 

Attachments

  • DSCN0064.JPG
    DSCN0064.JPG
    95.6 KB · Views: 142
  • DSCN0069.JPG
    DSCN0069.JPG
    66.7 KB · Views: 137
  • DSCN0066.JPG
    DSCN0066.JPG
    100.4 KB · Views: 143
  • DSCN0070.JPG
    DSCN0070.JPG
    113.9 KB · Views: 143
Thanks for the kind words. Installing the 35a48 transfer sprocket will have to wait. It was never intended to compensate for a poorly tuned carburetor. Today's test run proved my air screw setting is still not right.
Fall is upon us.
" Sharper than a box of tacks, Tom " More like dumber than a sack of hammers.
icon10b.png
icon10b.png
 
Back
Top