Motojoe2492
Member
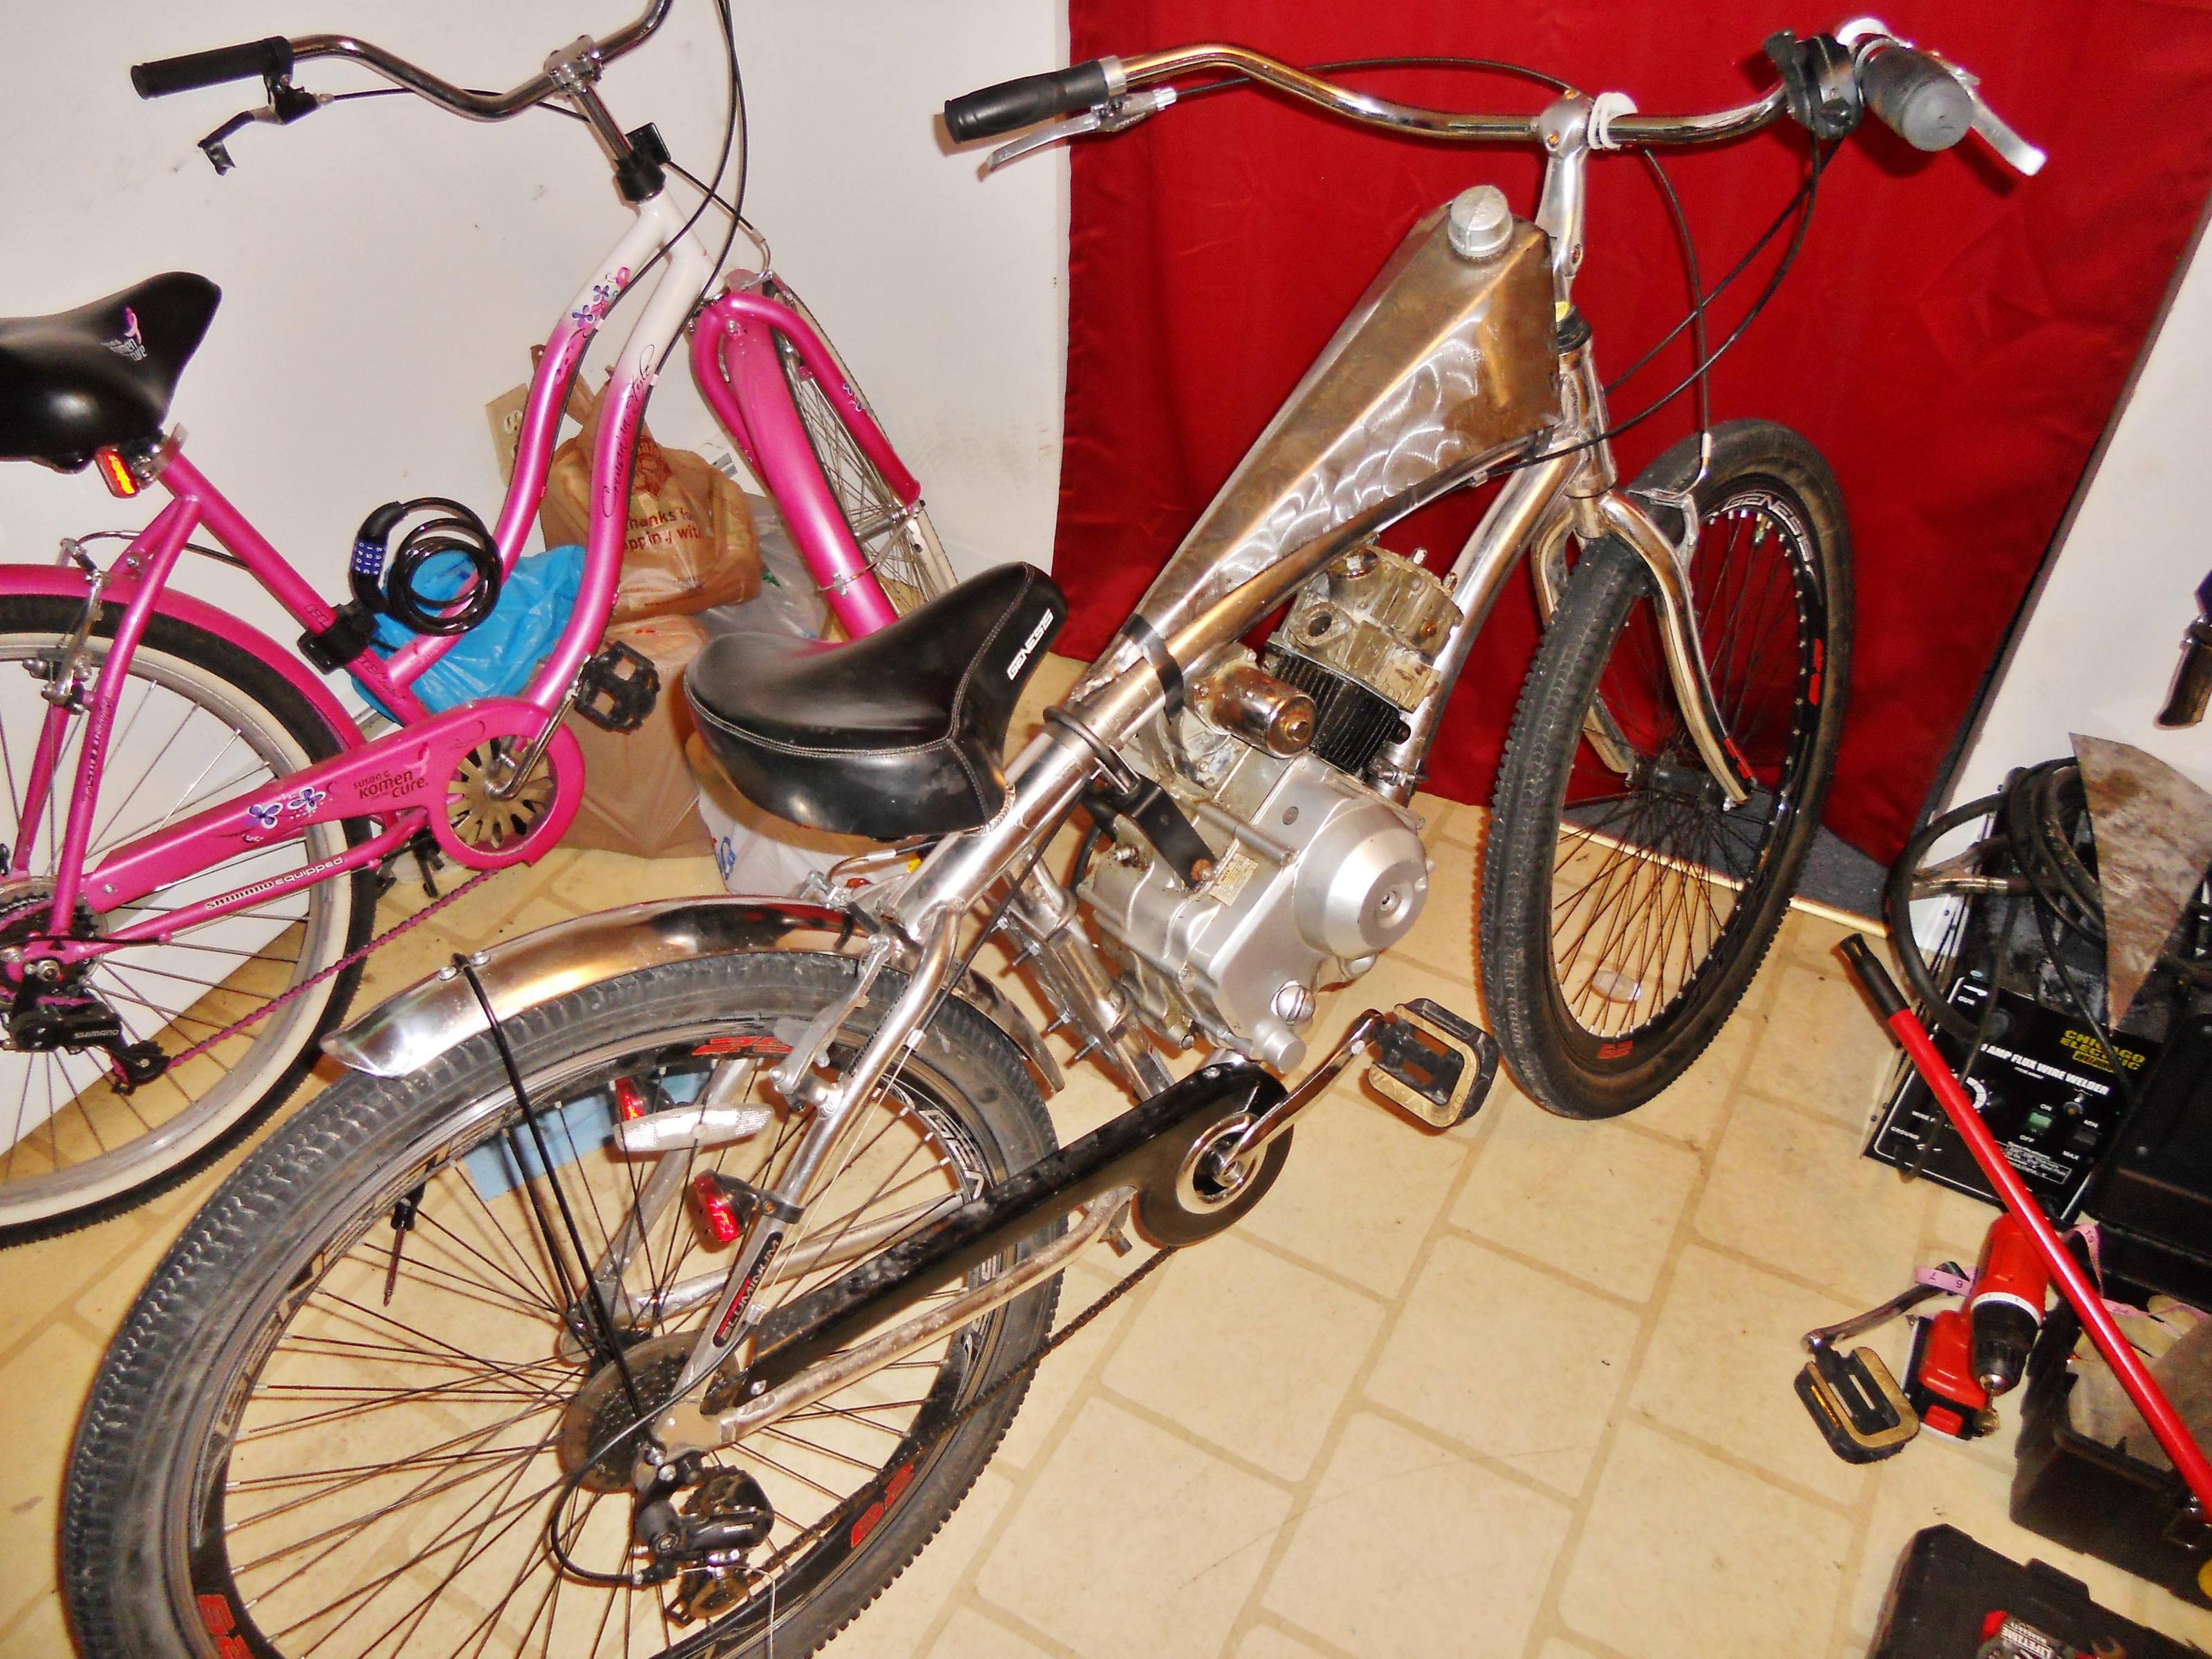
The tank is just to keep me from going crazy (or losing momentum)
The tank is just to keep me from going crazy (or losing momentum)
I completely understand the desire, jezz I have been holding off for a year on my current project until I could even get something made and buy what was needed to see if the drive train will work.
The difference between you and I is I make a plan and have enough to cover the cost of parts without killing me.
Yes, a rare luxury (thanks Pops).
You are trying to shove a heavy 4-stroke engine someone found in a forest and attach it to an Aluminum bike frame with some drive and mounts you think will actually last more than month, or week, or even a ride around the block.
My builders tip #2 for you:
Quit avoiding the huge drive challenge you face.
Hide the whole bike.
While you save all of your darn money figure out the EXACT parts you need to make an entire working drive train.
I only give ya a 50/50 you can even get that engine (if it even runs) mounted let alone your own makeshift jackshaft only attached to that seatpost.
Hey bud, I am just trying to help you.
All I am saying is you may be much better off using a 2 or 4 stoke kit with your spiffy tank and not destroy the bike trying to shove in something that has no business there even for free.
Just my take on this months long topic with no drive train, take it or leave it, it's your project.

Cool MotoJoe, just call that a 'preventive maintenance' post to help you focus, I really want to see you pull this off!
Actually I have no doubt you will get everything put together and make it go.
I just think all of us just want to help you make it not just go around the block before breaking and hurting you bud.
I have a quick question for you about your build. How did you clean up your welds on the gas take to make it look like it did afterwards. In the first few pictures your welds didnt look to great except in one of the other pictures the welds looked perfect like it was done with a tig. The reason I am asking is because I am currently working on a custom build and I am going to be starting the gas tank very soon and I am going to be welding it myself. I was thinking about using 16g so the welds dont burn through the metal. I thought anything less would burn through only because I have a mig and I cant turn it that low of a setting. In your pictures it looks like you used a mig on the 22g. Are those 2 different pictures of the same gas tank or did you redo it or is that what it looked like after you grinded it down? If I can use a smaller gauge sheet I would like to because to make it easyer to make different shapes. Also have you done anything else to the tank and how is it holding up. Here are a few pictures of my build, The cardboard is the template I made for the tank.
You are trying to shove a heavy 4-stroke engine someone found in a forest and attach it to an Aluminum bike frame


Just to satisfy a safety concern how about driving a second seat tube down the seat post to reinforce it. Theres going to be a pretty good loading there with the jackshaft and the engine mount I assume you are going to put there. You are going to have to put some pretty heavy clamp loads on the jackshaft mount to keep it straight
I have built two bikes using this type engine. Chain lines can be an issue, setting the primary drive chain might be a challenge with such a short(it appears) chain run. I would work that out first. The second chain shouldn't be as big a problem.
BTW be sure the valves are properly adjusted before the final install, looks impossible in the frame.

