
You are using an out of date browser. It may not display this or other websites correctly.
You should upgrade or use an alternative browser.
You should upgrade or use an alternative browser.
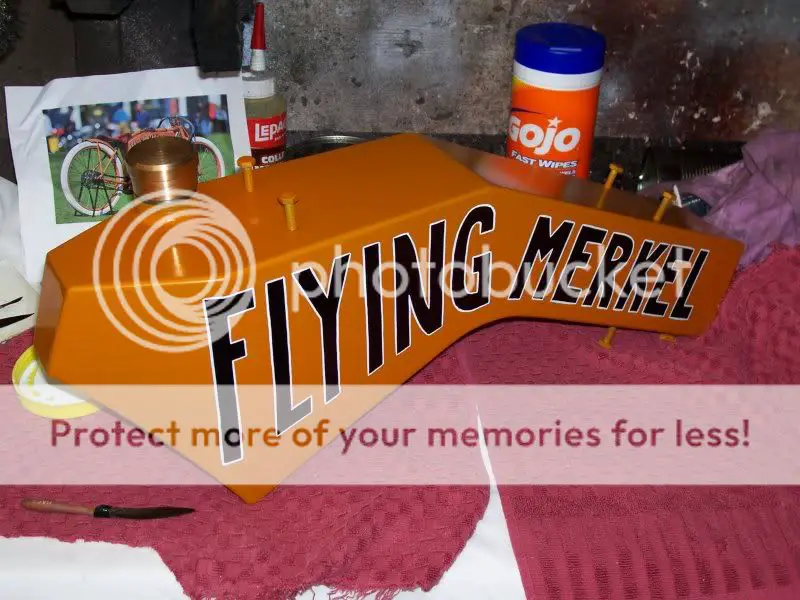
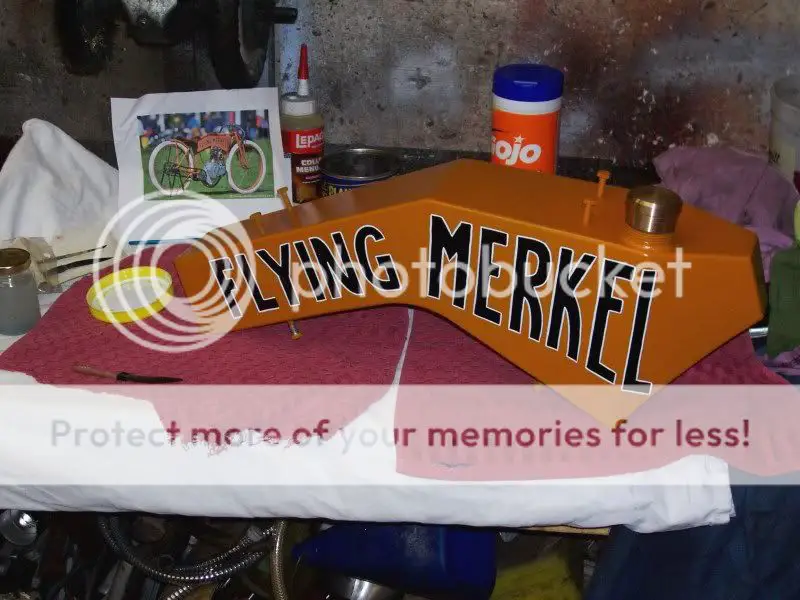
Merkel Board Track copy
- Thread starter Goldy
- Start date

cobrafreak
New Member
Very cool. Tell me, because of the bend in the tank does it require two petcocks or siphoning points to gather all the fuel?
harry76
Well-Known Member
Thanks Harry! Yes, made the velocity stack out of an old Yamaha swing arm bushing..a little spin in the lathe, a little polish etc, etc.
Yamaha swingarm parts??????? Wow.... you my friend are a genius, you seem to see things completely different to most of us, thats why youd have to be my favourite builder, and you probably do so on the tightest of budgets...... Much respect Goldy!!!!!!!!!!!!!!!!!!!!!!!!!!!!
Just wondering what the "goldish" finish is on the velocity stack?
Goldy
Member
Yamaha swingarm parts??????? Wow.... you my friend are a genius, you seem to see things completely different to most of us, thats why youd have to be my favourite builder, and you probably do so on the tightest of budgets...... Much respect Goldy!!!!!!!!!!!!!!!!!!!!!!!!!!!!
Just wondering what the "goldish" finish is on the velocity stack?
Thanks Harry, yes I try to keep things on the cheep side. I seldom throw things away; old bits and pieces are often a good source of machining stock.
The goldish finish is polished bronze.
Goldy
Member
Cool!!! So did you actually machine material away from the swingarm bushing or was it thinner material and you shaped it to the velocity stack (not sure of the term, "spinning"???)?
Yes, It started off about 1/8" thick with a shoulder on one end...I machined it down to look right...sorta-kinda, then soldered it to a flange to screw onto the carb. I do spin stuff now and then, it's fun to see the metal changing shape under pressure. Yup...I've always been a frugal beggar (the wife just calls me cheap)...been recycling for many's a long year; heck I'll even scan the roadsides on garbage day for hidden treasure

Gbrebes
Well-Known Member
As usual Goldy, the things you make are inspirational. I am always amazed at the bikes you build. A lot of cool details. I have one question. On the motor pic, I see you have a guard over the flywheel. Does the guard spin with the flywheel as the engine is running or is it stationary. I am using a briggs engine and I got a little owie from reaching down to adjust my carb while the engine was running (shaved fins, so didn't loose the finger, but I did loose the nail), so I am considering making a guard for the flywheel.
Thanks for all the pictures and knowledge and inspiration,
Gilbert
Thanks for all the pictures and knowledge and inspiration,
Gilbert
Goldy
Member
The guard is simply a disc cut from 1/4" aluminum plate. It was chucked up in the lathe and had the circumference trued and smoothed out and a 5/8" hole drilled in the centre. It's just held on with the flywheel nut and turns with the engine. I've done the same thing with my other builds...it stays in place and no owies.
harry76
Well-Known Member
Very nice looking work, Goldy!
Can't wait to see it come together.
Harry... google 'metal spinning' for some interesting stuff to learn about!
There's some youtube vids that are neato... U'll like it!
rc
I saw an episode of "Biker Build Off" where one of the builders (Indian Larry Legacy)got a guy to spin up oil bag from flat metal, it was amazing how he could work the metal, it was almost like someone working clay....... very cool
Goldy
Member
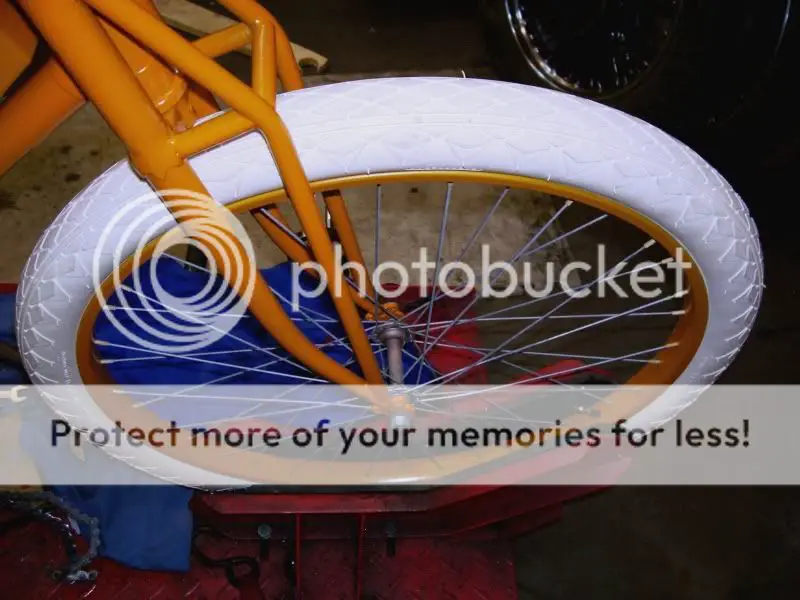
Here are a couple of teasers...Herm got the paintwork all finished and we got most of the bike assembled for the first time last night...looking good so far. Those Electra vintage pattern tires REALLY make the difference on this type of machine. Still waiting for the seat. Among the 'left to do' items are control cables, grips, lower frame loop plates and fuel lines.

Goldy
Member
Curt...Got the tires from Amazon.com - Electra cream vintage diamond pattern; they are a good high profile and width...really look the part.
Thanks Rusty...I'll keep that in mind, this is the first time I have used one of those rag joint set ups...when you get stuff for free, you gotta try it out") Been looking at those hub adapters myself, I think with a little time on the lathe, I could make my own version. In the meantime, we'll take it easy on the throttle.
Been looking at those hub adapters myself, I think with a little time on the lathe, I could make my own version. In the meantime, we'll take it easy on the throttle.
Thanks Rusty...I'll keep that in mind, this is the first time I have used one of those rag joint set ups...when you get stuff for free, you gotta try it out
Been looking at those hub adapters myself, I think with a little time on the lathe, I could make my own version. In the meantime, we'll take it easy on the throttle.