re: The Basics, Port & Polish and Port Matching
k - sorry 'bout the delay folks, that pesky RL thang keeps intruding heh
Anyhoo - as I recall yer sittin' there with yer engine all apart and perhaps wonderin' if it was such a good idea. Never fear - trust me when I say there's few engine projects simpler than portin' one of these lil happy time 2smokers FTW
If you've never shaped aluminum with a Dremel before - I heartily recommend practicing on something you don't care about first, preferably something with a hole not dissimilar to a port as that's the project yer interested in, but anything will do. Dremels are
great tools but they have lil quirks like spinning the "wrong" way and spitting bits and sparks into yer face heh, safety glasses are ossum.
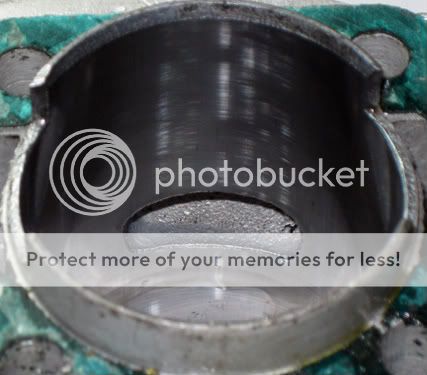
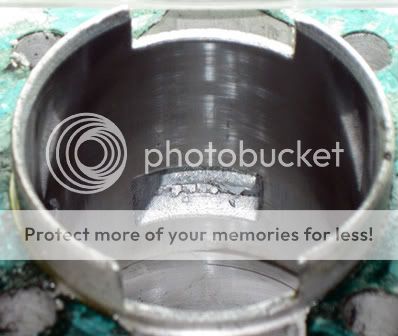
Lets start with the slightly easier exhaust port, all these engines are jus' a lil different so I've no way of telling how bad the castings may be on yours, but the general procedure is the same. The Dremel comes equipped with two different sized sanding drums, grab the lil one and see how it fits in the "corners" of the oval port - it should be smaller than the curve of the port - allowing you to get down into the "corner" without changing the port's shape or galling the sides. If it's too big and hits the sides without touching the inside of the corner - don't use it, you'll hafta do the detail work by hand.
It's important to start with the hard stuff first, the hard to reach places and corners. That way it's simple enough to match the rest of it to the work you've already done, if you were to do the large flatish sections first - you may well distort the shape when you try to get the corners to match... that's a pretty good rule of thumb with just about any project by the way - be it porting or painting heh
With such caution in mind, we'll experiment with a milder grit (like 120gt) small sanding drum and setting yer Dremel to a medium speed. You'll want to use as much of the drum's surface as possible by always keeping it parallel to the port - don't tip the Dremel to use just the edge of the drum as you'll dig into the aluminum and leave gouges that will be hard to make flush later. ALWAYS keep the tool moving for this same reason, back and forth, up and down, whatever it takes - just dont grind away at any one place too much... think like brushing your teeth, just slower ofc.
With nice smooth lateral motions (side to side) clean all four "corners" of the exhaust port till they're smooth but not necessarily perfect, paying careful attention to always keep the sanding drum flush against the port - particularly near the edges as you do NOT want to bevel them even a little. Resist the urge to do the easier "in and out" motion as you'll leave a deep trench, not to mention when hand sanding later - that motion is about all you can do, so lets use the power tool to do the more difficult method first. If the tool just isn't taking enough off - you can increase Dremel speed and/or switch to a coarser grit, but always remember to let the tool do the cutting - don't press hard or "scrub" with it, all that will do is generate heat, load up the drum with galled aluminum, and put deep and irregular scars in the surface that you'll hafta clean up later and defeating the purpose.
All four "corners" done and lookin' good? Sweet - now switch to the large sanding drum with 120gt and get the "flat" areas, same method as above except this time with more "side to side" movement, again - always keep it moving, even in lil circular patterns as this will help provide a smooth uniform surface, spend even a lil time in one place and you'll get a wavy, irregular face. The larger the drum, the easier it is to get a smooth flat surface, the lil drum just for the hard to reach stuff.
Don't worry if you've got a deep pit or two - odds are it was just a bubble in the casting and if you try and chase all of those down you'll end up with nothing but a pile of dust for your troubles. There's no "perfect" with these things - if the port is simply clean and smooth that's beautiful and all we're tryin' for.
Assuming that you cleaned up your mess with no coarser a drum than 120gt - now we finish sand by hand, 320gt works well (400+gt ifn yer crazy), if you've got particularly deep swirls and scratches you may need to start with 220gt or so. Always use a popsicle stick, round pen, or something similar as a sanding block and same as the Dremel - keep it flush with the work surface as not to bevel the edges. Keep a
close eye on any "extra" sandpaper as even a lil bit scraping the edge when yer not lookin' will round that edge.
You'll notice that despite how much you tried to avoid it - the Dremel left lateral scratches simply because of the way it spins. So while your hand sanding try and keep it to "in and out" opposite of the lateral scratching and circular motions - convenient as this is pretty much all you can do with the space yer in.
I bet that exhaust port is lookin' pretty hawt now - nice and smooth without alla scabs and bumps it usta have... guess what? The intake port is
exactly the same job except as I remember the "corners" are too tight to get even the little Dremel sanding drum in there, so sadly - you'll hafta do those by hand using a pen or a sharpie as a sanding block *shrug* I hate not being able to use power tools... but that's just the way it rolls sometimes heh
Remember - don't press hard and let the tool do the cutting, keep it flush with the surface at all times, and always keep it moving in circular/oval motions whenever possible. Smooth uniformity is what we're after so that's what ya need to get there

As I've now got 10 minutes to get ready fer work, "To be Continued" yet again lol


