Cafe Creme - my Boardtracker project.

GoldenMotor.com

Beachcomber

Well-Known Member
Nov 3, 2012
302
574
93
80
Redditch [UK] and Reichenau [Saxony ]
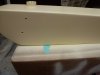
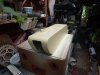
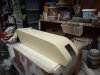
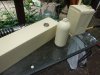
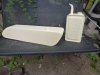
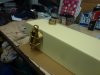
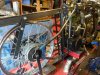
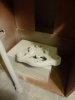
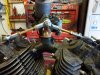
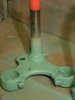
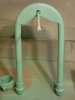
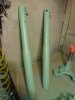
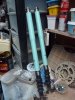
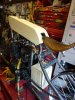
Now I KNOW I've jumped the gun, but as the tank was completely primered and flatted - couldn't resist trying out the Light Ivory I'd chosen to go with the Celeste Blue.

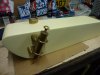
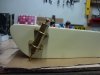
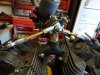
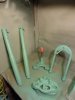
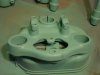
The photo's don't really do the colour justice, but I'll take pix again once the final coat is applied. It is meant to be a satin finish BTW !!

The splash of Blue in the first pic is the Celeste Blue.

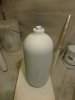
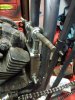
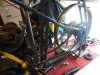
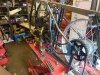
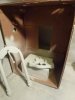
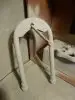
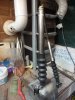
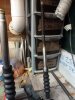
Wheels / bars and NOS bottle will all be powder coated Light Ivory, evertything else Celeste Blue - probably !
 

Attachments

Beachcomber

Well-Known Member
Nov 3, 2012
302
574
93
80
Redditch [UK] and Reichenau [Saxony ]
Well the end of the month has come and gone ................. unfortunately the "rely on me I'll be there" welder hasn't.

The blue masking tape is now holding the rear frame temporarily in place so I can get on with making the cross frame braces and positioning the footrests, gear and brake linkages etc. VERY frustrating.

I had hoped that the frame would at least have been tacked up by now which would have allowed me to progress the other parts.

Just can't get the staff ...........................
 

Attachments

  • Like
Reactions: indian22

Beachcomber

Well-Known Member
Nov 3, 2012
302
574
93
80
Redditch [UK] and Reichenau [Saxony ]
Some time ago I asked if anyone had fitted an oil pressure gauge to the Virago 125 / 250 engine ............................... deafening silence - so resorted to what I do best, I developed my own.

After a lot of research into the oil system in the engine I finally found a suitable take off on the right hand side gallery feed to the rockers and top end.

In the end simples .... remove the blanking screw, drill out 7.5mm then tap 5/16" UNF to take the oil fitting take off that came with the kit.

NO , I don't need an oil pressure gauge, but I scored a period brass pressure gauge - brand new in the box for next to nothing.

I'll position it when the bike is finally assembled.
 

Attachments

  • Like
Reactions: indian22

fasteddy

Well-Known Member
Feb 13, 2009
7,445
4,888
113
British Columbia Canada
Your a trend setter for installing oil pressure gauges on Virago 125/225 engines here on the forum I would guess. You are now the official go to person. Period brass pressure gauge-brand new in the box for next to nothing. How often does a person get to say that?

Wonderful set up.

Steve.
 

Beachcomber

Well-Known Member
Nov 3, 2012
302
574
93
80
Redditch [UK] and Reichenau [Saxony ]
Thanx Steve, I honestly couldn't believe my luck.

It was listed under the wrong heading [ ebay ] and mine was the only bid at his start price !! Under £5.00.

I'm a design engineer by trade and passion - I'm intrigued with this little engine. I've done 4 TR1 [ Virago 1000 ] Cafe Racers, but this bike is a design exercise. hence the Nitrous , SU carb etc.

When funds allow I want to go big block ........ 250cc !!!! I'll use the 125 then to investigate the innards.

When the frame is welded [ when indeed ] the only big outsource job then is to get some new exhaust flanges made and then I can finalise the shortie headers.

Rather than have the flanges laser cut, I'm looking at having them turned from a small alloy billet with grooves running round the circumference - old J.A.P. and Rudge ?
 

Beachcomber

Well-Known Member
Nov 3, 2012
302
574
93
80
Redditch [UK] and Reichenau [Saxony ]
Another step forward while I'm waiting for a welder [ !! ].

Prepped and primered the top yoke and front fork hoop. Once that's had a final rub down and one more coat all the fork parts are ready for Celeste Blue and assembly.

What do you all think about my new spray booth ???
 

Attachments

  • Like
Reactions: indian22

Beachcomber

Well-Known Member
Nov 3, 2012
302
574
93
80
Redditch [UK] and Reichenau [Saxony ]
Those 10 minute jobs that turn into 2 hours !!!

My pal fitted the bushes [ including 2 extra per leg ] for me, but unfortunately left one of the original staking pegs in one of the legs.

First leg took me 10 minutes to assemble .............. the second one almost 2 hours, mainly getting the old peg out which was 11" into the leg. Of course, I didn't discover this until the legs were painted ! Check first ?? Well yes I did - trial assembly, but in the "good" leg.

Serves me right for being lazy and not checking everything beforehand. Oh well, it's done now.
 

Attachments

  • Like
Reactions: fasteddy

Beachcomber

Well-Known Member
Nov 3, 2012
302
574
93
80
Redditch [UK] and Reichenau [Saxony ]
Steve,

the guy that tacked the frame is a mate and did rush over to get it tacked as he has to go in for heart surgery in 2 weeks time !!

All I wanted at this stage was for the frame to be solidly tacked so I can prove all the other parts out - gearlinkage, footrests, brake pedals etc., - before dismantling from the jig. Not ideal, bu the frame has to go to his workshop - that's why I wanted everything solid before taking it over there.

I was a bit concerned as I removed the ;ast of the jig clamps - but nothing moved !

Oh how I wish I could weld !!!!!!!
 

indian22

Well-Known Member
Dec 31, 2014
4,722
7,697
113
Oklahoma
As a lifetime welder who's mid 70's I encourage you to learn now. Instructional videos are better than ever and free. Machines are better than ever and for hobby machines, quite inexpensive. Then practice often. I know you will surprise yourself with your proficiency.

Rick C.