TensionerLESS chain tensioners!!!

GoldenMotor.com

Venice Motor Bikes

Custom Builder / Dealer/Los Angeles
Mar 20, 2008
7,271
1,810
113
Los Angeles, CA.
I have designed a new 'tensionerless' chain tensioning system for 2-stroke HT engine kits. (to get rid of those evil rollers!!)
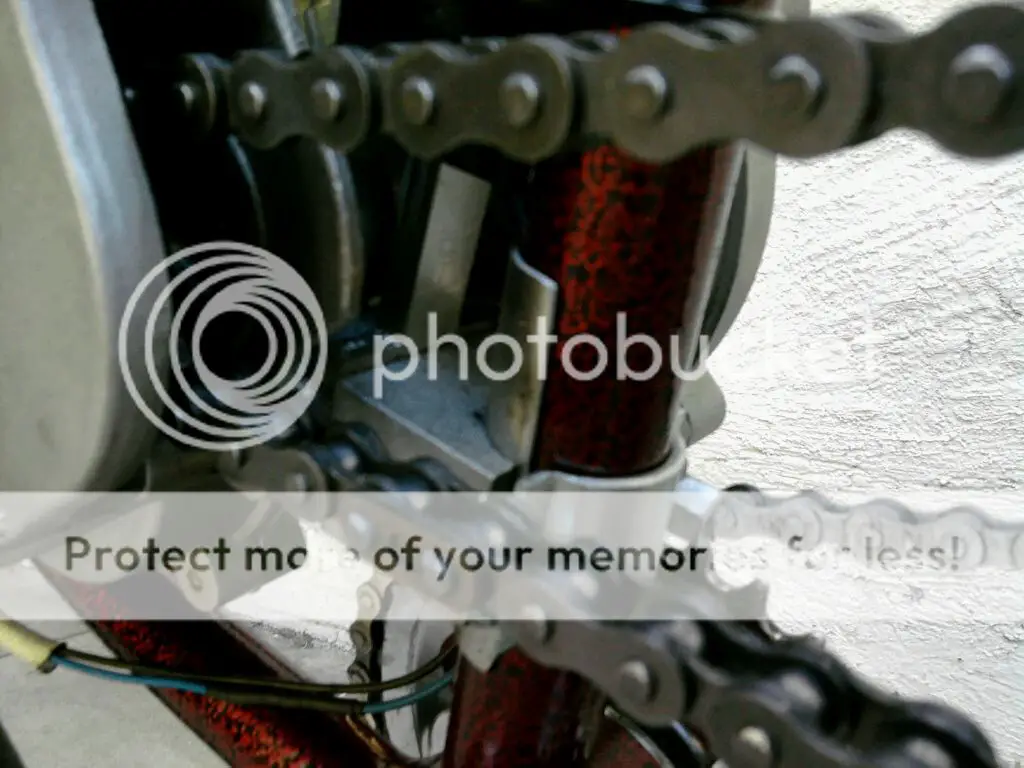
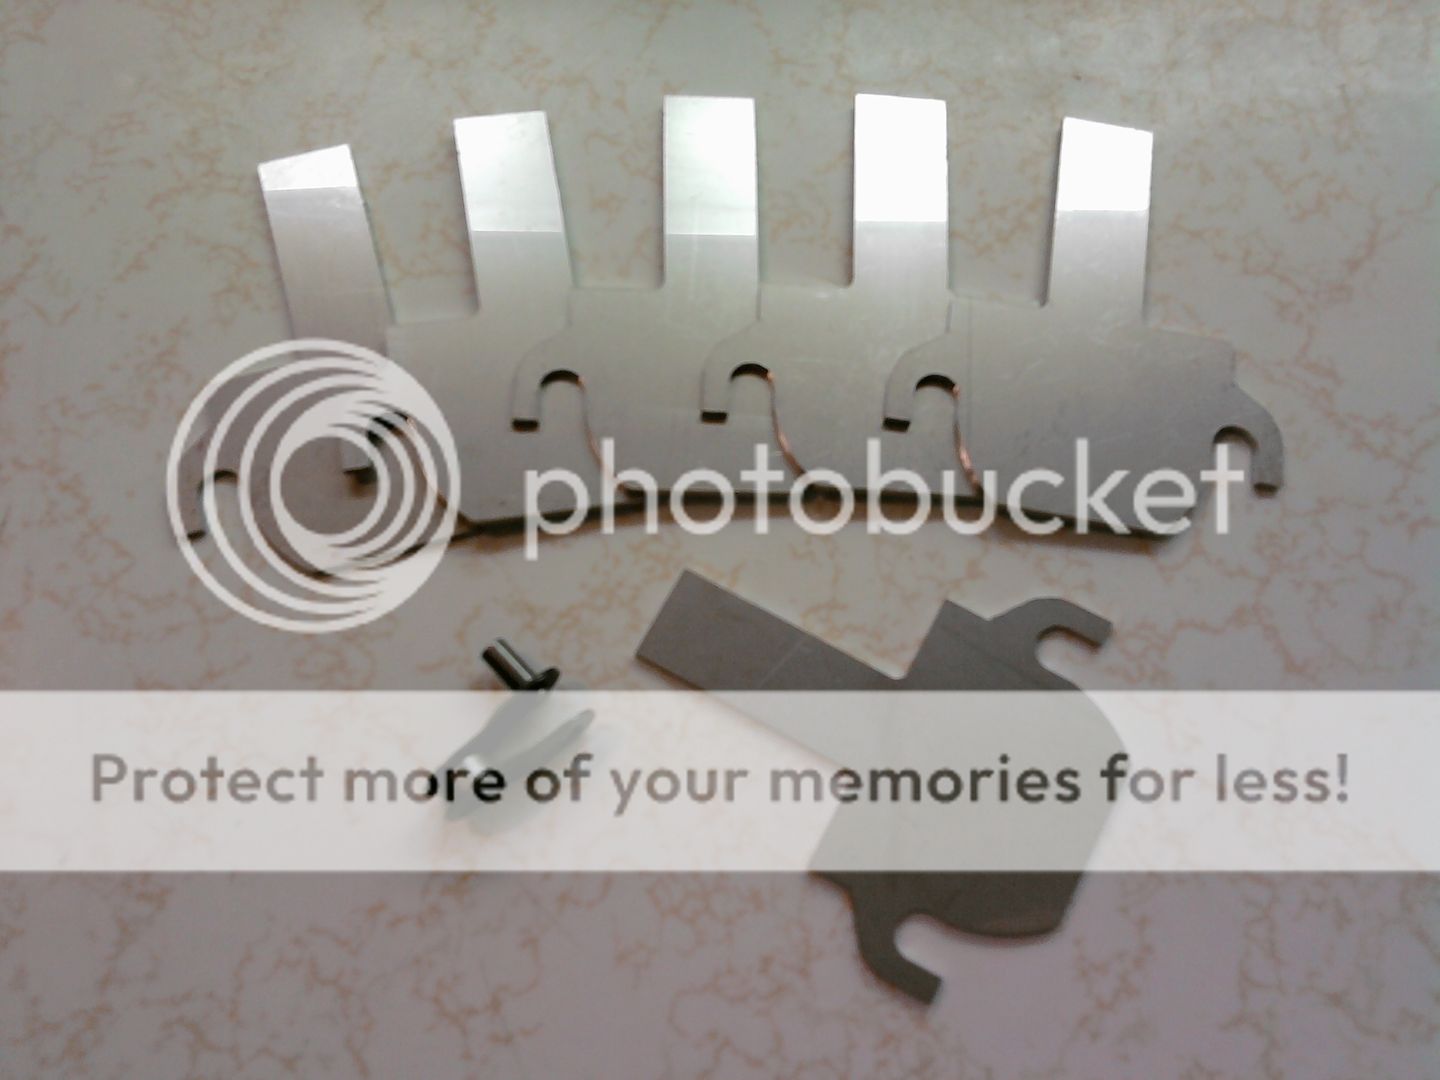
First you install the BMX 1/2 link in the pedal chain...Then to get the engine chain tension perfect, you slide these shims in between the rear mount & the engine. (& as the chain stretches over time, you can simply add another shim to re-tension the chain again!
The shims are laser cut from stainless steel (to prevent rust), have a built in handle & are shaped to make them easy to install.
I've tested this on several bike builds with great success.

I'll post another pic of what it looks like after it's installed ASAP.

Each kit will be sold for $30. (as pictured)

THE FIRST 5 BUYERS FROM THIS SITE can try one for only $20!!

Anyone interested can PM me, or go through my website- www.venicemotorbikes.com
 
Last edited:

Al.Fisherman

New Member
Sep 9, 2009
1,966
5
0
Calera, Alabama
what happens to the front mount when you start jamming spacers in the back.
I'm going to a system like that. Saw something similar the other day without the tab. The shims will move the engine both forward and up. All my builds have a custom made front mount so re positioning the front won't be a factor. Just make sure that the engine mounts fit perfectly on the tubes.
 
Last edited:

kipharley

New Member
Jul 9, 2009
646
2
0
Sanford,Maine
The engine simply slides forward & up until the chain is tight.
Sooo,you have to loosen the front and rear mounts,then you install one of those shims or however many you need to tighten the chain then you re-tighten the motor mounts? This is every time the chain streaches to the point of needing another shim and repeat the process?
Any reviews on this?
I see the advantage of losing the chain tensioner but at what cost?
I'm making a spring loaded modified stock chain tensioner that keeps the chain tight through out the streaching process,eliminating chain slap and you don't have to mess with loosening the motor-mounts.
Don't get me wrong I'm not saying your deal wouldn't work.Just sounds a little labor intensive for what it doe's.
maybe I'm missing something!! Like THAT'S never happened before!Kip.
 

azbill

Active Member
May 18, 2008
3,358
5
38
63
Fountain Hills, Arizona
these little shims work well :),,,
I did the same thing when I was running 2strokes,
Venice eliminates the hard part (cutting multiple pieces that fit properly) (^)

also,,, remember that each shim takes 2x the thickness off the chain length (top AND bottom run of the chain) ;)
 

bairdco

a guy who makes cool bikes
Aug 18, 2009
6,537
264
63
living the dream in southern california
if you start with a good quality aftermarket chain, you won't get very much "stretch" out of it. i run USA made, Diamond #41 chains, and they don't stretch at all. what does happen, is the sprockets wear in and the chain will loosen up in a few days on a new set-up.

i shim my rear motor mount up after that, and it takes me about 15 minutes. much less "labor intensive" then changing pedal sprocket sizes, moving my wheel back, etc.

all it takes is loosening both mounts, slide the shim in, wiggle the motor around, and tighten it all back up.

good idea, Norm!
 

KCvale

Well-Known Member
Feb 28, 2010
3,966
57
48
Phoenix,AZ
if you start with a good quality aftermarket chain, you won't get very much "stretch" out of it. i run USA made, Diamond #41 chains, and they don't stretch at all. what does happen, is the sprockets wear in and the chain will loosen up in a few days on a new set-up.

i shim my rear motor mount up after that, and it takes me about 15 minutes. much less "labor intensive" then changing pedal sprocket sizes, moving my wheel back, etc.

all it takes is loosening both mounts, slide the shim in, wiggle the motor around, and tighten it all back up.
Just so I have this straight...
This motor shim solution is to simply not use a tensioner on a direct drive side second chain correct?
And it is for some awkward rear hub mount drop backwards or straight down chainstay slot or something problem?

PLEASE tell me this $30 shim kit is not to compensate for the pedal chain size if the motor will mount perfect where you want and adjust just the drive chain without any help from anything but else moving the wheel back and forth and then dinking with the pedal chain to fit after...

Don't get me wrong, I did use a custom shim for a Grubee bike build that was so close it was easier to just move the motor forward a bit with a 3/8th" shim from an old PC slot cover than dink with the pedal chain.

Pictures of an actual bike use would really be great so I understand it, especially why you couldn't just move the wheel for the drive chain and then dink with the pedal chain is all.
I am all for practical innovation, but I do need to understand it and why it was needed.
 

Venice Motor Bikes

Custom Builder / Dealer/Los Angeles
Mar 20, 2008
7,271
1,810
113
Los Angeles, CA.
I'll get a pic up soon!!
It's pure luck if you can get both chains perfectly tensioned by just moving the wheel... even the 1/2 links don't always get them close enough.
Also... there are plenty of bike frames that have NO rear wheel adjustment; (because they have a derailuer)
That's why I designed these shims.
I've used them on several bike builds, & they work pretty sweet! ;)
 
Last edited:

jKellym

New Member
Jul 23, 2010
51
0
0
Houston
I'm not understanding why the 1/2 link is neccesary. How would adjusting the motor side chain effect the pedal side chain? I'm sure i'm missing something obvious hear.
 

Kevlarr

New Member
Jul 22, 2009
1,628
4
0
Mi
You can't always get both the motor chain and the pedal chain tightened evenly without the tensioner but with the shims you don't mess with trying to adjust the wheel at all, you just add shims to the back of the motor until the drive chain is tight.
 

KCvale

Well-Known Member
Feb 28, 2010
3,966
57
48
Phoenix,AZ
I'll get a pic up soon!!
Also... there are plenty of bike frames that have NO rear wheel adjustment; (because they have a derailuer)
That's why I designed these shims.
And just as I suspected, there was simply just no way to adjust to fixed chains with th back wheel.
Spiffy product for that need of motor shimming.
I'm not understanding why the 1/2 link is neccesary. How would adjusting the motor side chain effect the pedal side chain? I'm sure i'm missing something obvious hear.
To understand chain matching and what a half link is, you need to understand how chains work.
This is a great reference http://www.diamondchain.com/files/Maint_Guide.pdf

A 'link' of chain is actually two sprocket holes.


An actual link is the skinny center part that has the incased holes for connecting to another link via fixed fatter connectors or a master 'Link' which in fact is just a master Connector.

If you can move your wheel so you have tooth free between to thin end real Links, toy pop a master on to connect them.
If you end up with a fat connector end and a thin real link end, that is where a 1/2 link comes in.
It will allow you to fit them on one sprocket tooth.

If you have a derailer on the pedal side you have no worries, just make the drive side fit, the pedal side will adjust, but worst case other than motor mount shims and 1/2 links, put the tensioner on the pedal side.


I hope that helps.
 
Last edited:

Venice Motor Bikes

Custom Builder / Dealer/Los Angeles
Mar 20, 2008
7,271
1,810
113
Los Angeles, CA.
I'm not understanding why the 1/2 link is neccesary. How would adjusting the motor side chain effect the pedal side chain? I'm sure i'm missing something obvious hear.

The BMX 1/2 link is included with the kit 'just incase' the two chains are so far appart in tensions that you would need too many shims to get both chains even.
I include a BMX 1/2 link because the 1/2 links for the engine chain don't work very well.
Also... The BMX 1/2 link wouldn't work on a bike without rear wheel adjustability, (like the new Schwinn Jaguars) In such a case, you would have to use the larger 1/2 link on the engine side. (so I'm probably gonna include one of them with the kit too.)
 

chainmaker

Well-Known Member
Jan 19, 2010
2,634
69
48
Ma USA
These are pretty sweet.. tensioners are just a pain. I wouldn't be using one except for chain clearence on the stays. These are a nice solution to a common problem..with no moving parts to fail at just the wrong time!!!!

Cheersbrnot
 

mapbike

Well-Known Member
Mar 14, 2010
5,502
109
63
Central Area of Texas
Make my tensioners out of skateboard wheels and then use heavy steel strap for my bracket, never an issue yet, hope like heck I didnt just jinks myself here.....!LOL

But I do like the shim idea venice, as long as someone has room to move their engine up and forward thats a good fix.
 

bairdco

a guy who makes cool bikes
Aug 18, 2009
6,537
264
63
living the dream in southern california
when we say "moving the engine up and forward," it's usually a real small amount. it's not like it slides up a coupla inches. on my bikes, adding a 1/4" shim to the back will move my motor up less than a half inch.
 

KCvale

Well-Known Member
Feb 28, 2010
3,966
57
48
Phoenix,AZ
Make my tensioners out of skateboard wheels...
(smiles) Yep, use what is handy ;-}

Shims are handy, I am in the middle of adding a Jackshaft to an existing MB I didn't build and needed one to get the motor side chain right but the kit included a couple to make it easy.


When it comes to how much you have to move the front mount that is another story, especially on an already built bike change.

In the spirit of 'what is handy' you never know what might be better.
In this case the front mount was a downtube hole drilled and bolt up to the motor mount, which had the other side of the downtube bracket mounted for a nut to go on with a rubber washer between the two.


Since the JS kit moves the motor forward with it's own 2 point seatpost mounts I need to make a new front mount and drilling the frame again is just more silly so I looked around and going to try this.


Try to hold the laughter to a minimum for now guys, I am just looking at things to try to mount this baby in well and nothing is lined up properly in this quick pic as it sits right now.

That second U block from the motor is actually the one from the back of the motor that was removed for the shift kit mount, but they come in the motor kits 'universal mount' option (Pffft on those for the most part, but some hardware is useful)

To match the JS out to the pedal side, it needs adjusting to match it's chain ring as well so pretty much the same thing as single chain drives.

It looks like the kit Tensioner Pulley has some use after all...
The back side mounting bracket just happens to be a perfect fit for this Schwinn's downtube, and since I seldom use them I have a few.

I just taped the bottom one on to get a measurement, but with the width of the bracket I think I can drill 2 holes in it to accommodate two proper length bolts for the upper bracket to the motor out of the way of the two other larger holes, and then just get 2 proper length bolts to secure the bottom bracket.

As a bonus on this bike it covers the frame mount hole too, but should be easy to move up with just movement or a shim or both.

I guess we'll see soon as this rebuild needs to go out. I'll take pics of how the mount works out and share them here.