Old Guys X Autocycle

GoldenMotor.com

indian22

Well-Known Member
Dec 31, 2014
4,725
7,711
113
Oklahoma
Wret I kinda took your advice and used one of the crappy (French for crappy I think) tank decals for a stencil.and the result is a hammered copper tank applique shown below. I took that nice ride this afternoon and ran out of fuel a couple miles from home so I tested the pedals and it was an easy ride though quite slow.

After two days of break in the engine starts right up and idles spot on, progress though the motor is still pretty tight. Rick C.
0727171647-960x1280.jpg
0727171644-960x1280.jpg
0727171647a-960x1280.jpg
 

indian22

Well-Known Member
Dec 31, 2014
4,725
7,711
113
Oklahoma
I decided to mount a rear "bobbed/ duck tail" fender on the X, which was made more difficult by my selection of 24" wheels, just bolting on a fender left an extra 2" of gap between tire and fender.so a fender mount was made from an old seat post tube 7/8" diameter and 2" in length. I fish mouthed the end of the short tube to cup around the horizontal tube brace connecting the seat stays. I drilled a 1/4" hole through the other end for fender tab connections and drilled a single 1/4" hole through the fender and backing plate. The frame brace was factory drilled for fender attachment already. I used 2 ea. 1/2" length x 1/4" bolts inserted from the inside, to connect the fender tabs to the new brace prior to mounting it to the fender and then ran a 1/4" carriage bolt up through the bottom of the fender and the center of the brace and attached the whole affair to the bikes frame with washer and ny lock. I let the air out of the tire and avoided having to remove the rear wheel,I'm kinda lazy. Oh yeah the reason for the two short bolts was so the long carriage bolt would fit through the center of the tube, a single cross bolt would have blocked the vertical carriage bolts passage.

I had previously bobbed & rounded about 5" off a roadster fender to start the work. Duck tail was a factory job, I've no idea what the fender came off. I like the look and it leaves plenty of room to mount a 3.5" x 6.5" leather cylinder tool roll I have coming to mount under the saddle and the hammered copper oil tank I'm planning to fabricate to install just ahead of the fender. I may include a fender bolt to that tank, though I don't think it necessary, not much weight to support.

I still plan on adding an early style Schwinn chain guard and that will probably do it for sheet metal on this build, though a bobbed front fender (like I used on my Indian Outlaw 2 stroke) would look pretty sweet...and still be safe. Rick C
0729171955a-960x1280.jpg


I've commented my dislike of fenders in previous posts, but not because of the way they look. It's the flimsy connection to frame that many bikes are built with. It's a safety issue with me because fender to wheel lockup is a very common and real danger on two wheels.
 
  • Like
Reactions: Tom from Rubicon

fasteddy

Well-Known Member
Feb 13, 2009
7,454
4,920
113
British Columbia Canada
Absolutely fantastic bike Rick. Once again the tasteful addition of copper accents add to the build. The rear fender looks a lot like the Pyramid fenders I used on the tri car. I bought them from Niagara Cycle Works. The price was really reasonable for the quality but the mounts to the bike were the usual iffy item.

Steve.
 
  • Like
Reactions: Tom from Rubicon

indian22

Well-Known Member
Dec 31, 2014
4,725
7,711
113
Oklahoma
Thanks Steve & thanks for a source on the flipped fenders.. Are they located on your side of the line or ours? Duties and postage certainly add up. I've been doing a bit more with the UK vendors & been impressed with completed prices & service for the most part.

Didn't get much done today, but mounted a little leather cylinder tool bag under the saddle & it fit nicely just above the fender...filled the space just right. Also installed the brass Excelsior /Arnold Schwinn head badge. I should receive the early Schwinn pedal side chain guard in a couple of days & that only leaves the "oil tank" to fabricate, which will also double as the forward connection for the fender. I'm hoping that will be enough to secure the 5 oz. fender & fill in the gap between the rear wheel and seat tube. I'm not quite sure what the finished oil tank will look like, but I know it will be copper and black, with Excelsior branding. The chain guard will have the red Schwinn label.

I''m having fun to this point on a really simple build that is starting to please me. Rick C.
0801171431-960x1280.jpg
0801171433-960x1280.jpg
0801171514-960x1280.jpg
0801171513-960x1280.jpg
0801171515b-960x1280.jpg
 

indian22

Well-Known Member
Dec 31, 2014
4,725
7,711
113
Oklahoma
Still waiting on the chain guard to come in, but still riding the heck out of the new rig & two problems to date. Rear fender will definitely need some additional support to eliminate an annoying harmonic buzz at about 6,000 rpm a light finger pressure eliminates the vibration so I'm thinking a brace to the oil tank I'll be fabricating will do the trick. The second problem is the clutch actuator lever works it's way up and out of the side case, not all the way out but far enough to render the clutch useless. This is the second motor I've had this same problem with. By lubrication, clutch cable adjustment and fiddling both seem to work fine now, but I've no clue what caused the problem or what cured it. Anyone dealt with this before and have any insights. Visual inspection and comparison to other side covers and actuator arms, show no differences that I can see.

I also added one of my signature copper eagle feathers to the forks upper spring brace. Rick C.
 

indian22

Well-Known Member
Dec 31, 2014
4,725
7,711
113
Oklahoma
Riding the X celsior Schwinn every day and having fun, motor just purrs & little power. I bumped just over 30 mph yesterday GPS recorded & I really don't think it's good for much more. Although I'm good with that speed I need more bottom end performance & will eventually upgrade to a performance head and carb, using the SHA Dellorto clone and 6 cc aluminum head like the one on my Grubee bike. Just bolt on & see if it's enough and go from there. A couple of motors I built in the past using the GT 5 motors really performed well with just these 2 modifications & would pull well from the low end. Of course I can go crazy with the Dremel as well.

The clutch was extra noisy during my early rides but has become almost quiet & that has never happened before. I hope it's not broken.

I took the time to dye the leather tool bag to match the saddle leather and grips & it matches better.

Still waiting on little stuff to come in. Rick C.
0806171514a-960x1280.jpg
 
  • Like
Reactions: Tom from Rubicon

MEASURE TWICE

Well-Known Member
Jul 13, 2010
2,744
1,221
113
CA
The noise I might guess are the pads taking the shape of the bell, if it is not the plate type clutch. My centrifugal clutch was noisy at the start, but it is hard to tell why it quieted as I changed the ratio from 8 to 20 almost immediately. Now I use 12 and it works also fine. The mfr says to lube like every 4hrs the bronze bushing.
 

indian22

Well-Known Member
Dec 31, 2014
4,725
7,711
113
Oklahoma
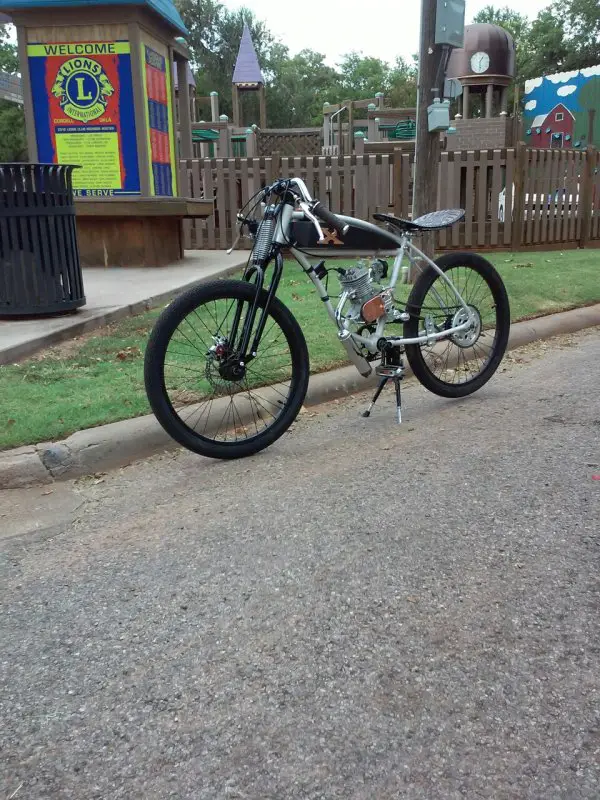
Thanks guys, put in some time today installing the Schwinn replica chain guard on the replica aluminum Schwinn bike frame & guess what neither one replicated the chain guard or frame to match up for mounting, but I was up for the challenge and now have the guard secure, rattle and rub free. Schwinn water transfer decal hasn't arrived yet.

Also added the Super X medallions to each side of the tool bag, bit of Henderson for luck on the Schwinn X-celsior Autocycle/Autobicycle can't do any harm, just having fun. The Excelsior name has branded so many varieties of product categories worldwide that a study could well prove interesting, if not profitable.

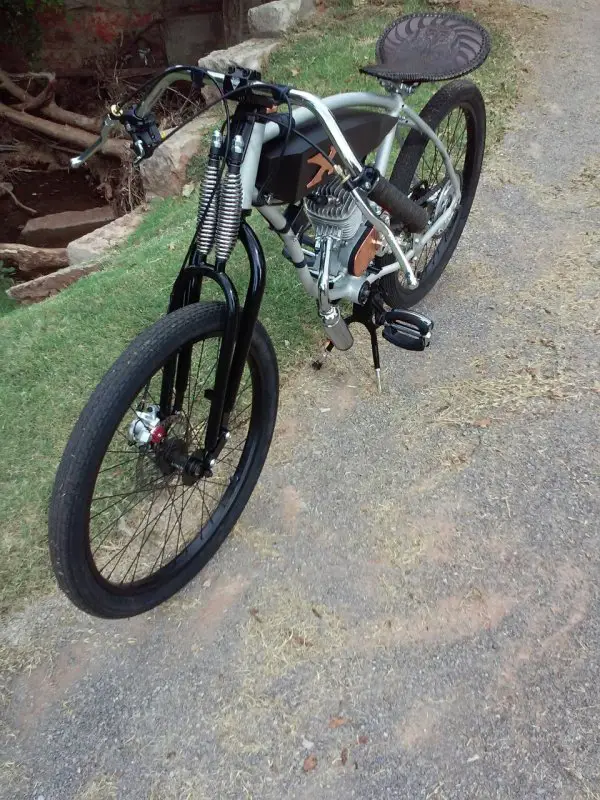
Thinking the troubles to be few on this build might not have been wise on my part as I spotted a small amount of fuel on the bottom of the tank that isn't from petcock or mounting bungs which leaves edge folds and welds as my go to culprits. I've yet to detect any seepage from these either. This tank had never held fuel before and I pressure tested before install, but through several days of riding and storage a small amount was visible but had not dripped onto the motor or bike, so I'll keep an eye on it till the source is found.

I hope to use some time tomorrow to start the "oil tank"
0807170841-960x1280 (1).jpg
0807171532a-960x1280.jpg
0807171532-960x1280 (1).jpg
0807171456-960x1280.jpg
: I cut out a stencil outline from cardboard in the basic shape required & I'll wing it from there. I'm not interested in storage (got a tool bag that won't rattle, when I wrap my few tools in a leather roll) just want to fill the empty space with an interesting shape. Rick C.
 

indian22

Well-Known Member
Dec 31, 2014
4,725
7,711
113
Oklahoma
I'm running into completion trade offs. Those who've built more than a few motorized bicycles and motorcycles know what I'm referring to. Changing one thing leads to two or more changes to facilitate each addition or subtraction. As an example I had just enough room to add the pedal side chain guard. I'm happy, but if I now want to add an after market performance head I don't have much wiggle room, before adding the chain guard I could easily gain room through lowering the motor in the frame by eliminating the front pedestal motor mount. Now to make space I would have to also either eliminate the guard or "chop" a huge hunk out of it to lower the motor. Just an example that may never take place, since head temp has been holding around 270 degrees after long rides, which isn't much higher than my other 2 cycles with "big" CNC heads. I have no idea why this motor with stock slant head runs 50 to 70 degrees cooler than my previous slants.

I may also go with a .4 mm copper head gasket to up compression a bit on the slant, mirror polish the combustion chamber (cuts down on carbon buildup) and add a SHA clone Dellorto carb and expansion pipe to increase low through mid range power. With the offset intake pipe I have no seat tube interference so carb and free flow air cleaner are not problems. Long, high tuck expansion pipes usually are not straight bolt on's however and require additional bracket work and often heat shielding to protect the rider. I'll also probably have to add an internal baffle to placate the neighbors and law....still building and having fun. Rick C.
 
  • Like
Reactions: Tom from Rubicon

indian22

Well-Known Member
Dec 31, 2014
4,725
7,711
113
Oklahoma
Steve you're lovely tri-car is a good example of what a complex build looks like; whereas my X-celsior Schwinn is at the easy end of the build spectrum and still I've run into these similar problems, just not as many as or as difficult to solve. If getting out of problematical build situations is the mark of the experienced fabricator then it must follow that fore seeing and avoiding design flaws is the signature of a great fabricator. I have a great long way to go before I can claim the later title!
No sign of tank leak to this point?? Think I've found a simple solution to rear fender buzzing, without using vertical stays. I really like the chain guard and I've decided it stays and will remain uncut as will the engine pedestal mount.

As long as head temp stays under 300 degrees I can work with it. The performance mods I'm planning are mostly of the bolt on variety, carb, expansion chamber and mild head work/compression increase. With increased compression comes additional heat and I'll just have to gauge that as I make changes. I think the 40 mm stroke motor will be fine. It balanced out fine and runs smooth. No 4 stroking so I'll have to induce a little along the way, but won't deal with it till motor mods are completed, which might sort the issue entirely.

Building on....Rick C.
 
  • Like
Reactions: Tom from Rubicon

indian22

Well-Known Member
Dec 31, 2014
4,725
7,711
113
Oklahoma
I'm again waiting on stuff to finish the X-celsior Schwinn. Carb, expansion pipe, copper head gaskets & copper pop rivets etc. I made some progress on the jug ported & matched the intake & exhaust and slightly enlarged all the jug ports as well as surfaced the jug and head. I still need to mirror polish the slant head combustion chamber, which slightly decreases compression, but offs sets the rise of compression caused by decking the cylinder and head surfaces during the truing process. De-carbonizing the head & piston periodically is a great way to restore lost power and was a routine maintenence item in the early days of riding. Mirror polishing makes very quick work of cleaning the combustion chamber...just wipes off. I don't usually polish the piston dome, but it too is easier to clean off the higher the surface polish. I routinely clean both when replacing a plug that's been run a few months. Next week I hope to have the parts in hand to assemble.

I also need to build a setup to run a RSE reed valve "window" piston and machine a jug with third transfer port, next week as well for a a 66 cc GT-5....similar to the one mounted on my Grubee Skyhawk bike. That cylinder and piston are also on order. Rick C.

I've got plenty to keep me busy in the meantime. Rick C.
 
  • Like
Reactions: Tom from Rubicon

indian22

Well-Known Member
Dec 31, 2014
4,725
7,711
113
Oklahoma
I've had a fresh, ported and balanced GT 5 case & bottom end sitting on a shelf for quite awhile and it will finally be fitted with a new cylinder modified with a third port for RSE reed valve, transfer ports as well as intake and exhaust ports enlarged and matched, 6 cc CNC aluminum head & window modified reed valve piston...the piston was modified using a "drilled" oil impregnated bronze bushing, replacing the sometimes troublesome roller bearing, the piston I've ordered was pre machined for use with the RSE reed valve. I will be very interested in how this piston varies from the one I've been using on the Skyhawk. I've held up on machining the cylinder for the third port till I see the new piston. This motor could eventually find a home in the X-celsior Schwinn if the addition of an expansion pipe, modified head and SHA Dellorto clone don't bring the long stroke motor to life. In the meantime I'm waiting on parts, some of which are scheduled to arrive sometime today.

I really shouldn't be be working on this during my busy season, but it pleases me. Rick C.
 

indian22

Well-Known Member
Dec 31, 2014
4,725
7,711
113
Oklahoma
Thanks Curtis I'm moving along for sure. Pipe carb and .4 mm copper gasket came in have been installed and the pipe has already been removed, not because it didn't work, but it was dirt bike loud. I'm fab a muffler for the pipe and it will end up on the Grubee Skyhawk frame. Stock muffler on the X-celsior Schwinn.
The slant head and thinner copper gasket com
0814171547-960x1280.jpg
0808171823-1280x960 (1).jpg
0814171545-960x1280 (1).jpg
0814171545a-1280x960.jpg
bo with the Delorto clone carb using the 60 jet on the offset intake, which also allows the use of a high flow air cleaner, has improved throttle response and power significantly. I have a CNC aluminum head coming, but may not use it unless motor runs hot. NGK plug was also installed with the fuel mix ratio dropped to 20:1 ... I run Lucas ash free semi-synthetic and premium non corn eating gas.

Photo of the intake cut window (1" diameter round) Gt-5 piston & graphite /bronze oil lite bushing is not for the X bike, but a new engine I'm building that will use an RSE reed & Dellorto Clone, along with a cylinder featuring a third port for using with a reed and my usual transfer port enlargement and contouring. Intake and exhaust port enlargement, shaping and smoothing. Also using an aftermarket 6 cc head. Rick C.
 
  • Like
Reactions: Tom from Rubicon

indian22

Well-Known Member
Dec 31, 2014
4,725
7,711
113
Oklahoma
Harold I have not. I've searched & waited, the quantity is quite small about a drop every 2 days. Always shows on the left side & rear of the tank, has never left a drop on the bike or floor or my clothes, so I'm stumped.

Reed valve cylinder is ready to assemble, head came in as well as the new reed valve so I may do that tonight as the third port is finished and I've already matched the original two ports to the new jug. I'll need to trim a base gasket to match the transfer ports as well. The transfers were knife edged as well.
0817171445a-960x1280.jpg
0817171405-1280x960.jpg
0817171331-960x1280 (1).jpg
0817171337-960x1280.jpg
The reed third transfer was cut with a 7/16" end mill. I'll be interested to see what effect the 1" piston window will produce. I'm positive the window is larger than I've cut in past 66 cc reed setups. Rick C.
0817171445a-960x1280.jpg
0817171405-1280x960.jpg
0817171331-960x1280 (1).jpg
0817171337-960x1280.jpg