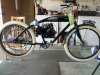
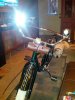
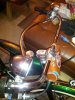
Gee's! do you plan on going deer hunting with those thing's ? (LOL!) they're bright even in the pic, park it in front of a wall in total darkness and adjust those bad boys so you don't blind anyone and besides it will also give you a focus point at night adjust it them to about 10,15,20 ft. this will give you sight for breaking and pot holes that could be avoided in advance, insted of BLAM!!! all of a sudden your pick'n your a$$( and I mean your $$$) up off the pavement.
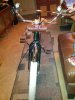
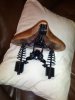
Seat looks killer too!
Looks good Bro!
From the way you discribe the weather you must live in Cali? we got the same temps today 108f outside 78f indoors

")


")
")