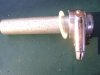
i've got some aluminum rods that are, uh, i dunno what size, same size as normal strut rods.
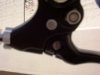
take your big hammer (BFH) and beat the crap out of the ends. i use the flat part on a vice as an anvil. keep flipping them over and beating on them till they're about 1/8" thick.
you'll notice that the last side you were smashing will end up offset a bit, so it lays flat on the bike.
go back to the bench grinder that you already ruined and clean them up. (the picture shows before i polished them.) you don't have to get them perfect, because your axle nuts and washers will hide any deformities.
one thing you do have to make sure of, is that the axle mount part is flat. if it's angled at all, your axle nuts will tweak out on an angle, and that's just not good.
punch and drill holes in the ends for the axle. i go one drill bit size bigger than the 3/8's axle, otherwise they're really tight. forgot the size. 25/64ths or something.
then set them on the ends of your axle, have a smoke and figure out how you want them to look.
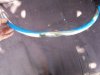
mark where you want to bend them and then, well, bend them. i use the wooden 2x6 railing in my backyard. they're aluminum, so you just hold one side flat, and push the other side down. MAKE SURE you're bending them along the same line as the axle mounting ends, or you'll get them all crooked, try to bend them back, and never get them straight. also, as i mentioned earlier, one side where it mounts to the axle will be flatter from when you last beat on it. when you're bending, make sure you bend one the opposite as the other, so you have a left and a right.
i bend one first, check it back on the bike, then bend the other one to match.
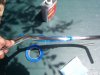
make all the bends you need then mark where the trussrod bracket is and cut them off. cut them as clean as possible, or else they'll end up a little shorter (or one will) and you'll have to do some re-bending and they'll be crooked.
once you have a clean cut, drill into the center, using pilot bits and progressing up to the size of the tap you're gonna use. do this slowly, carefully, and straight-ly. remember, it's soft aluminum, and if you drill crooked, then you just wasted all that time hammering and bending.
with these rods, i've tapped them for M6 bolts, the same size as most of your engine bolts. i've done them with 1/4-20's, too. that's about the biggest you can go.
once they're tapped, clean them up and install them. you might have to do a little "adjustments" to your bends.
i think that's it. here's the pics:

")
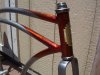
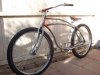
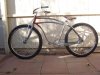
 I'm liking the color scheme so far!


")
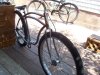
") Everything is for sale$$$$$
Everything is for sale$$$$$