Nel Lusso 4-Stroke Huashengtai Motorized Bike

Makakoa602

Member
Hello,
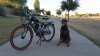
This is my first build. I got a Nel Lusso from Walmart and a Huashengtai Motorized bike kit.
Any help or input will be much appreciated.

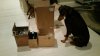
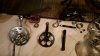
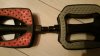
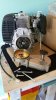
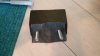
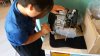
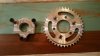
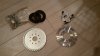
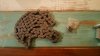
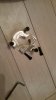
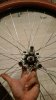
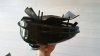
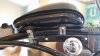
Here are some photos of the bike and the kit opened but still in the box.
 

Attachments

  • 20171002_195409.jpg
    20171002_195409.jpg
    3.8 MB · Views: 1,746
  • 20171010_202901.jpg
    20171010_202901.jpg
    48.9 KB · Views: 382
I know you've probably heard or read this but watch the fenders, they can break the brackets, some here have had some bad crashes as a result. I see you have a guard on duty watching over everything.
 
I have one bike built with a Huffy and the Huasheng 4 stroke motor. It turned out nice. Make sure you completely disassemble the bike and clean and regrease everything, these bikes are pretty dry on grease from the factory. Probably OK for pedaling around but not enough grease when your moving fast motorized.
 
Ok so I got the 3 piece crank with wide shaft so my pedals don't hit the 4 stroke motor. The sprocket on the crank looks like it got a little bent during shipping. My chain kept coming off, I had to hand bend it to straighten it out, easy fix I guess. Also had to get a pair of $10.00 9/16 sized pedals at, my local bike shop, because the stock pedals were just a little to small.

I guess I should explain some of the photos.
Photo of the bigger crank on left compared to smaller 3 piece crank on right.
Photo of smaller pedal on right compared to slightly bigger pedal on left.
Photo of 3 piece crank installed on bike.
 

Attachments

Looking at mounting the motor and boy do these bolts look cheap. The are a little dinged up like they have been already used. Love it, made in china right...
 
Pedals: SAE compared to Metric. Get better bolts for mounting. Take more pictures as you, should be a nice build when done..................Curt
 
Make sure to use LockTite on those crank nuts, they are cheap and I had one come loose on be and lost the nut. After LockTite they were fine.
 
I know you've probably heard or read this but watch the fenders, they can break the brackets, some here have had some bad crashes as a result. I see you have a guard on duty watching over everything.
I did not know that, thanks for the info!
 
Putting the motor together was relatively easy just a matter of bolting the transmission on, had my son help me so it was great father son time. I put pieces of old tire tubing on to the motor mount bracket so as not to scratch the bike frame.
 

Attachments

  • 20171014_094439.jpg
    20171014_094439.jpg
    76.5 KB · Views: 454
  • 20171015_140205.jpg
    20171015_140205.jpg
    53.7 KB · Views: 444
  • 20171014_100150.jpg
    20171014_100150.jpg
    64.7 KB · Views: 473
  • 20171014_084457.jpg
    20171014_084457.jpg
    68.6 KB · Views: 404
Almost forgot, my Sprocket Clamp Adapter 40 tooth came in today very excited!! Saw a video on youtube and some post on this forum on the problems with spoke sprocket setup and decided to save myself the trouble. Went ahead and purchased the Sprocket Clamp Adapter, 415 heavy duty chain and 415 Chain Lock.

In the image I have a photo of the spoke sprocket setup that came with the kit on left and on the right the CNC 40 tooth sprocket and Clamp Adapter. I must say the sprocket that came with the kit is so much thinner and the 40 tooth sprocket just seemed to be much better made, so glad I got it!
 

Attachments

  • 20171017_180529.jpg
    20171017_180529.jpg
    58.6 KB · Views: 461
  • 20171017_182627.jpg
    20171017_182627.jpg
    56.6 KB · Views: 364
  • 20171017_180633.jpg
    20171017_180633.jpg
    65.7 KB · Views: 322
Aloha Makakoa602!
Welcome to the club.
If you're from Hawaii, where are you at?

I'm watching your build.
It looks like you only have a rear coaster brake.

You NEED better brakes.
BEFORE you start riding your motorized bicycle.

Years ago, the rear coaster brake on my electric cruiser locked up going downhill by Radford High School.

It took me into a mean slide and totaled my rear wheel.

Good thing I had installed front v-brakes on the bike.

That's the number 1 priority.
Another option that will make the bike
more comfortable to ride is a front suspension fork.

Most suspension forks come with a disc brake.
Find a donor mountain bike. Get the fork, wheel, brakes, levers and handlebar.

The mountain bike's rear brake lever makes for a good throttle lever.

Have fun!
 
I agree, both of my bikes are single speed cruisers and I added front side pull brakes. Once on a ride a friend had his pedal chain come off at cruising speed, he looked like Fred Flintstone trying to stop at the next stop sign. I found that 96mm reach bmx brakes do a good job and work with the 2.125 tire.
 
Aloha Makakoa602!
Welcome to the club.
If you're from Hawaii, where are you at?

I'm watching your build.
It looks like you only have a rear coaster brake.

You NEED better brakes.
BEFORE you start riding your motorized bicycle.

Years ago, the rear coaster brake on my electric cruiser locked up going downhill by Radford High School.

It took me into a mean slide and totaled my rear wheel.

Good thing I had installed front v-brakes on the bike.

That's the number 1 priority.
Another option that will make the bike
more comfortable to ride is a front suspension fork.

Most suspension forks come with a disc brake.
Find a donor mountain bike. Get the fork, wheel, brakes, levers and handlebar.

The mountain bike's rear brake lever makes for a good throttle lever.

Have fun!

I'm from Kailua but not living in Arizona about 10 years now.
Thanks for the info on the breaks, I actually already got front and rear hand brakes. Guy at the bike shop gave me a two for one since he only had silver and not black colored ones.
So basically I got like 3 brakes now. lol
 
The Sprocket Clamp Adapter was very easy to put on> I originally left the Coaster Brake Arm off thinking I was going to use front and rear had brakes, but later I found out that Clamp Adapter pushed more towards the spoke the Coaster Brake Arm (or what ever you call it) did not hit anything at all, did not have to bend it.
 

Attachments

  • 20171017_182906.jpg
    20171017_182906.jpg
    49.8 KB · Views: 343
  • 20171017_183131.jpg
    20171017_183131.jpg
    63.7 KB · Views: 414
  • 20171017_185206.jpg
    20171017_185206.jpg
    4.1 MB · Views: 1,878
Mounting the gas tank was easy, I also used pieces of rubber tire so as not to scratch the frame. I remembered not to over tighten, just enough so the tank stayed straight and barely moved unless a pushed it with some force.
 

Attachments

  • 20171014_085528.jpg
    20171014_085528.jpg
    37.9 KB · Views: 330
  • 20171014_092701.jpg
    20171014_092701.jpg
    69.7 KB · Views: 361
Back
Top