I am bad at Titles (OCC first build)

GoreWound

New Member
Several months ago it all started when I stumbled on a classified ad for a bike. I was looking for any bike i thought a motor could fit into, searching for brand names i had picked up in youtube videos.
"Isn't Orange County Choppers, like motorcycles or something?"
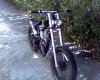
Thus I had discovered that chopper bicycles exist.
also the guy wanted less than two hundred bucks for it.

The rest is history... or is the present.

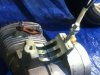
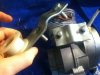
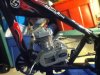
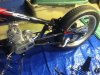
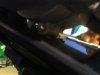
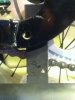
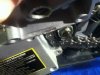
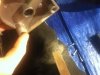
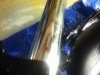
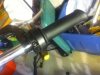
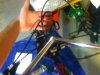
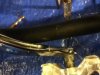
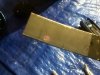
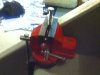
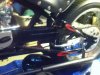
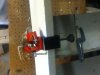
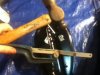
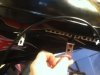
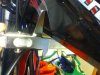
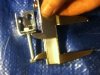
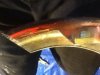
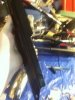
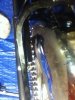
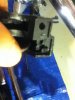
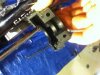
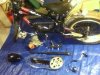
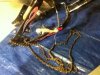
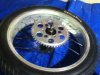
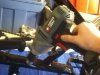
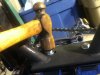
anyway you all want photos, so here are those.
sorry about camera being an ipod.
 

Attachments

  • IMG_1238.JPG
    IMG_1238.JPG
    314.3 KB · Views: 361
  • IMG_1240.JPG
    IMG_1240.JPG
    286.8 KB · Views: 332
  • IMG_1239.JPG
    IMG_1239.JPG
    258.3 KB · Views: 327
  • IMG_1242.JPG
    IMG_1242.JPG
    263.5 KB · Views: 325
  • IMG_1244.JPG
    IMG_1244.JPG
    226.6 KB · Views: 308
Last edited:
more photos for your eyes to absorb

The hammer was only necessary because I measured three times instead of four before I drilled those holes. but as you can see it all went together in the end.

the instructions I got with the mount said to use that part for the front mount, I thought it was crazy but it worked perfectly. also everybody everywhere said that the chain would be too short, mine was perfect!
 

Attachments

  • IMG_1243.JPG
    IMG_1243.JPG
    253.7 KB · Views: 286
  • IMG_1245.JPG
    IMG_1245.JPG
    242.2 KB · Views: 271
  • IMG_1246.JPG
    IMG_1246.JPG
    217.9 KB · Views: 267
  • IMG_1247.JPG
    IMG_1247.JPG
    283.6 KB · Views: 257
  • IMG_1248.JPG
    IMG_1248.JPG
    299.4 KB · Views: 426
That nut under the engine was the hardest part so far. Had to use a clamp to hold the motor mount in place with tension on the chain. As you can see the chain just fits through that gap, but its nice and tight. Probably still going to have the bend the brake arm.

the muffler was my first big snag, the tab doesn't quite line up with the hole in the back, also i had to bend the tab to get it in there.

I spun the pedals while I was mulling it over and got a severe clank. So far I am slightly less impressed with Barrys exhaust than I am with his motor mount.

Now in that fifth picture we have something I was a little surprised by when I tried to roll the bike around.
 

Attachments

  • IMG_1249.JPG
    IMG_1249.JPG
    190.5 KB · Views: 244
  • IMG_1250.JPG
    IMG_1250.JPG
    250.6 KB · Views: 267
  • IMG_1252.JPG
    IMG_1252.JPG
    107.5 KB · Views: 255
  • IMG_1253.JPG
    IMG_1253.JPG
    105.1 KB · Views: 256
  • IMG_1254.JPG
    IMG_1254.JPG
    237.6 KB · Views: 260
All it took was a little love from a file and my chain is mobile!

did the nail polish thing and got that plastic monstrosity put together.

also Nüdlewerkz!
I need some zip-ties.
 

Attachments

  • IMG_1256.JPG
    IMG_1256.JPG
    256.6 KB · Views: 247
  • IMG_1251.JPG
    IMG_1251.JPG
    235.7 KB · Views: 243
  • IMG_1257.JPG
    IMG_1257.JPG
    262.7 KB · Views: 233
  • IMG_1258.JPG
    IMG_1258.JPG
    259.2 KB · Views: 248
Loose those handle bars.... those are widow makers, you cant turn that bike you will wreck if you pedal it, your knees will hit the bars if you stand on the pedals to pull out.... repeat get rid of the factory OCC bars they are deadly.... you have been warned ... if you want I can type it 3 more times in caps
 
Loose those handle bars.... those are widow makers, you cant turn that bike you will wreck if you pedal it, your knees will hit the bars if you stand on the pedals to pull out.... repeat get rid of the factory OCC bars they are deadly.... you have been warned ... if you want I can type it 3 more times in caps

No no, all caps won't be needed. I think I got it. Thanks for the tip.
I've been looking for an affordable set of cruiser/crescent bars, even pedaling the first thing I noticed is that the handlebars are too narrow and too low.

I love the seat, but it hates me. I have a few plans for putting some boing under there.
 
I was wrong about the exhaust tube.
doubling up the exhaust gasket got the pipe fitting like a glove.
Also, it took me about half an hour to drill through that plate, Barry used good steel!

hack-sawed down a spare bolt from the rag joint and it all went together perfectly.
 

Attachments

  • IMG_1262.JPG
    IMG_1262.JPG
    258 KB · Views: 236
  • IMG_1259.JPG
    IMG_1259.JPG
    244.1 KB · Views: 228
  • IMG_1260.JPG
    IMG_1260.JPG
    260.7 KB · Views: 246
  • IMG_1261.JPG
    IMG_1261.JPG
    258.7 KB · Views: 237
  • IMG_1263.JPG
    IMG_1263.JPG
    221.5 KB · Views: 219
I am shocked at how quick this is going together.
Just gas-tank and cable management away from test runs.
but for tonight I am just going to eat this lovely bowl of leftover turkey stew, finish this post, and hit the sack.

thanks for being here everybody!
 

Attachments

  • IMG_1264.JPG
    IMG_1264.JPG
    268.9 KB · Views: 243
  • IMG_1265.JPG
    IMG_1265.JPG
    273.6 KB · Views: 247
  • IMG_1266.JPG
    IMG_1266.JPG
    303.8 KB · Views: 289
  • IMG_1267.JPG
    IMG_1267.JPG
    278.1 KB · Views: 247
Thanks Dan!
I am rapidly approaching a need to hit a store, so I might not be making such hard progress over the next few days. Hopefully gonna be test driving it soon
*vibrates in joyful anticipation*
 
a little bit more progress.

chopped up some shelf brackets to make them fit under the gas-tank.
The faux-tank on this bike is making it really difficult to get the real tank on there. Also the spare bolts from the rag joint are just a few millimeters too short for this, wish I knew that before I went to the hardware store...

In the third pic you can see my dilemma with the brackets. the front pair are lovely, but the back pair... not so much.
My plan is to drill through the triangular faux-tank and bolt the brackets through the whole bike. I am loathe the put any more holes in the frame tubes on this thing.
 

Attachments

  • IMG_1269.JPG
    IMG_1269.JPG
    251.5 KB · Views: 249
  • IMG_1268.JPG
    IMG_1268.JPG
    245.5 KB · Views: 228
  • IMG_1270.JPG
    IMG_1270.JPG
    198.7 KB · Views: 240
  • IMG_1272.JPG
    IMG_1272.JPG
    264.9 KB · Views: 234
  • IMG_1273.JPG
    IMG_1273.JPG
    120.8 KB · Views: 229
Last edited:
did the fender, had to cut the chain guard too.
ended up cutting the fender twice to get good clearance, good practice filing rough edges.
 

Attachments

  • IMG_1274.JPG
    IMG_1274.JPG
    115.6 KB · Views: 235
  • IMG_1275.JPG
    IMG_1275.JPG
    124.3 KB · Views: 228
  • IMG_1276.JPG
    IMG_1276.JPG
    127.3 KB · Views: 218
some love with a sharp object later, the throttle grip has been upgraded from 'dangerous' to 'functional'
 

Attachments

  • IMG_1286.JPG
    IMG_1286.JPG
    106.4 KB · Views: 210
  • IMG_1287.JPG
    IMG_1287.JPG
    126.6 KB · Views: 221
I've built about 10 of the OCC bikes, And one of the Jesse James chopper. They look REALLY cool but ride real stiff. Also I think they look better with baby apes for bars. I Got pics but I haven't figured out how to re size them to fit on this site.
fatdaddy.
 
Last edited:
good luck with those pics, I would love to see them.

might go the ape-hanger route with this bike, but also considering a set a cruiser bars.
something HAS to be done about the ride though, not sure what, but something.
 
Yeah, About the ride. Not much to do sxcept for the seat. And even that presents another problem due to the extra large seatpost. Best idea I got is to weld a Shock post to the top of that OCC post and then put on a BIG xtra comfy cruiser seat. Or just weld a regular post to it. Just enough of one to attach the seat. Worksman has a 13" wide seat for about $30. THAT ought to do it. And they still look good with a regular type seat on it.
STILL working on the pics of my OCC builds.
fatdaddy.usflg
 
Back
Top