stickerbush
New Member
I've completed my first build and am thrilled with the results! I've not had this much fun since I started riding motorcycles 10 years ago.
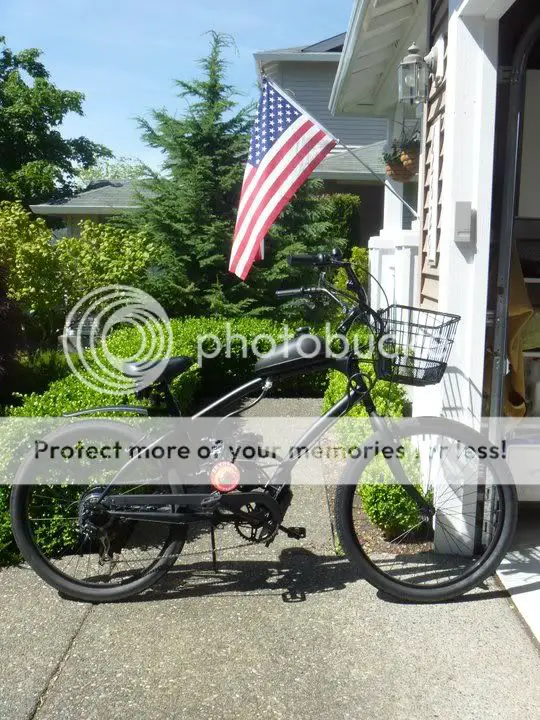
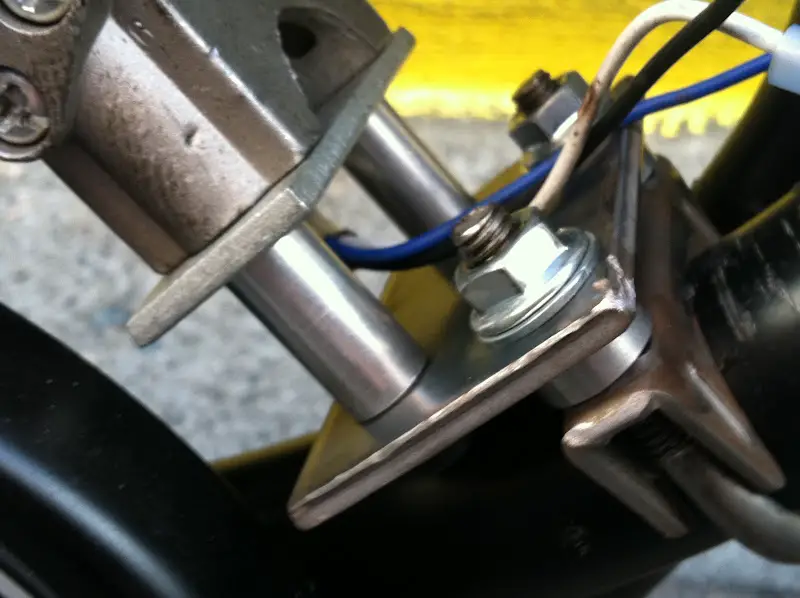
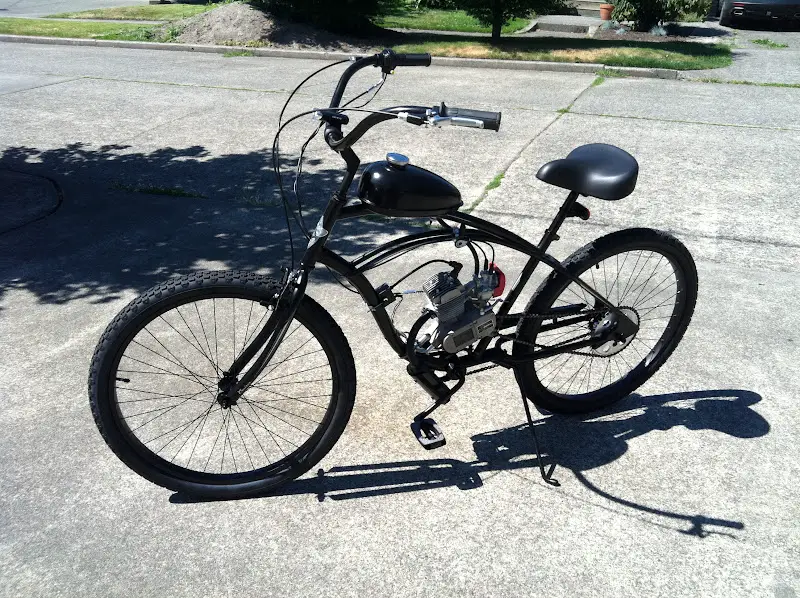
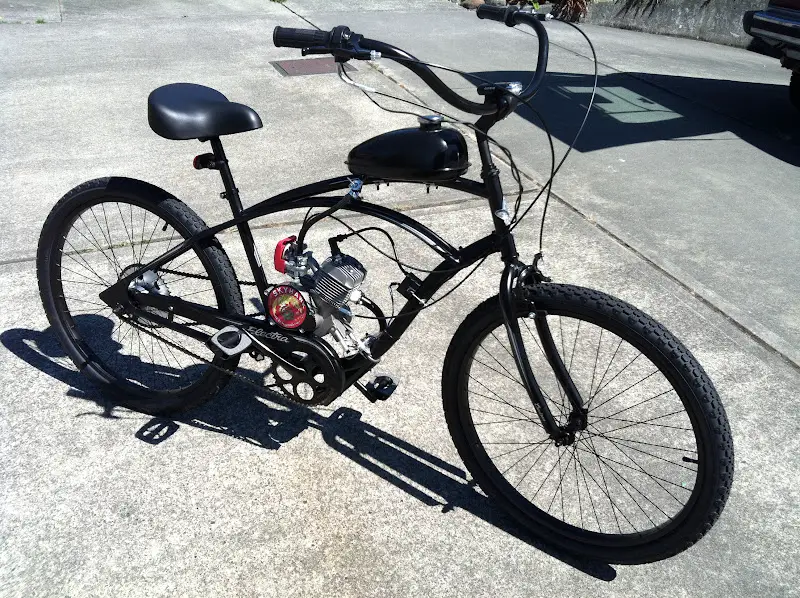
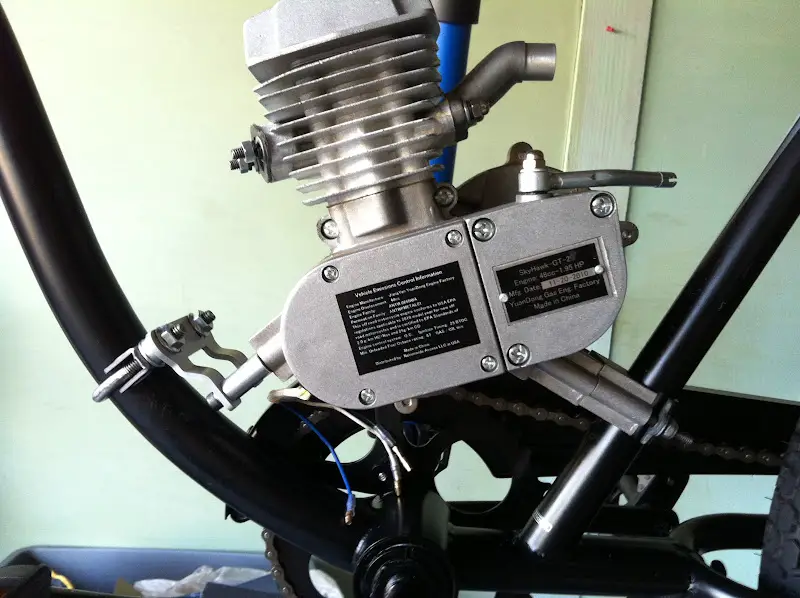
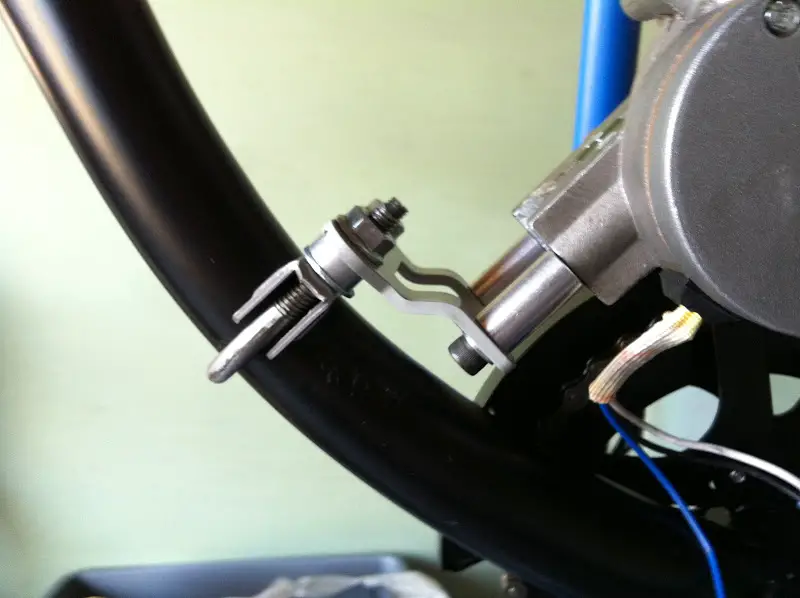
A bit about the project--the goal was to keep it simple, relatively inexpensive, nothing fancy out of the gate. I did start with a new bicycle, an Electra Cruiser that I bought from REI for about $200. I wanted a steel frame, single-speed, comfortable, fun-to-ride bicycle and the Cruiser fit the bill perfectly. The motor is the ubiquitous Grubee Skyhawk 48cc with the CNS carburetor. The first challenge was to get the motor mounted in the slightly stretched frame. For the front mount I put together a mount from Sick Bike Parts and some aluminum spacers with longer bolts (see pictures below). For the rear mount I used the parts that came with the engine kit. I fooled around with the rag joint for hours before discovering the Manic Mechanic hub adapter. Awesome product! Getting the adapter and sprocket solved all my alignment problems. I replaced the standard 410 chain with a 415 and was able to adjust it tight enough to not need a tensioner. I've not yet had any problems with the chain coming off. I added a front brake, a side-pull setup that cost about $10. The brakes aren't great but I feel like they are adequate for the speeds I'll be riding. Have to be careful going downhill though!
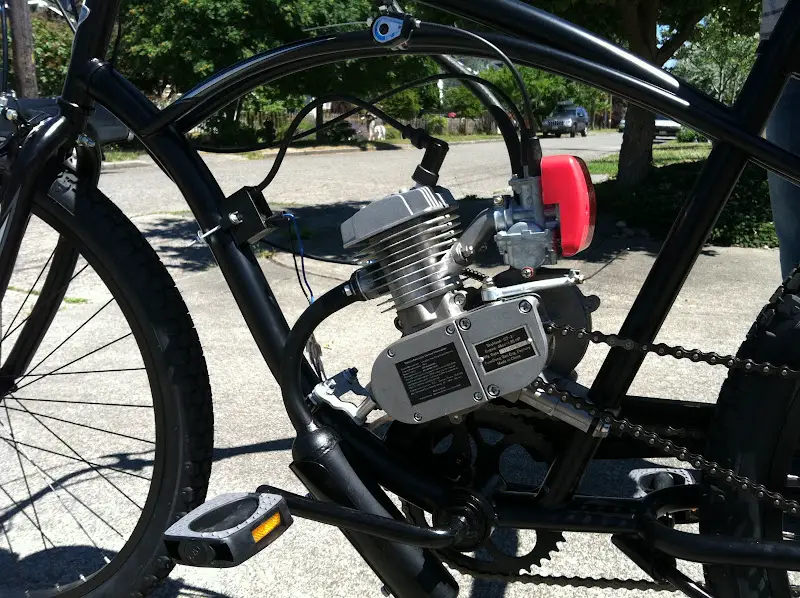
The carb was a little tricky, and I'm still getting it dialed in, but it's running pretty smoothly I think. I still have some issues to sort out, the kill switch isn't working and I need to bend the muffler a few millimeters so it doesn't touch the frame, but the bike is totally rideable now. Last night I cruised around downtown Seattle for about an hour, including the acid test, a long hill (up Pike St to Capital Hill).
I'm already thinking about my next build...
From the left side:
And the right side:
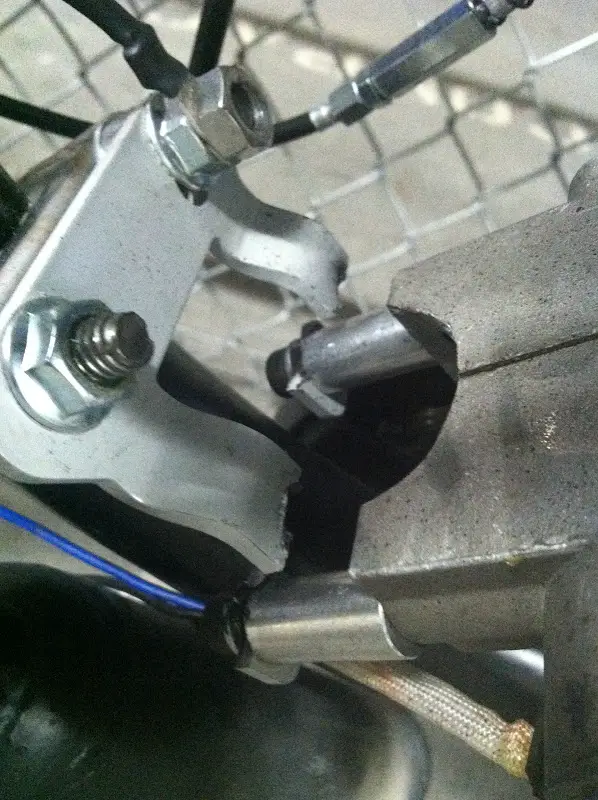
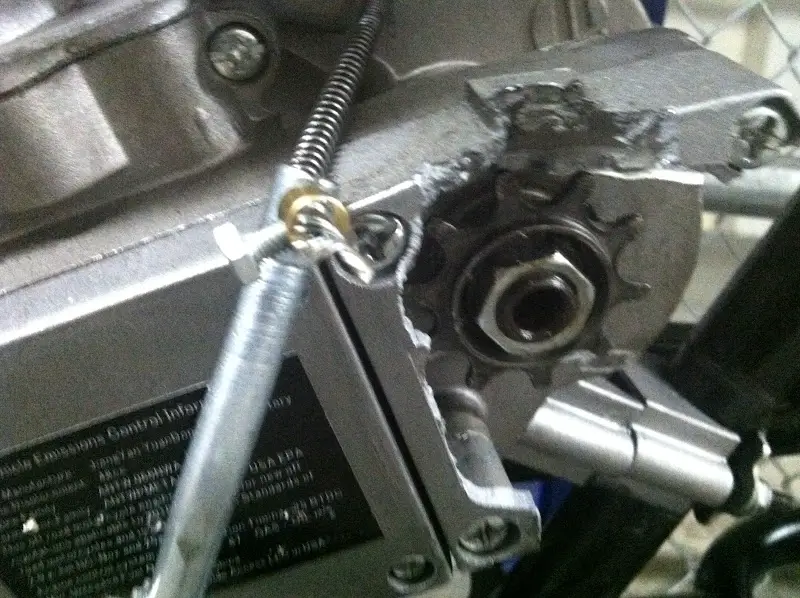
The motor:
Motor close up:
Front mount detail:
A bit about the project--the goal was to keep it simple, relatively inexpensive, nothing fancy out of the gate. I did start with a new bicycle, an Electra Cruiser that I bought from REI for about $200. I wanted a steel frame, single-speed, comfortable, fun-to-ride bicycle and the Cruiser fit the bill perfectly. The motor is the ubiquitous Grubee Skyhawk 48cc with the CNS carburetor. The first challenge was to get the motor mounted in the slightly stretched frame. For the front mount I put together a mount from Sick Bike Parts and some aluminum spacers with longer bolts (see pictures below). For the rear mount I used the parts that came with the engine kit. I fooled around with the rag joint for hours before discovering the Manic Mechanic hub adapter. Awesome product! Getting the adapter and sprocket solved all my alignment problems. I replaced the standard 410 chain with a 415 and was able to adjust it tight enough to not need a tensioner. I've not yet had any problems with the chain coming off. I added a front brake, a side-pull setup that cost about $10. The brakes aren't great but I feel like they are adequate for the speeds I'll be riding. Have to be careful going downhill though!
The carb was a little tricky, and I'm still getting it dialed in, but it's running pretty smoothly I think. I still have some issues to sort out, the kill switch isn't working and I need to bend the muffler a few millimeters so it doesn't touch the frame, but the bike is totally rideable now. Last night I cruised around downtown Seattle for about an hour, including the acid test, a long hill (up Pike St to Capital Hill).
I'm already thinking about my next build...
From the left side:
And the right side:
The motor:
Motor close up:
Front mount detail:
")
")