
You are using an out of date browser. It may not display this or other websites correctly.
You should upgrade or use an alternative browser.
You should upgrade or use an alternative browser.
Dave's Hot Rod Velocar
- Thread starter DaveM
- Start date

wheelbender6
Well-Known Member
I will definitely be following this thread.
DaveM
New Member
Hi again, I really don't know what I'm doing but that is part of the fun.
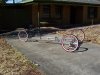
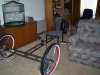
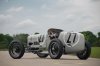
I am going to try and build a body for it that should look like a vintage race car, I need to get some plywood to build the frame and then cover it with aluminum sheet. The one concern I have is how heavy it will end up being.
I have a Grubee GT2B 48cc that I need to reassemble to power it and a Sick Bike Parts expansion chamber to give it some extra HP. I have rebalanced the flywheels and hopefully this motor will be able to push it along at a reasonable speed.
Here are some build pictures for you to look at.
Cheers,
Dave.
Attachments

Last edited:
DaveM
New Member
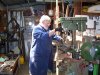
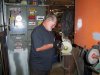
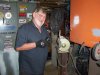
Here a some pictures of my friend Mike helping me notch the ends of the tubes.
I used to drive Agitators (concrete trucks) for a labor hire company, which is how I met Mike (He's a good guy!)
I went and bought a metal hole saw to notch the ends of the tubes. The first hole saw I bought I had to take back because all the teeth wore off, oops!
It turns out that the hole saw when drilling steel needs to be spun at a maximum of 275 rpm. The new hole saw I bought came with instructions with the cutting speeds.
My cheap drill press is not able to be slowed down to the correct speed so I had to ask Mike if I could use his drill press.
Cheers,
Dave.
Attachments
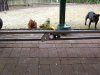
Dave, That looks like a velo limo. Seating for six. ")
A first rate start on the project and I see the assistant engineer is casting a critical eye on it all. I found out myself that the hole saw works at a very slow rate of speed.
Looking forward to seeing what you do for the body.
Steve
A first rate start on the project and I see the assistant engineer is casting a critical eye on it all. I found out myself that the hole saw works at a very slow rate of speed.
Looking forward to seeing what you do for the body.
Steve
DaveM
New Member
Hi again,
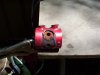
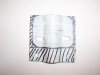
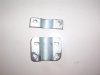
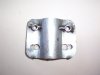
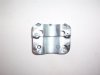
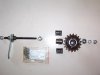
I assembled the motor yesterday, Sunday and today I worked on the front frame mount adapter.
Here are some pictures.
Cheers,
Dave.
I assembled the motor yesterday, Sunday and today I worked on the front frame mount adapter.
Here are some pictures.
Cheers,
Dave.
Attachments

Scott.D.Lang
Member
I like this I will be keeping a eye on it could picture some neat bodes on it
DaveM
New Member
Hi to everyone following my build,
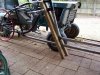
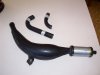
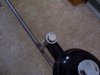
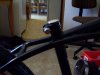
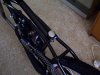
I mounted the coil today and soldered the wires for the magneto and worked on the exhaust as well, I had to cut it up as I wanted it down low, the previous bike it was on I had it going up and beside the head.
I am really happy with the look of the exhaust.
I have some more pictures, one is where the sitting position will be, also one of a body shell I really like and am using as guide, also one of the exhaust fitted to the bike.
Cheers,
Dave.
Attachments
DaveM
New Member
Hi to everyone following my build.
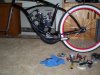
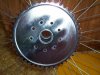
I rebuilt the rear coaster brake wheel and added the rag joint, I used my own bolts and still managed to strip one that is how tight I like to assemble the bolts.
I also used loose ball bearings instead of the raced bearings because I can get more ball bearings in to support the axle, but it does make it a lot harder to assemble the coaster brake hub. I also used automotive teflon grease.
After the first time I tried to assembled a coaster brake wheel, I did not get it right, bugger! I found some good videos on YouTube, the coaster brake wheel must be assembled in a certain order.
The raced bearings are 2 x 11 ball bearings and 1 x 9 ball bearings, by using loose ball bearings I can get 15 ball bearings in place of the raced bearings 11 and 11 ball bearings in place of the raced bearings 9.
Here are some more pictures, the one of the sprocket shows how well it goes onto a 36 spoke coaster brake hub. I did surface grind the dust shield to get it to fit because of the thickness of the sprocket.
Someone with good eyes will notice that the brake shoes are actually back to front.
Cheers,
Dave.
Attachments
DaveM
New Member
Hi again,
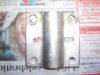
The postie was nice enough to finally bring some parts I have been waiting for, I bought some 7/8" and 1" nickle plated plugs from the U.S. also a vintage Raleigh seat post bolt also from the U.S.
The 7/8 plug, fills the hole where the head stem went and the 1" plug fills the hole where the seat post went.
Here are some more pictures.
Cheers,
Dave.
Attachments
Mr. OrangeConeRacing
New Member
You can use coroplast for the shell. A lot of people build Velomobile shells out of it.
Dan
Staff
Cool build Dave.
I had to look up "Velocar" https://www.google.com/search?q=Vel...gB-W_2QXzgoCIAQ&ved=0CDkQsAQ&biw=1024&bih=499
Ludwig, great thought using cloth. Gonna try that for a project.
I had to look up "Velocar" https://www.google.com/search?q=Vel...gB-W_2QXzgoCIAQ&ved=0CDkQsAQ&biw=1024&bih=499
Ludwig, great thought using cloth. Gonna try that for a project.