Intrepid Wheelwoman
New Member
Now that does look good 

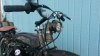
The creativity involved in your build is very pleasing to me. Also the vintage frame, tank and other components appeals to me, I like the old stuff.
Thank you very much Lab Rat for sharing this with us,
Gilbert
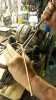
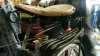
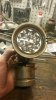
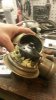
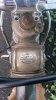
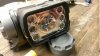
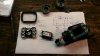
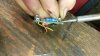
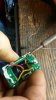
Ok now here is today. Updated Hawthorne carbide lamp mounted. Success!
")