My First Motorbike Project

GoldenMotor.com

lowracer

New Member
Oct 17, 2008
1,319
2
0
Charleston, SC
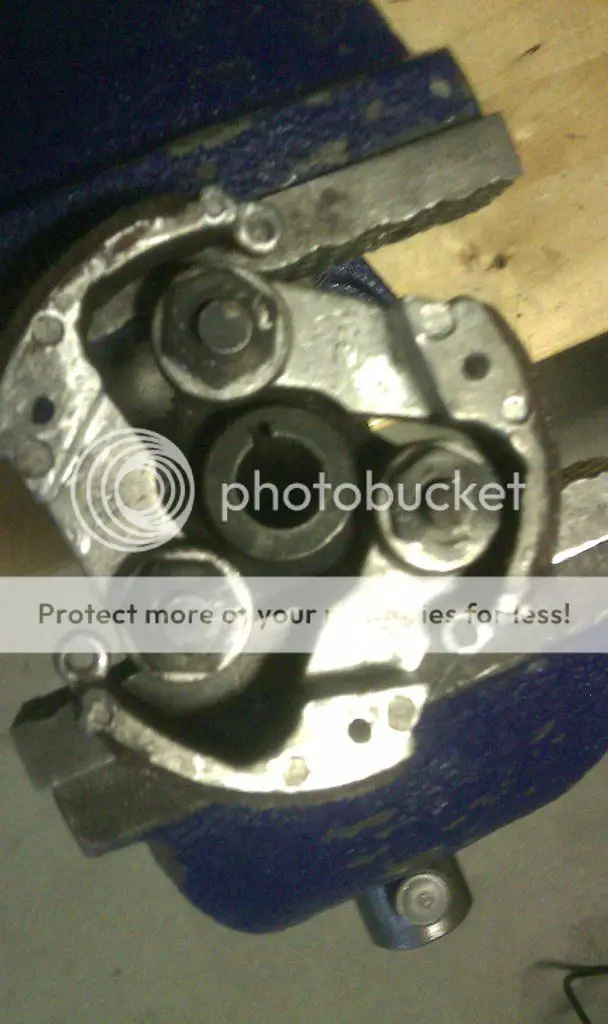
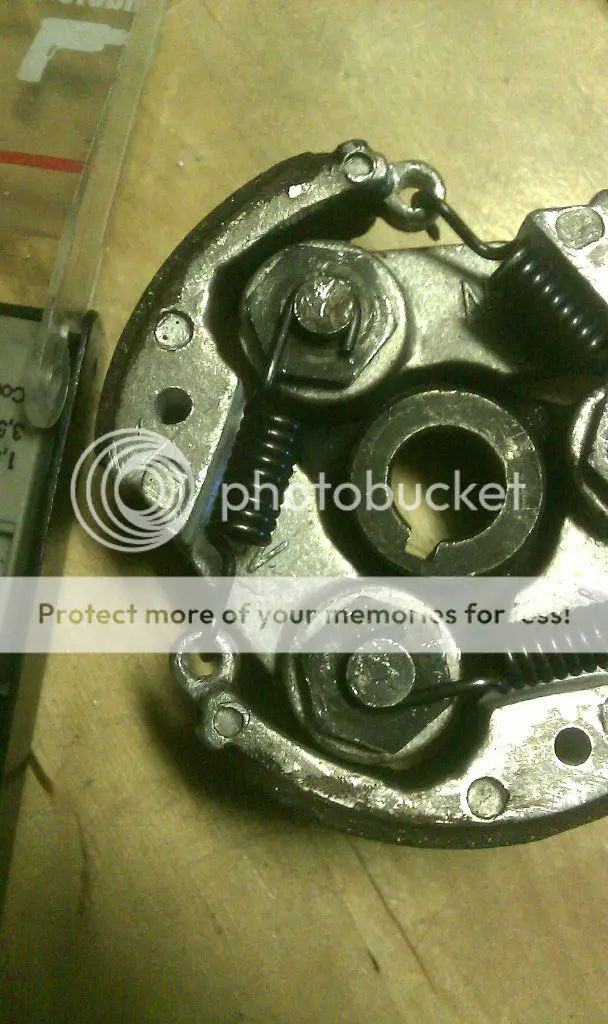
The flywheel is toast....just throw it away.
These Cags are constant maintenance like China Girl engines but with twice the power.
Its the only reason I fool with them as long as I have...I'm addicted to power & speed.
I had a race today with a buddy on his Tomos moped. He has done a few mods to make the moped faster (carb & pipe) but I still smoked him both off the line & thru the mid range & especially on top...
Lots of fun
-Lowracer-
 

gera229

New Member
Sep 4, 2011
465
0
0
USA
I just realized I used the old woodruff key for my clutch because it didn't have a key in it when I got the engine.

Now I need to buy a woodruff key online, unless someone has a spare and would like to ship it for 44 cents with a mail stamp and envelope.

On the crankshaft I'm thinking of putting JB weld on the worn out part AFTER inserting the key just for safety because only the bottom half of the slot would hold the key in place otherwise. Any other solutions?
 
Last edited:

wayne z

Active Member
Dec 5, 2010
1,743
5
38
louisiana
I think that the flywheel nut wasn't tight. I've seen this happen on other engines. With every power stroke, the slack lets the flywheel jerk to and fro. That's what caused the damage to the crank and flywheel. The flywheel wouldn't have cracked without the damage.
 

wayne z

Active Member
Dec 5, 2010
1,743
5
38
louisiana
I just realized I used the old woodruff key for my clutch because it didn't have a key in it when I got the engine.

Now I need to buy a woodruff key online, unless someone has a spare and would like to ship it for 44 cents with a mail stamp and envelope.

On the crankshaft I'm thinking of putting JB weld on the worn out part AFTER inserting the key just for safety because only the bottom half of the slot would hold the key in place otherwise. Any other solutions?
Mosy hardware stores and Home Depot ect. carry a variety of woodruff keys.

If there is any slack at all in the keyslot, the same damage may occour again.
Instesd of JB, I would put the key in the slot, and make a bunch of centerpunch marks on both sides to move some metal against the key.
Then take the key out and dress the punchmarks down a little.
For added security, put a little lapping compound on the taper to help lock the joint when the nut is tightened.
The lapping compound will lock the flywheel in place even without a key if you tighten the nut real good.
 

Mike B

New Member
Mar 23, 2011
2,256
7
0
Central CA
Told ya - :)

Ya wanna buy mine?

Stage 1, no mods, never used.

Bought it for $90. Will sell it for $90.

I planned to use it on a friction drive that never happened, but I had a new idea to use it to kill gophers by plumbing the toxic gas into their holes, so I guess I do have a use for it after all - :)

Never mind.

They're cheap, buy a new motor.

Or better yet, a different motor. Too much power for a cheap build.
 

culvercityclassic

Well-Known Member
Sep 27, 2009
3,115
177
63
Culver City, Ca
Told ya - :)

Ya wanna buy mine?

Stage 1, no mods, never used.

Bought it for $90. Will sell it for $90.

I planned to use it on a friction drive that never happened, but I had a new idea to use it to kill gophers by plumbing the toxic gas into their holes, so I guess I do have a use for it after all - :)

Never mind.

They're cheap, buy a new motor.

Or better yet, a different motor. Too much power for a cheap build.
I like that Mike.... Kill the Gophers...laff
 

gera229

New Member
Sep 4, 2011
465
0
0
USA
Mosy hardware stores and Home Depot ect. carry a variety of woodruff keys.

If there is any slack at all in the keyslot, the same damage may occour again.
I have a homedepot that sells 1/8" keys. In length they have 1/2" 5/8" and 3/4"
I guess I should get the largest one possible.

You are right, the flywheel bolt was loose. I wish I checked the bolt before riding. I check all the bolts except the flywheel because it turns clockwise and that's the same direction the bolt tightens so I was expecting it to tighten the bolt by itself. I was wrong.

Instesd of JB, I would put the key in the slot, and make a bunch of centerpunch marks on both sides to move some metal against the key.
Then take the key out and dress the punchmarks down a little.
For added security, put a little lapping compound on the taper to help lock the joint when the nut is tightened.
The lapping compound will lock the flywheel in place even without a key if you tighten the nut real good.
Center punch marks? Are you saying to hammer both sides in?
dress the punchmarks down a little - what exactly does this mean?

lapping compound - are you talking about locktite?

Told ya - :)

Ya wanna buy mine?

Stage 1, no mods, never used.

Bought it for $90. Will sell it for $90.

I planned to use it on a friction drive that never happened, but I had a new idea to use it to kill gophers by plumbing the toxic gas into their holes, so I guess I do have a use for it after all - :)

Never mind.

They're cheap, buy a new motor.

Or better yet, a different motor. Too much power for a cheap build.
I don't need your engine, I can get a used one off of craigslist for way cheaper than that. Are you just trying to get rid of your engine and finding someone to sell it to? Well not to me because my engine is PERFECT, it's just a simple part that's broken.
 

wayne z

Active Member
Dec 5, 2010
1,743
5
38
louisiana
Take a sharp centerpunch and hammer. Don't hammer directly on the shaft, hammer on the punch. Install the key so as to not let the process move too much metal into the slot, making it hard to get the key in without filing the slot.

Make some good deep punchmarks about 1/16" or a little more away from the keyslot, and about 1/8 " apart. The punchmarks cause the metal to expand and raise slightly, close around the marks.
Wouldn't hurt to get a helper to hold a heavy hammer or dolly on the other side of the shaft while punching.
the expansion part is what you're after, to move some metal towards the key and tighten the slot.
The raised part of the punchmarks need to be smoothed down some with a file so as not to interfere with the flywheel bore.

Valve lapping compound. Coarse grit is better. It's a paste of abrasive grit and grease. NAPA ect, has it.
 

gera229

New Member
Sep 4, 2011
465
0
0
USA
Punchmarks would not work for me because there is limited space to get access to that area and I was afraid of breaking it. JB weld however worked quite nicely. I put the rocket key in first and then put JB weld in there. Now the rocket key seems to be permanently stuck, but that should not be a problem.

Rocket keys cost me 60 cents for 2 keys at home depot. Not bad although I had to file just a little off about .1" for them to fit in the slot.

After a few days of applying JB weld on the flywheel by layers and letting it dry layer by layer, I managed to fix the flywheel quite nicely although not perfect.

Today I put the flywheel on and tightened it down real hard and it started right up. And held up pretty good while I rode it a couple of feet just for a test.
Now I will apply some epoxy around the shaft that the flywheel fits on and put the flywheel on top of it and let it dry instead of using valve lapping compound like wayne z suggested. Not sure if that will work, but time will tell.

Gera
 

gera229

New Member
Sep 4, 2011
465
0
0
USA
Road about 7 miles today, fairly trouble free. I am satisfied.
Still have small spits and leaks, but they are not as bad as they used to be before I welded up some main spots where it spit.
They are actually fairly mild compared to how it used to be so I don't think it's a big problem and I think I am done trying to fix them and shouldn't make too much of a big deal out of them. As long as it doesn't spit all over my cloths!!

Anyway, from now on I am going to try not to run it at fully throttle for over 10 seconds and try to release it for at least a few seconds before doing again. My way of making sure the engine never seizes again. :)
 

gera229

New Member
Sep 4, 2011
465
0
0
USA
Remember when my cylinder seized because of a crankshaft bearing failure?
I ended up buying a new FCC crankshaft for $40 when I could have bought the ENTIRE bottom end with a FCC crank and flywheel and everything for $40 from DAX, then I would have had a spare flywheel too (Although mines fixed and good):
http://thatsdax.com/ENGINE_KIT_PARTS_PAGE_3.html
 

gera229

New Member
Sep 4, 2011
465
0
0
USA
Engine seems to be riding nicely so far so good.

Now, I want to make a spring held chain tensioned one that won't bend into the spokes.

I was thinking of using a long piece of aluminum to mount to double mount at the top and bottom, and use my spare clutch springs as spring tensions. They are very strong springs too and should hold the chain real tight.
 

gera229

New Member
Sep 4, 2011
465
0
0
USA
Today this bicycle became perfectly Legal.
Using turn signals, tail light, stop light, horn, headlight I got for about $7 from a Chinese seller on ebay.

Only thing it lacks is a reflector, but who will touch me if I have all the lights and most likely won't be riding when it's dark? I suppose lights are good enough for them (they look like reflectors anyway).

Everything is now mounted and as you can see I put a new chain tensioner using an idea that I copied from another user on this forum.

In addition I used very flexible stainless steel and bent it around the muffler so that stuff stops spitting on my shirt. Ahh, the major holes are welded but it still has very minimal spits that are quite visible on my shirt if I wear white while riding. Now it's perfectly covered. I imagine a very black and oily surface under that plate sooner or later, but I'll let it sit and dry.

That engine looks so small compared to the rest of the bike while the power is ridiculously good.

Excuse the quality of the image:
 
Last edited:

gera229

New Member
Sep 4, 2011
465
0
0
USA
Here I did a clutch mod to try to eliminate the snapping springs problem. This mod was recommended from an experience user from the pocket bike forum.

As you can see I drilled out the holes where the clutch springs go into to smoothen them out and filed them a little to make them round. I also filed the faces a bit to remove some bulk material so that it does not rub on the springs and this would also eliminate any extra tension on the springs.

I also drilled out holes just under the pads because I was told that that would allow for a more evened out balance and would provide better cooling.

After all, I hope my spring snapping problem is gone. I will update later after riding some.
So far these springs held well for some 20 miles without problems. Never had a spring snap on this aluminum clutch.

@Lowracer, if you read this I would like to see what your clutch looks like stock. I didn't take a picture of before this mod was done.


lowracer

New Member
Oct 17, 2008
1,319
2
0
Charleston, SC
Gera,
My clutch looked like yours before it imploded & I threw it in the trash. I dont think the springs break upon the clutch engaging, its when slowing down the engine is braking thru the clutch & drum. There is a lot of stress on the clutch shoes using these engines on MB applications...
-Lowracer-
 

gera229

New Member
Sep 4, 2011
465
0
0
USA
For me I haven't broken a single spring on that clutch yet, but I'll update in the future how this mod works.
 

gera229

New Member
Sep 4, 2011
465
0
0
USA
Lowracer, I now question how many miles do the clutch pads last? Let me know how many miles yours have without having to be replaced.

I agree that MBs pose a lot off stress on these clutches, I'm geared rather low and max out at 42mph according to the speed calculator and 26" wheels. Final ratio is like 19.5.
I have 72 rear and 11 front plus gear box 3:1 ratio.

If I put 14 front, my engine still pulls pretty good at that ratio of 15.43 final drive and would be 54mph according to the speed calculator which is quite fast. But then the pads would wear out quicker and possibly start snapping springs (which I will test soon when I gear higher after a couple more miles with the lower gearing).
 

lowracer

New Member
Oct 17, 2008
1,319
2
0
Charleston, SC
I've never worn out a set of pads completely. The stock clutch thast came with my cag lasted awhile until I broke my 1st spring...then it constantly broke springs & the bolts that carry the springs would loosen out. I loctited them but the springs were still snapping at an alarming rate (every long ride). The 3 spring/shoe clutches are one of the weak engineering points of the cag. I then went to the 2 spring clutch that although raises the engagement rpm, is a much more durable unit. If I were still running cags, I'd surely be using the 2 shoe/spring clutch instead of the 3.
-Lowracer-
 
Last edited:

gera229

New Member
Sep 4, 2011
465
0
0
USA
Update on the Chain Tensioner:
Looks like I found out what to use my spare clutch springs for (the ones that were stretched out from the very first disaster that occurred when I just began this project).


Also you can see a bolt right above the top of the chain. I put nylon spacers on the bolt. This was necessary to prevent the chain from rubbing on the frame. I tried not to go too far or else I suspect the nylon washers would wear out very quickly.

The HD Springs tension it quite hard so I tightened the chain by hand and didn't even stretch the spring when mounting it (well just a little).
Now this should hold good. If this was a bad idea let me know. Maybe I can use some lighter clutch springs like the stock ones or another spring only if necessary. But if this will hold up nicely I can stick with it until the spring snaps (Joke lol).
 

gera229

New Member
Sep 4, 2011
465
0
0
USA
I was doing test revvs and got it to revv to about just a little over 11,500 RPM with the wheel up and no other load than the wheel itself.
I don't know if that is good or not, but good enough for me with a stock key and spark plug gap at 0.028" (my last setting if I remember correctly since I haven't touched the plug).

The problem:
Well I was revving it, and the mounting bolt in the middle (on the side where there are 3 bolts), just fell off. I expected it because that spot is stripped to the point that I can turn it by hand.
I would like to know if there are any solutions to repair this. I can make the thread bigger and use a larger bolt, but that will take some time. But if that's my only bet right now I will attempt it. If you guys have a solution for me please let me know.