PsychDoc
Member
My friends (and anyone else who’s checking this out) feast your eyes- ask your questions- try not to be to envious of my fine machine shop (or photographic prowess)

That should be a god clutch, i have 2 in the box, yet. Bought of the market post, sell & trade.........CurtThanks Rick! I think I will go with powder coat eventually. Unless cost is prohibitive or someone has information I need to consider.
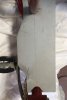
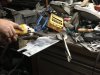
My welder wouldn’t let me take the bike without cleaning the welds, a bit of a perfectionist.
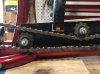
And I don’t think I mentioned it here- I did buy a Motorsport 3D manual clutch.