Mega 50 CC is here.

Msrubin1261

New Member
Sorry but I really dont have time to view every post here to see if my answer exists so I'll just throw this one out there. My Bikeberry (low Quality Video with audio in/out) installation instructions say the sprocket should be mounted concave side out. Does this mean the the teeth should point towards the spoke or towards the frame rail. I installed it last night with the teeth towards the rail and it looks fine and seems to have enough room but I looked at a you tube build video and it was hard to tell which direction it was facing. Id like to get this confirmed before I start the engine mount so not to take everything apart if i dont have too. Also in the youtube video the sprocket assembly had two sets of metal back plates for the gaskets one set for the inside of the wheel had three with three holes each and then one set for the outside (closest to the sprocket) one with 4 and one with 5 holes. My kit only came with the set of three for the inside. Should I be concerned with this set up? Any help would be appreciated as I hope to be up and motoring by the weekend. With pictures to follow soon.

Thanks in advance!!!!
 
Be less concerned with the concavity of the sprocket, and more with securely attaching the engine to the frame. Once you've done this, only then should you attach and align the sprocket. If after attaching the engine, you find that its drive-sprocket's alignment (the 10-toothed sprocket on the engine) is closer to the wheel, install the large-sprocket closer to the wheel...if the 10T is closer to the frame...do the same with the wheel-sprocket. Although I wouldn't like it if my kit did not come with the 4 and 5 holed rings for the rag-joint, I believe you should be fine with just those three 3-holed ones.

A securly mounted engine and a properly aligned and tensioned chain is essential to your safety, enjoyment, and reduced maintenance. Do NOT try to isolate the engine from the frame with rubber or any other intended vibration-damper; attach it metal-to-metal. Be patient, and spend some time aligning the sprockets, it'll save you hours of annoyance and possible damage later.
 
As Kioshk said alignment is a must, the dish of the sprocket is to help in alignment. Some frames/wheel combos require the sprocket to be installed toward the spokes, it all depends on you particular bike. Lock everything down tight and use thread locker, the removable of course.
 
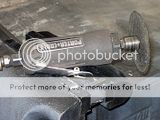
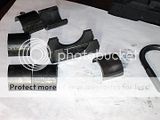
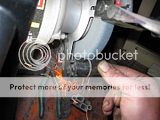
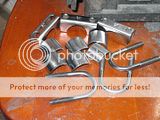
Set the motor in place last nite and the alignment is pretty perfect with it on the outside. 1st snag tho , my down tube is two inch so the bracket and u-bolt sent wont work and neither will the vertical tube bracket as it is about 1 1/4". Getting a couple of pieces of flat stock cut now and I'll fab my own brackets for larger u-bolts. Thanks for all the help.
 
Set the motor in place last nite and the alignment is pretty perfect with it on the outside. 1st snag tho , my down tube is two inch so the bracket and u-bolt sent wont work and neither will the vertical tube bracket as it is about 1 1/4". Getting a couple of pieces of flat stock cut now and I'll fab my own brackets for larger u-bolts. Thanks for all the help.

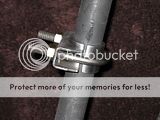
I use heavy duty muffler clamps. Simply weld a chunk of plate to the stamped section and drill it for your motor bolts. Be careful not to crush the frame tubing since these are FAR stronger than the kit U-bolt big tube adapter mount...
 
For a better mount that can be torqued fully w/o frame kink, get a clamp sized one over, steel pipe scraps, chop, zot & done;

 
For a better mount that can be torqued fully w/o frame kink, get a clamp sized one over, steel pipe scraps, chop, zot & done;


This is the best homemade setup. Very nice work BarelyAwake!
*hides primitive hackjob mount under bench*
 
Thanks maniac, it's just a refinement is all & a hackjob jus' the same - but whatever ya do, don't look under my bench lol, it's a bent burnt & bungled graveyard of ...not quite as good as I'd thought iders ;)
 
Last edited:
Back
Top