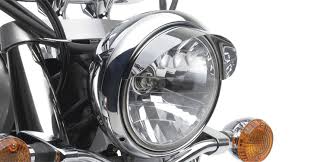
Pea soup headlight

GoldenMotor.com

Rockenstein

New Member
Feb 8, 2009
442
0
0
Ontario, Canada
In another thread I posted a pic of the bullet type headlight that's slated to go on my Riff Raff bike...but...I was looking at it, and some other lights I have, last night thinking it just isn't doing it for me. That's not to mention that just about every custom bike I've seen lately uses one too.

So..

I have this NIB 5" round 6 volt sealed beam headlight assembly kicking around my shop and it looks the part but it is a little bit too large looking on the OD in comparison to the bike it's going on and too it sucks up 18 watts of power which of course presents some other problems that I care not to deal with. Now I was quickly looking over a 6v flashlight at a dollar store the other day, more out of interest in the bulb than anything, and then this morning I got looking at a pea soup can that was sitting on the counter waiting to get tossed in the recycle bin when the idea of mating the pea soup can with the dollar store flashlight came to mind. I went out to the dollar store this morning and bought the 6 volt flashlight :oops:

The lens on the flashlight is 4" and with the yellow plastic shroud it's about 4 1/4" OD in total which is about right in terms of light size matching bike size. The lens assembly fits inside the soup can just about perfect too...so...in the spirit of the apple juice can gas tank we might as well have a pea soup can headlight :D


Will post pics of how it all comes together...
 
Last edited:

silverbear

The Boy Who Never Grew Up
Jul 9, 2009
8,325
670
113
northeastern Minnesota
I'm sure you 'can' do it. This is recycling at it's best. Do you picture painting the can or shining it up and shooting it with clear coat? Leather to match the tank? I think it's a great idea! You da can man!
SB
 

BarelyAWake

New Member
Jul 21, 2009
7,194
21
0
Maine
Rockenstein! I seen yer house bfore! I know where you live!!!


house made of cans


Seriously man - you do great things, loved the apple juice tank and I'm lookin' forward to this 'un without a doubt :D
 

2door

Moderator
Staff member
Sep 15, 2008
16,302
175
63
Littleton, Colorado
Rock,
I'm going to look through my recycling bin and see if there's anything in there you could use. I've got an idea for a name if you want to change from Riff Raff...How about, Vege-a-matic? Great work, as always. Keep those ideas coming.
Tom
 

Rockenstein

New Member
Feb 8, 2009
442
0
0
Ontario, Canada
I'm really digging the house of cans and was just thinking about how the north side of my shack is in need of some siding repair...hmmm...the thoughts in my head ;)

I'll keep you all posted, not exactly sure how it's all going to go together or how it will be finished. Going to take an hour or so this afternoon and get the vented cap for the tank finished off before I get too sidetracked by the headlight.
 

Tim_B_172

New Member
Aug 26, 2009
251
0
0
41
Saint Joseph, MO
I ran a headlight made from one of those 6V flashlight for a while, It worked pretty well. I made rear part or the headlight out of fiberglass though, a can just wouldn't look right on my bike. ;)
 

Rockenstein

New Member
Feb 8, 2009
442
0
0
Ontario, Canada
Well I had to add a can of sliced mushrooms to my headlight recipe in order to get the flavor tuned into my tastes rotfl


I have the part cut off the flashlight that I can epoxy to the OD of the large can so as to screw the yellow shroud down and hold the lens in...BUT...I don't particularly like the look of the thing with the big ugly shroud attached and I don't think changing it's color would change my mind. It just looks out of place on the bike. So I think I'll work out a way to secure the lens in the can(s) bare, make my own trim ring and visor plus maybe even a 1/4" mesh grill from 3/32 music wire.


Mocked up on the bike the shroud-less setup pictured looks pretty slick IMO and with a coat of black paint, the visor etc it should blend in nicely...

.
 
Last edited:

silverbear

The Boy Who Never Grew Up
Jul 9, 2009
8,325
670
113
northeastern Minnesota
Nice. I look forward to seeing how you attach it and with a final paint job. I wonder if there is some sort of chrome ring you could use to hold in the lens. That's a nice, clean cut on the can. How did you co that, with a cutoff wheel on the Dremel?
SB
 

Rockenstein

New Member
Feb 8, 2009
442
0
0
Ontario, Canada
SB on the top side of the small can I will have 2 shaped sheet metal mounts that reach up to where the fork legs, struts and spring assembly bolts together. I'll also have a mount of some kind coming up from where the fender bolts to the steering tube attaching to the bottom side of the small can...this will be where the angle adjustment is made and secured.

How do I cut the cans?

I use curved scissors similar to what is pictured below, I get them for $1.50 at a surplus store and they work just great on thin sheet metal too. Before cutting I mark up with either a fine sharpie or tool makers ink and a fine scribe. To dull the edges of a fresh cut I use my Dremel with a fine stone bit then I finish off with some fine sandpaper...freshly cut cans have edges sharp as a razor!
 
Last edited:

silverbear

The Boy Who Never Grew Up
Jul 9, 2009
8,325
670
113
northeastern Minnesota
SB on the top side of the small can I will have 2 shaped sheet metal mounts that reach up to where the fork legs, struts and spring assembly bolts together. I'll also have a mount of some kind coming up from where the fender bolts to the steering tube attaching to the bottom side of the small can...this will be where the angle adjustment is made and secured.

How do I cut the cans?

I use curved scissors similar to what is pictured below, I get them for $1.50 at a surplus store and they work just great on thin sheet metal too. Before cutting I mark up with either a fine sharpie or tool makers ink and a fine scribe. To dull the edges of a fresh cut I use my Dremel with a fine stone bit then I finish off with some fine sandpaper...freshly cut cans have edges sharp as a razor!
Yes, I can see that scissors would work and good to get cheap ones since they will dull pretty easily that way. My own projects are on hold for awhile as I am packing up for my annual snowbird migration to western Maryland. I'm taking four bikes with me, a couple motors, leather and tools to keep me out of trouble. I work as a caretaker/ handyman at a rural home not far from Camp David for a few months throught the winter. This year I'll be converting the rear portion of the main house into an apartment. Last year I always knew when Obama was going for the weekend as there would be military helicopters flying over in a grid long before his own would fly over. I waved and like to think he waved back. Howdy, pres.
You know, regarding your apple jiuce and now pea soup/ mushroom can projects. Unless somebody has done it themselves they have no idea what pleasure it is to make something out of nothing, especially when you have thought it up yourself. There's nothing like it. Just a great satisfaction. Nice going, my friend.
SB
 

BarelyAWake

New Member
Jul 21, 2009
7,194
21
0
Maine
I see now that you did mention a "visor" but I still wanna say I think yer headlight came out great, I agree makin' yer own bezel looks far better, I can't wait to see it with the "eyelid" - I've always been fond of 'em lol


Rockenstein

New Member
Feb 8, 2009
442
0
0
Ontario, Canada
Thanks SB, making something up pretty much as you go and ending up with a working product that you can say is uniquely your own is enjoyable to say the least. Seeing the finished product of others that might happen to get inspired by a project such as this is very cool too :)


So since I'm mounting the lens without the aid of the original shroud I needed to get it sitting in the can flush, snug, centered and somewhat sealed. The method that I came up with to accomplish those things is a leather gasket sealing against the rim of the can plus the ID of the trim ring/visor part that's yet to be cut and put in place. Sealing and centering the lens to the ID of the can is a strip of Felpro's cork gasket making material, I feel I got lucky as it was the perfect thickness to do the job! Bonding the leather and the cork to the lens was done with contact cement applied with a small'ish tipped artists paint brush. To get the ID of the leather gasket cut out in a reasonably neat fashion I used a paper template tacked to the leather via a glue stick. Took me a couple of tries to get the ID of the gasket right but hey I got a whole couch worth of leather to play with...lol! I'll trim the OD of the leather gasket later when I get the trim ring/visor part attached. Next part I'll be working on is the rear mount which will allow me to secure the lens and service the light if required.

.
 
Last edited:

RecycleBill

New Member
Oct 31, 2009
74
0
0
Greensboro, North Carolina
Good work! I think I'll drop by my recycling center tomorrow (no customers to bother me on Sunday) and see what I can find. I've been dreaming of gas tanks and lights made from 3"-4" copper pipe.

I've also got some interesting PVC scraps I'm thinking of using.
 

Rockenstein

New Member
Feb 8, 2009
442
0
0
Ontario, Canada
A little more progress was made today...was scratching my head for a while trying to come up with a simple method of securing the lens to the cans. Had lots of elaborate over engineered ideas but since this thing isn't going up on the next shuttle mission I gave my head a shake and came up with something simple...and cheap...lol

I took a 3/8" x 1" 1/2 fender washer and bored the center out so it matched the OD of the area on the back side of the lens I wanted to connect to. I then drilled 6 holes in the washer, 4 1/16th holes for closing the 2 halves back together with a length of copper wire once they are in position and 2 #29 holes for the 6-32 x 2" screws that go through the 2 #29 holes drilled into the end of the small can. After the boring and drilling was done I split the washer with a hacksaw and cleaned up the ends. I made a couple leather washers to go under the regular washers used on the outside of the small can just to help seal things up against the weather. I will eventually put a dab of securing solder on the 2 copper wires used to close the washer halves together but I'll wait and do that when I'm ready to button the thing up for the last time before mounting. Too I need to make a better and more secure E10 type bulb socket so there may be a need to disassemble everything once or twice yet. The pictures should give you all an idea of how it goes together and where I'm at with the project.


Cheers till next time :)

.
 
Last edited:

K.i.p

New Member
Nov 8, 2009
339
1
0
CNY
Nice engineering and fabrication. That is going to be one nice retro headlamp!