Stripped mounting stud socket

GoldenMotor.com

Teratoma

New Member
Apr 24, 2014
27
0
0
Arizona
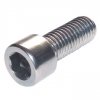
Today I noticed Lola was lagging and making a lot of noise. Got home and realized the whole stud on the right rear had worked its way out and was now somewhere baking in the unforgiving AZ sun.

No problem right? Just replace it... Only somehow the socket is so terribly stripped that the new stud seems to be at least a millimeter too small. Like, when the stud came out, it took 90% of the threading with it. It literally would slip right out from gravity alone.

I'm not sure how that could even happen, but I imagine I'm going to have to take it to a machine shop and have it re-set, but was wondering if anyone here had any suggestions or input.

My novice go-to MacGuyver solution would be to try forcing the next larger sized stud into that socket, but I realize that would probably make things worse.

I've only had her about four months - the engine (and bike) were brand-new when she was built.
 

Teratoma

New Member
Apr 24, 2014
27
0
0
Arizona
Thanks! I haven't checked yet, but I suppose it's reasonable to assume that a machine shop would charge more than $30 to do it for me?

This is an unforeseen issue and I'm angry that it's more expensive to repair/replace than any other part on the bike besides the motor and frame.

I'll check among my friends to see if I can get it done cheaper - either way, that thread repair kit looks like a worthwhile thing to add to my toolbox.
 

2door

Moderator
Staff member
Sep 15, 2008
16,302
175
63
Littleton, Colorado
A thread repair, heli-coil, is the only way out of your dilemma. Don't listen to the advice that you'll surely get to use epoxy (glue) to fix stripped threads. It won't work.

You might get away with running a 1/4 X 20 tap into the hole and using a 1/4X 20 stud or better yet an Allen head cap screw in place of the original fastener.

Tom
 

Teratoma

New Member
Apr 24, 2014
27
0
0
Arizona
You might get away with running a 1/4 X 20 tap into the hole and using a 1/4X 20 stud or better yet an Allen head cap screw in place of the original fastener.

Tom
Is that basically what my 'MacGuyver' solution was? Please elaborate - I've learned quite a bit in the past few months but am still very green to most of this.

Could you describe the Allen head cap screw idea with a little more detail? I'm intrigued.
 

2door

Moderator
Staff member
Sep 15, 2008
16,302
175
63
Littleton, Colorado
Here is a photo of an Allen head cap screw. This one appears to be stainless steel but they also are available in black. Usually the ones you'll find at an Ace hardware will a hardness grade 8. You'll need to determine the length but the size will be 1/4 X 20.
That means 1/4" diameter by 20 threads per inch. You'll need a 14 X 20 tap, preferably what is called a 'bottom tap' and enough case material to support these new threads. Good luck.

Tom
 

Attachments

Teratoma

New Member
Apr 24, 2014
27
0
0
Arizona
Ok, I believe you've made that clear enough for me to accomplish myself! Kudos for that!

I feel like I've made it to that level of Scientology that made Tom Cruise lose his marbles.

Do I continue?

I still love the bike, but I've had a considerable amount of issues with her in a short time - nothing I couldn't take care of myself without coming here for help, but enough to where everyone I know has made a comment about it :(

I give her a lot of attention. I check her nuts and bolts every day... Had no idea that stud was about to bail.

I like the Allen screw solution. Guess I'll be going for that. Wish me luck again!
 
Last edited:

Rudz

New Member
Jun 24, 2014
454
1
0
Tyler TX
Helicoil threads are steel. They will make anything stronger. It's an expensive investment for the set but it's worth it.
 

Teratoma

New Member
Apr 24, 2014
27
0
0
Arizona
Thanks for the help everyone!

Can someone tell me - are the heli-coil kits multi-use? I have a feeling I'm gonna have to do the left one too. And the front ones as well, eventually.
 

2door

Moderator
Staff member
Sep 15, 2008
16,302
175
63
Littleton, Colorado
There are kits that only contain one and large kits with an assortment of sizes and multiple coils of each size. Those are very expensive ones. I recently bought a set from NAPA. There were six coils in it, a tap and the insertion tool.

Like Rudz said, take care of the tap. Clean and lubricate it, and don't break it!

Tom
 

Teratoma

New Member
Apr 24, 2014
27
0
0
Arizona
From digging around online it looks like I'll need to drill out the socket first? Is this an accurate assumption, or might I be able to do it without? I'm sure I can borrow a drill if necessary. What else might I need?
 

Greg58

Well-Known Member
May 1, 2011
5,353
2,575
113
65
Newnan,Georgia
The tap usually has the drill size needed on it or the instructions tell you what size drill bit to use. When taping a hole you have to go slow turning the tap in a little then backing it out then turn in a little deeper. This method cleans out the shaving created while cutting the threads. Use plenty of oil, I sometime stop about half way and wash out the hole with wd40 then blow it out with air then reoil and thread it till its deep enough. You can see this on you tube if you want.
 

Rudz

New Member
Jun 24, 2014
454
1
0
Tyler TX
Your kit should specify which size drill bit corresponds to which tap size. You need to carefully drill out the damaged threads, then use a can of air or a compressor to blow out any debris. You should be wearing eye protection.

Then follow the insertion instructions on your kit.

I helicoiled a rack mount and it's held strong ever since, even with a loaded rack, no suspension, 23mm tires and 20+mph of non motorized road bike fun on crappy roads.