Excalibur ‘09

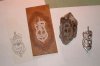
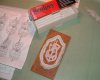
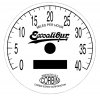
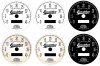
6-13-09 LOGO UPDATES

I’ve decide to remove the “’09” from my logo, I think it looks better and makes more sense.

Besides if I ever make another Excalibur it won’t be tied to a particular year.

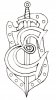
I’ve also worked up an additional Edwardian inspired logo (crest) for a future head badge and perhaps somewhere else small on the sides of the frame...?
 

Attachments

  • 46 .jpg
    46 .jpg
    74.3 KB · Views: 244
  • 45 .jpg
    45 .jpg
    95.4 KB · Views: 256
6-19-09 BADGED

Finished creating a custom head badge today!

A couple of days ago I sculpted a head badge based on my earlier drawn logo using a product call “Sculpey,” It’s a type of polymer modeling clay that’s hardened by baking in a kitchen oven.

I then made a mold of it using hi-temp automotive silicone.

Melted lead was used for the final casting. It took a few tries to get a good clean copy.

The lead is soft enough that I’ll be able form fit it to the head tube later on.
 

Attachments

  • 48 .jpg
    48 .jpg
    117.9 KB · Views: 311
  • 47 .jpg
    47 .jpg
    152.8 KB · Views: 297
7-17-09 SPEEDO

I’ve put together a speedometer.

Started with a vintage 1960’s Stewart-Warner unit and painted the plastic case Excalibur blue (aka: Rust-Oleum rattle can Navy).

I distressed the paint to a proper barn fresh look and even added some fake rust & crud.

The outside edge of the lens cover was painted gold & then distressed silver to hopefully look like nickel plated brass- I’m not 100% on this part and will keep my eye out for a real metal bezel.

For the gauge face I created a replica of a period correct Corbin Screw Corporation design complete with a Excalibur logo insert.

Good enough for Indians & Harley's- Good enough for me.

I photoshopped some options and finally decided on a “yellowed” white face typical of their earliest models.

I had a color copy laminated at a local copy center and attached it to the old S/W face.

The driver is the 2 gear type and will be too wide for my forks, I’ll have to sort that out later.
 

Attachments

  • 49 .jpg
    49 .jpg
    106.7 KB · Views: 269
  • 50 .jpg
    50 .jpg
    151.7 KB · Views: 282
9-6-09 REALLY BIG SHU!

This morning for the first time I went to the annual Black Hawk Chapter of the Antique Motorcycle Club of America in Davenport Iowa. It’s usually just referred to just as “the Davenport show”

It’s just an hour drive away and one of the largest swap meets & shows period!

All I can say is Wow,

Wow, Wow, Wow!

Attached is a Imgur folder, I’ll just let the photos do the talking.

http://imgur.com/a/yAQtI#0
 
9-28-09 GRINDING

Spent some time today grinding the new welds, I also finished assembling the handle bars.

Some vintage brake levers were welded to seat post clamps which in turn hold the cross bar in place.
 

Attachments

  • 51 .jpg
    51 .jpg
    151.7 KB · Views: 403
  • 52 .jpg
    52 .jpg
    162 KB · Views: 420
9-29-09 LITTLE STEPS

Finished fabbing the lower motor mounts and upper motor brackets tonight.

I’ll be using castle nuts and cotter pins for most of the bolt on's.

Earlier this afternoon I garbage picked a children's bike from a curbside.

It has a tiny chaining with a nice period look, and the small size
may help make room for jackshaft arrangement.

It also had this neat little metal chain guard which might be converted into primary “pulley guard” later.
 

Attachments

  • 53 .jpg
    53 .jpg
    174.5 KB · Views: 389
  • 54 .jpg
    54 .jpg
    179.3 KB · Views: 383
  • 55 .jpg
    55 .jpg
    216.9 KB · Views: 481
11-12-09 FINESSING FORKS

Been working the remaining parts for the springer fork.

The design is unique, but familiar- Kind of a cross between a early Indian & a Iver-Johnson.

I’m happy with the springs!

2 shortened leafs from the model T, and “fake” bottom fold under leaf that will have hidden welds and registration pegs to tie everything together.

This baby will stay aligned on the roughest of roads!

However, the lower geometry is proving very hard to nail...

I have to balance travel and the risk of cam over...

I’ve already made 3 sets of rockers and now realize it’s the front struts that need to be longer. :-(

So I cut the bottom off and added spacers & sleeves to be spot welded & braised.

But I just don’t like the heavy clunky look of them.

Id hate to take a step back, but after all this work I really want this thing to be just right...

At least I know how long to make a new set now.
 

Attachments

  • 57 .jpg
    57 .jpg
    195.7 KB · Views: 410
12-1-09 FINISHED FORKS

New front struts, and yet another new set of rockers.

I’ve finally got all things right for the fork fabrication.

Getting here was a quite a trial, but I think it’s a worthwhile detail.

And if I ever do this again I WILL get it right on the first try! :-)
 

Attachments

  • 58 .jpg
    58 .jpg
    183.8 KB · Views: 427
  • 59 .jpg
    59 .jpg
    200.4 KB · Views: 378
1-1-10 EXCALIBUR ‘09

Well 2009 has come and gone and I’m still a long way from being finished.

But I still plan to keep the name Excalibur ‘09. Has a nice ring to it!
 
3-25-10 STAND IT

Started building a drop stand today. I’ve been planning it from the beginning and have already installed sturdy stops to the frame stays long ago.

I found a nice shallow c-channel at the local steel mart, I believe it’s used for building hand rails.

I was able to bend it between a couple black pipe fittings without folding over the sides.
 

Attachments

  • 61 .jpg
    61 .jpg
    153.2 KB · Views: 372
  • 62 .jpg
    62 .jpg
    107.9 KB · Views: 336
4-27-10 MOCK UP

The weather has turned nice, so I hauled the old beast out for a quick photo shoot. The wheels & red tires are for mock up only.

Unrecorded new additions include a card board gas tank mock up,

Finished painted rear fender complete with heavy duty cold rolled stays, and a completed drop stand and clip.

Completely finished welded forks,

Updated drop stand, it’s amazing how much rigidity is adding by a simple strap!!!

This thing is really strong now and will easily carry the bike and the rider as he flails away trying to pedal start the engine.

I would, however, like to replace the stove bolts with more authentic rivets.
 

Attachments

  • 63 .jpg
    63 .jpg
    275 KB · Views: 407
  • 64 .jpg
    64 .jpg
    262.4 KB · Views: 436
  • 67 .jpg
    67 .jpg
    252.5 KB · Views: 587
  • 65 .jpg
    65 .jpg
    216.5 KB · Views: 414
5-9-10 NOT SO HAPPY TRAIL

After pushing this mock-up around a little and getting a feel for the handling I’m not happy with the trail.

This is at just lowly foot powered speeds. I fear this will only get worse with the upcoming additional weight and speed.


There’s not enough room to shorten the rockers and I finally have all that working well now anyway-

hate to say it, but I may have to cut the frame and kick out the head tube rake-

Yuck!
 
7-7-10 CARB’ED

I made aluminum plate that fits between the engine and the carb today.

I filed the walls of the center hole into a taper so the carb’s 22mm opening would match the engine’s 7/8” port.

The intake side of the carb now has a coarse wire screen across it and the stack is filled with a thick disc of foam cut from a Lawnboy mower filter.

All is mounted now with a old brass drain cover- I’m not sure I’ll leave the cover on there or not...?
 

Attachments

  • 68 .jpg
    68 .jpg
    161.6 KB · Views: 346
  • 69 .jpg
    69 .jpg
    178.6 KB · Views: 372
7-11-10 WHEELS & YAMMIES

Laced up and trued the wheels this morning. The Rims are from a 1950’s Monark and are pretty stout. I like ‘um! I won’t add a tire to the rear until I’ve added the belt sleeve.

But the big news today is I bought 1973 Yamaha XS (XT)650 literally fresh from a farmer’s barn.

I got it for a song, and I’m a lousy singer! “-)

It’s fairly complete and I would of replaced most of the missing parts anyway. I’m not crazy about the after market extended forks, perhaps I can resale those to a chopper guy?

Regardless, for now I’m just going to set it aside, let it brew in my brain awhile and save it for a later day.
 

Attachments

  • 70 .jpg
    70 .jpg
    166 KB · Views: 312
  • 71 .jpg
    71 .jpg
    185.1 KB · Views: 349
9-4-10 JACKSHAFT

At the Davenport Show I saw an inspirational jackshaft through the bottom bracket on a restored Shaw Motor bike.

That’s also the same pedal crank/pulley drive used by early Indians and several others.

But I never considered it before because I was still trying to get the earlier direct drive flat belt look. Since I’m forced to use a jack shaft anyway I think this just may be the “clean” looking way to go...?
 

Attachments

  • 72 .jpg
    72 .jpg
    206.3 KB · Views: 949
  • 74 .jpg
    74 .jpg
    210 KB · Views: 395
9-9-10 UPDATES

1- I found a old leather toiletries kit I intend to use as a tool roll.

It somewhat fell apart when I beach scrubbed the mold from it... But that inspired to fit & rivet the surviving cover around a metal box ( just like the old Indian box).

I think it will look damn authentic and will mount quite nicely to the back of the luggage rack.

2- Pretty sure I'll cut the head tube tonight to fix the shallow rake problem, all is well mounted & braced in the jig now...

3- On a whim I bought a pair of Harley rear wheel bearings on the Ebay- Inexpensive, heavy duty, double sealed rollers, 3/4” ID, and quality made in America.

Amazingly it looks like they will press fit into Excalibur’s old thin walled bottom bracket :-) These could also be a good resource for future projects...

With that in mind attached is a proposed concept for the crank/jackshaft combo...

Lots of stuff here that’s beyond the ability of my modest workshop, I see the biggest obstacle being the double pulley. I’ll need to use a metal lathe.
 

Attachments

  • 75 .jpg
    75 .jpg
    188.3 KB · Views: 318
9-10-10 RAKED

Cut & bent the head tube tonight. Filled in about 3/4” on the down tube.

I also tucked a 6.5” wide x 4” tube tightly up into top of the rear triangle.

It’s 1/4 thick and quite heavy, but that’s the point as I want it to be a structural connection between the upper rear stays and the rest of the frame.

I’ve always worried that the original braised connection there was too weak for a motorized bike!

It will also be used as a battery box for the lighting system.

A drop loop filler piece and brackets to attach the belt sleeve to the rear wheel are also fabbed.

Ready to weld!
 
9-17-10 FINISHED FRAME!

A morning welding session at Big J’s has pretty much finished the frame!

Also added a couple of beads to the drop stand (recently replaced the stove bolts with slightly larger cap screws).

Yea! Yea!

Looking forward to grinding, painting, pin stripping, and distressing!
 
10-1-10 STRIPED

Pin-striping and distressing are done.

I painted a little sword graphic to the fork blades...

A little light steel wool scuffing reveals nice areas of authentic period rust!

Still need to add the correct length bolts and castle nuts to the fork rockers
 

Attachments

  • 76 .jpg
    76 .jpg
    268.3 KB · Views: 336
Back
Top