Bike Bobber

Just for giggles I trimmed the excess weld off with the mill. I'll still have to do some grinding and filing to blend in that nice straight line. I used my air filter as a template to lay out a radius on the newly created gusset. I was going to saw out the radius, but just for laughs I used the mill instead to rough cut the radius out.
 

Attachments

  • 154.JPG
    154.JPG
    147.9 KB · Views: 159
  • 155.JPG
    155.JPG
    168.4 KB · Views: 146
  • 156.JPG
    156.JPG
    179.4 KB · Views: 168
  • 160.JPG
    160.JPG
    160.2 KB · Views: 167
  • 163.JPG
    163.JPG
    174.3 KB · Views: 151
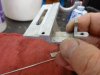
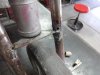
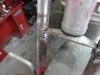
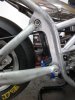
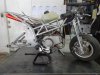
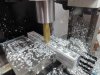
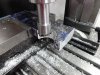
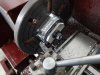
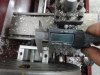
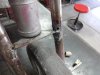
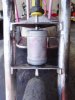
With the outside clamp gusset roughed out its time to gusset the inside clamp. I'm going to use the flat on the inside of the frame rail to help lock the bracket in place when the clamps are tightened. This requires the gusset to transition from round at one end to flat at the other. I'll make the gusset from 3 piece's of aluminum, fitting and welding each piece as I go. First I cut out a small piece of aluminum 10mm wide, then I ground the edge of the welding table to match the inside radius of the clamp. I then clamped the 10 mm work piece to the table over hanging the ground edge, heated it up and bend it over the edge of the table. Next I milled a small piece of aluminum to match the width of the inside of the clamp and ground the edge's to the radius ( I made a tool or a die.) Then I clamped the tool to the welding table and clamped the 10 mm work piece to the tool heated it up and bent the other end over the tool. A little fitting and trimming and I have my first of three piece's done.
 

Attachments

  • 167.JPG
    167.JPG
    127.6 KB · Views: 158
  • 168.JPG
    168.JPG
    155.2 KB · Views: 174
  • 170.JPG
    170.JPG
    167.2 KB · Views: 145
  • 171.JPG
    171.JPG
    130.9 KB · Views: 148
  • 172.JPG
    172.JPG
    136.2 KB · Views: 165
I've been busy with customer parts and haven't had time to return to the brake arm. This is not a bad thing though. Currently I'm working on a children's two seat tricycle restoration for a client. I'm not doing the complete restoration just the metal work. It's in poor condition Here are some picks of what I started with. The front fork was full of gapping holes from someone whole thought they could braze the fork.
 

Attachments

  • 1.JPG
    1.JPG
    106.4 KB · Views: 169
  • 2.JPG
    2.JPG
    93.3 KB · Views: 157
  • 3.JPG
    3.JPG
    94.7 KB · Views: 160
  • 4.JPG
    4.JPG
    106.4 KB · Views: 143
Omar came to me with his pocket racer and asked if I could make some brackets. He wanted to raise the rear axel 2" and lengthen the wheel base 2". This is what I came up with for him.
 

Attachments

  • 1.JPG
    1.JPG
    172.2 KB · Views: 157
  • 2.JPG
    2.JPG
    145.2 KB · Views: 158
  • 3.JPG
    3.JPG
    170.5 KB · Views: 151
  • 4.JPG
    4.JPG
    126.3 KB · Views: 148
Going "old school" on the lathe and mill!
 

Attachments

  • DSC01141.JPG
    DSC01141.JPG
    185 KB · Views: 152
  • DSC01142.JPG
    DSC01142.JPG
    202.4 KB · Views: 121
  • DSC01145.JPG
    DSC01145.JPG
    186.1 KB · Views: 147
  • DSC01150.JPG
    DSC01150.JPG
    178.5 KB · Views: 131
I've been busy with customer parts and haven't had time to return to the brake arm. This is not a bad thing though. Currently I'm working on a children's two seat tricycle restoration for a client. I'm not doing the complete restoration just the metal work. It's in poor condition Here are some picks of what I started with. The front fork was full of gapping holes from someone whole thought they could braze the fork.

So I finally found time to finish the fork on the tricycle project. Final tally is 25 hours to repair the fork and make new caps. There was no profit in this job, in fact I spent more in material and shop supplies than I got paid. I hate when that happens. I'm glad to see this one go home it was a real pain...
The 1st pic is what I started with. 2nd pick is the finished repair. The 3rd pic is the new fork caps I made out of 6061 aluminum. The 4th pic is the caps mocked up in place.
 

Attachments

  • 1.JPG
    1.JPG
    151.7 KB · Views: 165
  • 2.JPG
    2.JPG
    148.5 KB · Views: 147
  • 3.JPG
    3.JPG
    97.1 KB · Views: 167
  • 4.JPG
    4.JPG
    121.4 KB · Views: 147
Back
Top