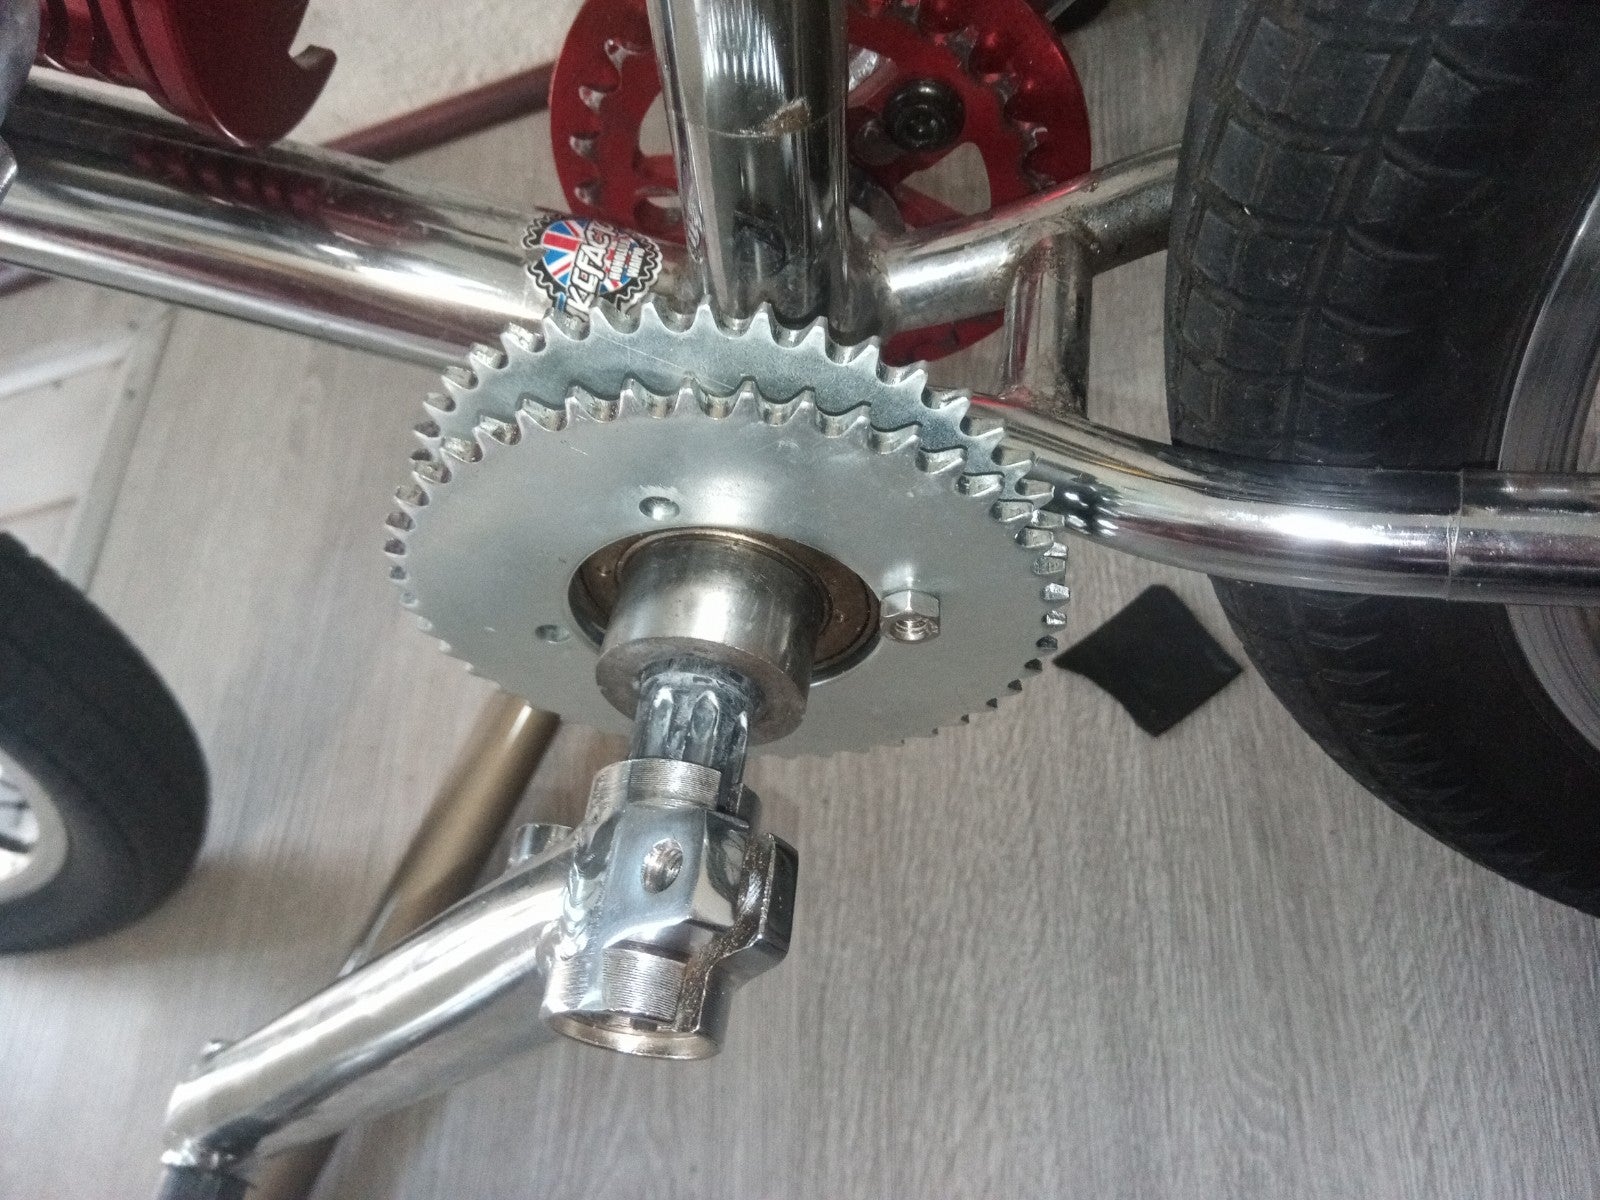
After 1 year of shenanigans...I'm back it again.

GoldenMotor.com

CrimsonPrince

Member
Mar 6, 2020
77
17
8
28
This time, we're going to finish it. Yeah, I'm looking at you @MrKitty :alien: Here is the quick and dirty:
I have a pocketbike engine mounted midframe in a 2018 Fitbike Augie BMX. The primary objective is to ensure pedal power and NOT modify the frame invasively (no welding, boring, etc.). The pic is below.
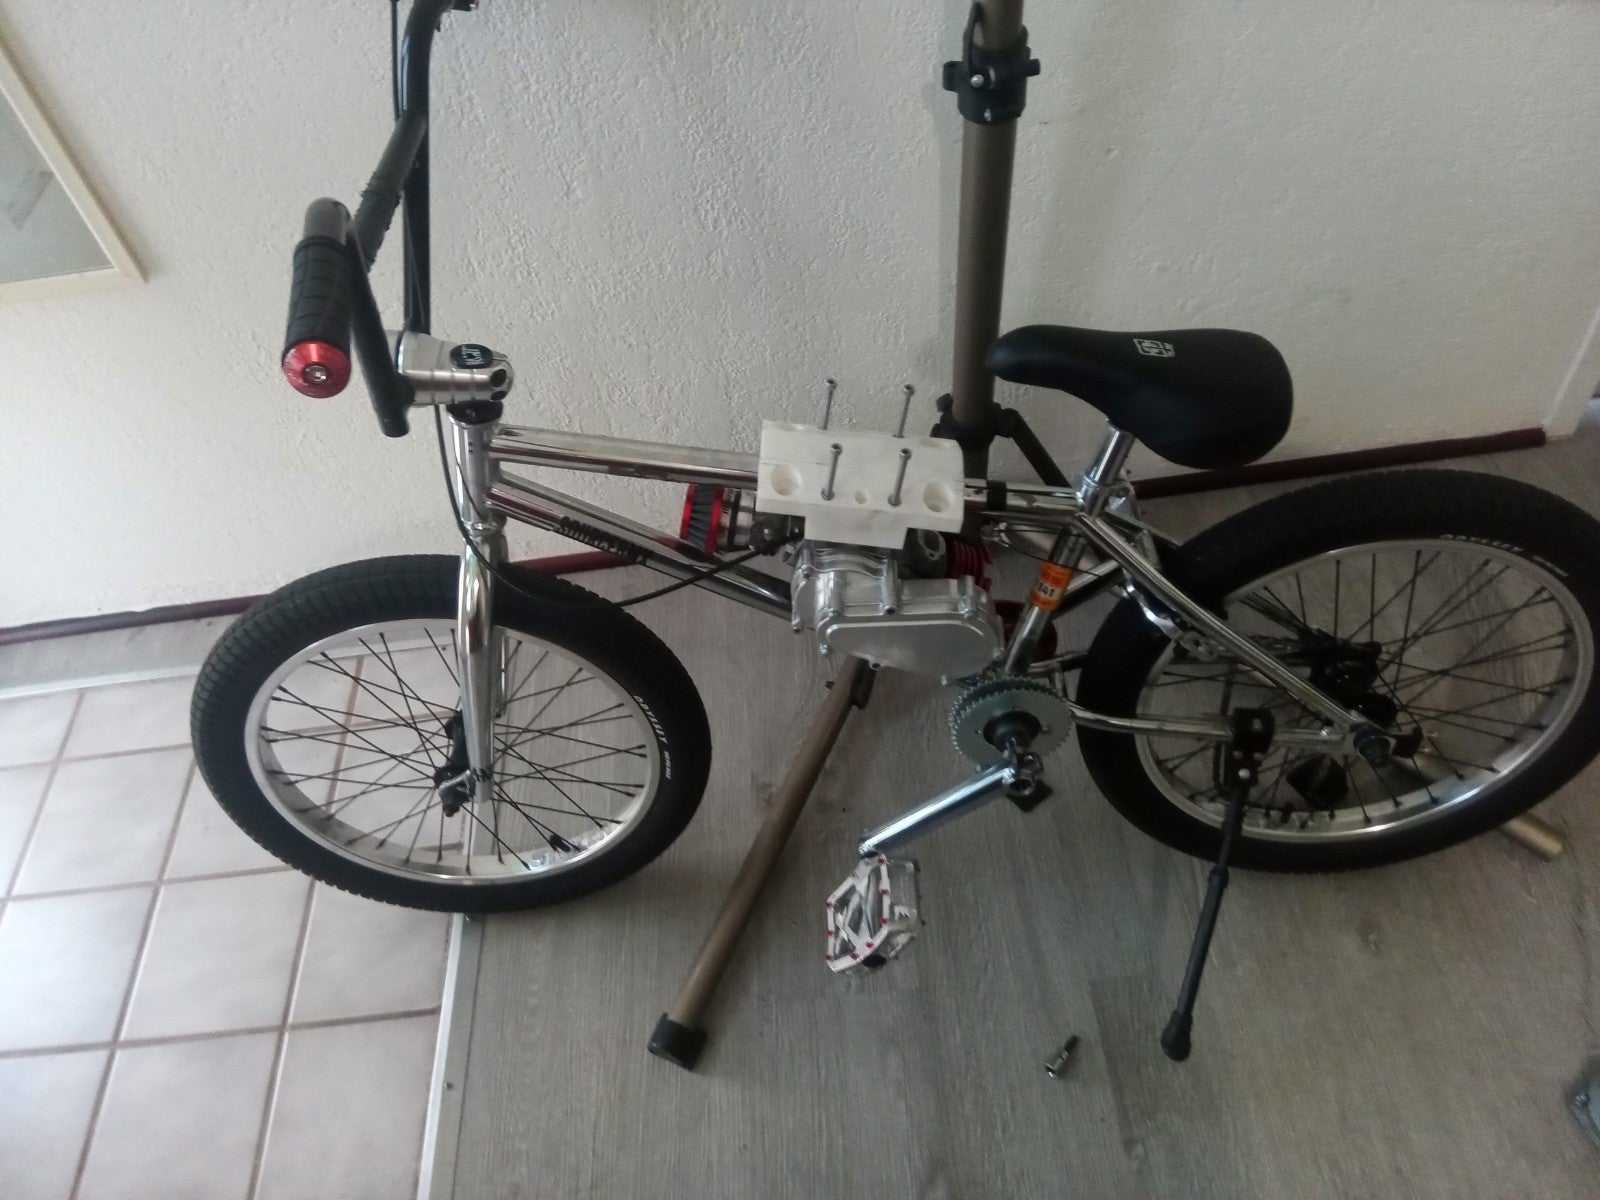
160380


Here is the reduction hub
160381


I have a couple of rapid fire questions for you guys as I go through the project.
1. The topmount holds the static engine very well. I have yet to test it when the engine is running. Because I don't have a throughbolt going through the mount and into the toptube, clamp force + strong friction force is the only thing keeping the engine from riding up and down the toptube. Do you guys have any ideas on how I can address that?

2. I have access to a drill press but I need some help for the rear sprocket adapter. What is the best way to align the holes of the sprocket adapter to my rear sprocket? I want my holes to be as close to perfect so there isn't any wobble. Pic Below
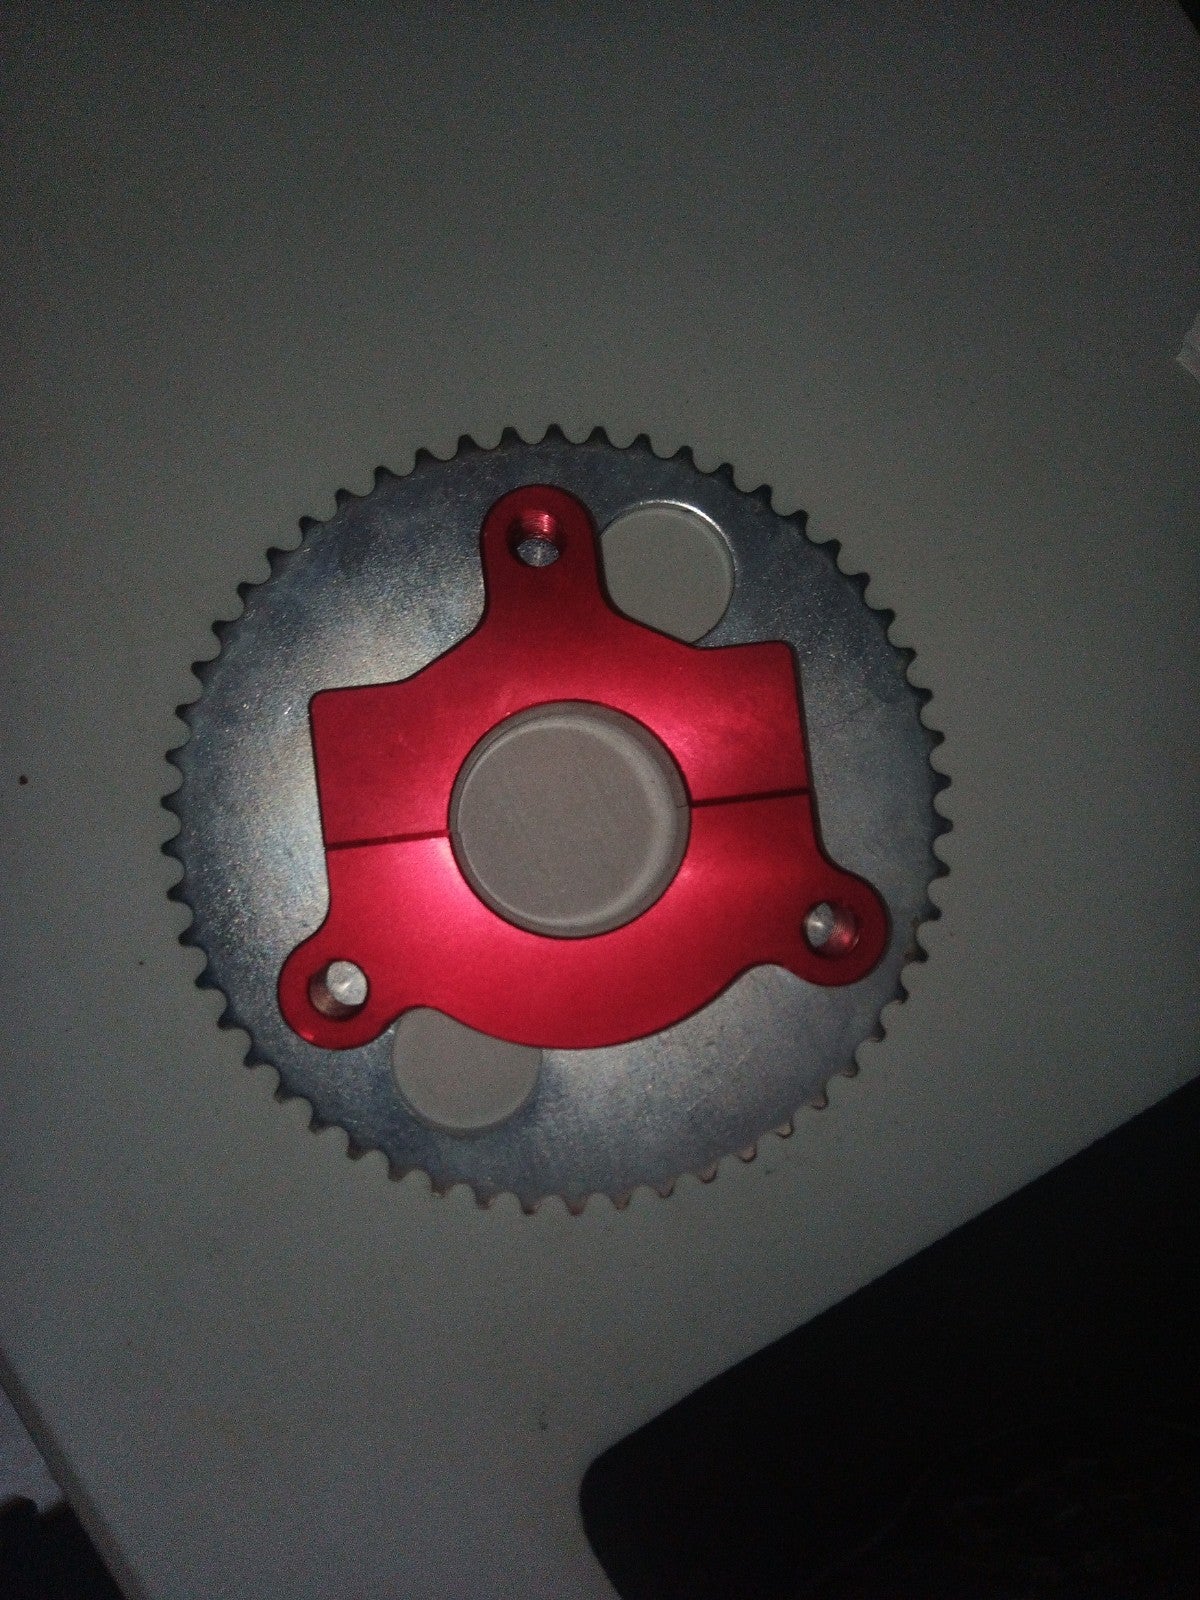
160383


3. Does anyone know what kind of oil/fuel ratio works best for their pocketbike engines? Also, what lube do I need to put between the piston and the cylinder block? I've seen people lube it up but Im not sure exactly what's being used...


Thanks for all your help gents! I appreciate it. I'll be ordering in a few more parts to fix up my engine and hope to run it next week. Let me know if you have any other suggestions.
 
  • Like
Reactions: fasteddy

CrimsonPrince

Member
Mar 6, 2020
77
17
8
28
Should I drill a throughbolt through the toptube engine mount? That would keep it from rotating on the x and z axis. I really didn't want to do anything invasive with the frame, though...
 
  • Like
Reactions: fasteddy

5-7HEAVEN

Well-Known Member
Aug 2, 2008
2,661
240
63
Hey Buddy! Long time no hear!

Do NOT drill the frame to stabilize your single engine mount.

You need to fabricate/triangulate a second engine mount.

Measure the diameter of the down tube.
If it’s 1.25”, buy a muffler clamp that size on eBay. They’re not that expensive, but you won’t find it locally.

Then bolt a piece of strap steel onto the clamp and a convenient bolt hole on the engine block.
 
  • Like
Reactions: fasteddy

5-7HEAVEN

Well-Known Member
Aug 2, 2008
2,661
240
63
To center the adaptor, eyeball it as best as you can.

Then use any accurate measuring device to ensure that the bolt holes equidistant from the sprocket’s edges.

You could also google it.
 
  • Like
Reactions: fasteddy

5-7HEAVEN

Well-Known Member
Aug 2, 2008
2,661
240
63
I learned this in middle school, which is more than 60 years ago.

Carefully measure the sprocket’s circumference, then divide by 3.
Mark the sprocket’s edges at these 3 points.

The sprocket’s center is hard to determine, because of its large center hole.
Place the sprocket onto a flat surface.
Using a compass, make 3 intersecting arcs from the 3 points along the sprocket’s outer edge. That’ll show the sprocket’s exact center.

Draw lines from the 3 marks to the exact center.

Place the hub onto the sprocket.
Where the 3 bolt holes line up with your 3 lines is its perfect centered alignment.
 
  • Like
Reactions: fasteddy

CrimsonPrince

Member
Mar 6, 2020
77
17
8
28
Hey Buddy! Long time no hear!

Do NOT drill the frame to stabilize your single engine mount.

You need to fabricate/triangulate a second engine mount.

Measure the diameter of the down tube.
If it’s 1.25”, buy a muffler clamp that size on eBay. They’re not that expensive, but you won’t find it locally.

Then bolt a piece of strap steel onto the clamp and a convenient bolt hole on the engine block.
Hi there, Sir! School is finally done so now I have time to finish this! I will definitely fab a second mount. Im thinking of that plate you mentioned earlier. It's a shame that the engine is asymmetrical on that mounting area, as that is a lot harder to work with...
 
  • Like
Reactions: fasteddy

CrimsonPrince

Member
Mar 6, 2020
77
17
8
28
Morning, SIr! I've got a 3:1 gear ratio within the gearbox, an 11T gearbox transmission chained to a 44T inbound sprocket, and a 44t outbound sprocket connected to a 54 T rear drive sprocket. This gives me a 14.4 Gear ratio!
I was thinking about purchasing a 65T rear drive sprocket, which lowers the gear ratio to 17.27, close to the 18 value that you suggested previously!
 
  • Like
Reactions: fasteddy

5-7HEAVEN

Well-Known Member
Aug 2, 2008
2,661
240
63
If you install a 54t to connect with the 11t, your gear ratio will lower to 18.07:1.

3 x (54/11) x (54/44) = 18.07:1,

Orrr, you could replace the 44t chainring with a 36t Cateye sprocket to get:

3 c (54/11) x (54/36) = 18.00:1

compared to:

3 x (44/11) x (54/44) = 14.727:1

You’ll be pedaling more with 14.73:1 gearing.
 
Last edited:
  • Like
Reactions: fasteddy

5-7HEAVEN

Well-Known Member
Aug 2, 2008
2,661
240
63
Sorry, I miscued.

Simply replacing the inside chainring with a 36t sprocket gets you 18.00:1 ratio.

3 x (44/11) x (54/36) = 18.00:1

Using a 65T rear sprocket enlarges the diameter from 5.4” to 6.5”…..

Replacing the 44T outer chainring to a 54T enlarges the diameter from 4.4” to 5.4”.

Dropping the 44T inner chainring to a 36T reduces its diameter from 4.4” to 3.6”.
 
Last edited:
  • Like
Reactions: fasteddy

5-7HEAVEN

Well-Known Member
Aug 2, 2008
2,661
240
63
FYI, the BMX 25t chainring’s diameter should be about 3.97” diameter.
Therefore, the 36t T8F sprocket should “tuck in” to the chain stay very well.
 
  • Like
Reactions: fasteddy

CrimsonPrince

Member
Mar 6, 2020
77
17
8
28
Thank you, Sir! I used the drill press and my adapter now fits into my 54T rear sprocket perfectly!
The 36t cateye was a great find! I purchased it right away.
At this point, I'm finalizing my design for the topmount, getting ready to CAD the bottom mount, and will have to make an exhaust manifold.
IMG_20210618_001824_3.jpg
IMG_20210617_200834_0.jpg
IMG_20210617_200910_5.jpg
 
  • Like
Reactions: fasteddy

Larry Trotter

Well-Known Member
Nov 26, 2017
476
306
63
76
I was under the impression that those types of adaptors were used along with the rag mount and simply kept the sprocket aligned while the rag joint was installed.
 
  • Like
Reactions: fasteddy

5-7HEAVEN

Well-Known Member
Aug 2, 2008
2,661
240
63
You don’t need a CAD bottom motor mount.
All you need is a simple mounting strap. That should cost you less than $5 to make.
 
  • Like
Reactions: fasteddy

5-7HEAVEN

Well-Known Member
Aug 2, 2008
2,661
240
63
No. A simple metal strap or narrow plate, bar or angle iron would work.

You could probably find the scrap piece, measuring less than 6" around your home.

Like this:
1/2" x 1/2" X 1/8" X 80 in. Angle Iron Hot Rolled A36 Carbon Steel

Drill mounting holes at both ends, and you're "pau".

A wire or cable gives support only under tension.