LabRat
New Member
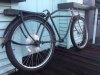
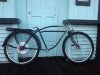
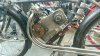
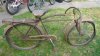
Ward, a 1941 Montgomery Wards horn tank cruiser.
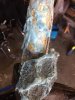
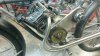
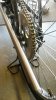
Ward's original owner enlisted in the Army and left for the fight in Europe. He was never to return. Ward sat unattended in a Pennsylvania barn for some 70 years.
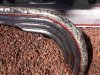
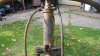
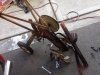
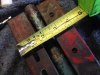
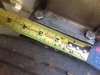
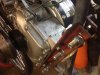
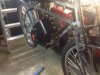
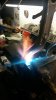
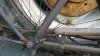
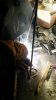
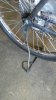
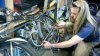
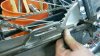
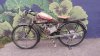
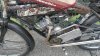
He nearly lost his life when he was removed from the safe haven barn by a scrapper! As it should happen; Ward was rediscovered in a pile by wing nut. At the time wing nut was picking scrapper acres for odd ball engines. You know the kind with MAB potential. He has been to the location before and shown us pictures of things like lawn mower wall. Well this trip he sent back pictures of Ward as seen below.
I simply fell in love. This was a bike I had to have, I had to build. I could already see him completed in my minds eye.
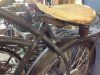
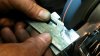
So the negations begin. "What you mean no cash I exclaimed in a text message... is it for sale or not", I exclaimed! Put it this way wing nut is the only perpetrator that has ever worked a set of super wheels out of the shop. The set he received, the last wheel set I had Sledge build.
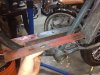
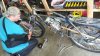
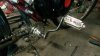
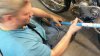
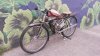
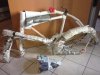
Wing nut picked Ward took him down and packaged him up. His desire for a set of super wheels so strong he simply asked for my address and shipped Ward my way Pennsylvania to Washington State. That last picture is how he arrived and the bow well it was last December and it sure made me smile. Although it was not entirely the bow that made me smile.
Ward's original owner enlisted in the Army and left for the fight in Europe. He was never to return. Ward sat unattended in a Pennsylvania barn for some 70 years.
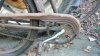
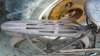
He nearly lost his life when he was removed from the safe haven barn by a scrapper! As it should happen; Ward was rediscovered in a pile by wing nut. At the time wing nut was picking scrapper acres for odd ball engines. You know the kind with MAB potential. He has been to the location before and shown us pictures of things like lawn mower wall. Well this trip he sent back pictures of Ward as seen below.
I simply fell in love. This was a bike I had to have, I had to build. I could already see him completed in my minds eye.
So the negations begin. "What you mean no cash I exclaimed in a text message... is it for sale or not", I exclaimed! Put it this way wing nut is the only perpetrator that has ever worked a set of super wheels out of the shop. The set he received, the last wheel set I had Sledge build.
Wing nut picked Ward took him down and packaged him up. His desire for a set of super wheels so strong he simply asked for my address and shipped Ward my way Pennsylvania to Washington State. That last picture is how he arrived and the bow well it was last December and it sure made me smile. Although it was not entirely the bow that made me smile.
")