I’m more than happy to share everything I’ve learned in my experience with this CVT. As previously explained, I damaged my first tranny by forcing it up a steep hill with improper gearing. That damaged the variator but in doing so it also uncovered what, IMO, are weak points in the design. All the sequent modifications I made to repair the old box were incorporated into the new one.
The first thing is to achieve proper gearing, as I am running the Staton rear wheel, which allows the installation of a left hand freewheel, I moved my pedal drive to the left side. This results in a single speed pedal system but as I’ve stated, I don’t pedal much anymore. The sprockets for the CVT are 8mm so I chose to stay with that chain. I found the best gearing for me was an 11 tooth on the tranny and a 72 tooth on the right side freewheel. My calculations indicate a 45.90/1 ratio in low range and 18.82/1 in high range. In actual operation, I believe the variator will overdrive more than I figured, so the actual high range may be slightly higher.
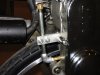
The CVT is designed to run in the horizontal position and I am mounting in the vertical position. This messes up the secondary gear box venting, which is a problem because this box must be wet lubed. Others fixed this by replacing the vent plug with a solid bolt but I felt that might facilitate oil leakage due to pressurization from heating. I devised a venting system that corrected this issue by installing a reservoir tube through the vent plug hole that keeps the oil in and the pressure out. More on that later.
The first step is a total disassembly of the tranny. The only parts not removed were the gear box bearings, as this requires heating the case to remove them and I’ve had no issues with the OEM parts. The entire tranny has been sprayed with a silver paint and that includes the inside of the gear box, this should be removed with a liberal washing with brake parts cleaner until it’s gone. Once that is done, place masking tape over the inside vent baffle of the gear box and carefully drill out the plug threads with a 21/64” drill bit, being careful not to drill too deep and through the baffle. Once drilled, the hole is tapped with a 1/8” pipe tap, so that it will accept the vent system. Remove the tape and clean the entire case until it’s squeaky clean, with no sign of metal cuttings.
I discarded the stop washer that acts as a stop for the inner variator plate and using a 5/8” bronze flange bushing, cut to .210” long, made a spacer that acts as a stop and transfers the load to the inner bearing race in the shaft bearing. The shaft bearings were replaced with two SKF 6002-2RSJEM bearings and I replaced the oil seals, this time with seals from Rocket Seals
Rocket Seals in their nitrile line as they are much cheaper. The last change and the most tedious was reinforcing the outer variator sheave plate by shaping a 5/16” washer to fit the variator shaft and welding it on the sheave. The completed parts looked just like the previously posted pictures of the old parts.
The new vent system is just like the old one except it now is made entirely from 1/8” pipe fittings which seals up much better. The gear box was filled with Mobil 1 75w-90 synthetic gear oil and this has to be done before the tranny is installed. With the tranny in the horizontal position, the oil is forced up through the vent until it comes out through the drain hole which will be on the upper side. Once that is done install the drain plug and the vent system and add oil to the reservoir until there is about ½” up the reservoir tube. Any air left in the box will work its way out through the vent while running, just add oil when necessary.
That's just about all there is to it.