I would first like to thank this website and all of its supporters. Thank you for the plethora of good solid information.
You help me in ways that you can't even imagine and save me hours and hours of frustration. And for that I am deeply grateful.
I'm going to State the obvious here for people who are looking for a more concise answer or point of reference for first build.
BEFORE YOU START YOUR ENGINE ... DO THIS!
INSPECT every part closely and take the engine apart to your skillset and visually inspect all the compartments and clean out or add grease where applicable.
Dont mess with the piston set up if you know how to navigate that procedure as the piston rings are tempermental and require skill to do correctly.
It is a good idea to go over all of the parts that come in your bicycle kit. I have done everything from filing the rough edges from around the gear drive sprocket and the back big sprocket to removing the casting burs imperfections.
I have compiled a checklist of things that will give you a slight edge on prolonging its life.

The bolts on these motors are pure crap so make sure you use the proper sized screw diver tips ect... You WILL strip these out!!! And while your engine may tolerate some easy disassemblely the cheap gaskets on these bikes are brittle and waffer thin.
You can make your own using cereal box cardboard material (cut and soak in 2stroke oil before use.).
First, take the head off the piston cylinder cover or head and look down in the area where the Piston is at for debris and foreign material. I did this just on a whim to see what it looked like in there and there was a tremendous amount of metal shavings and things that I could not identify.. especially metal casting shavings from them tapping these spark plug hole and letting the debris fall inside.
Clean and wipe the cylinder and top of piston. Depress the clutch lever and move piston downward to expose anything that may have fallen between the cylinder wall and piston. Swab cylinder lightly with 2 stroke oil.
Check all ports,channels and flanges for casting "bugs" , places the casting may have bled through. Clean, sand or grind imperfections noting where your debris is falling. Place tape over the exhaust and air intake ports to keep them debris free.
Next open the clutch compartment and remove any material that shouldnt be there. BEFORE you remove the clutch plate take and measure how much room between the plate and pads. I found that the bottom of a matchbook is about the right thickness or distance.
COUNT THE revolutions or turns it takes to remove the flower nut holding the clutch plate on and inspect the pad area.
When the clutch pads were installed on mine, the debris from the cuttings from around the clutch pads when it was installed was still stuck inside of the clutch area and would have quickly gummed up and been non beneficial in the life of the clutch. Be careful not to get any oil or anything excessive on the clutch pads themselves.
Reassemble.
Next inspect your magneto compartment making sure everything looks proper. I put a dab of grease or rubberized sealent on the wire opening just to negate moisture or contamination.
Reassemble.
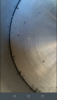
Next inspect gear cogs both the on on the motor and the one on the back wheel.
These are roughly cut and need attention for good chain health. The larger back gear is pressed from a sheet of steel and have edges on them that chew chains up!
Take a chainsaw file and lightly soften all areas that feel sharp or rough and take the hard edge off all angles. It shouldnt take many soft passes with the file to do.
Next the 10 tooth gear. Most kits come with the removal tool included if not google it.
Remove the gear cog and remove all square edges from gear teeth. This will DEFINITELY HELP chain binding and climbing / derailment and alignment issues.
I ordered a small wedge that installs in the upper gear housing that keeps the chain from bucking and getting snagged in the
Gear comartment which causes the back wheel to lock up. I suggest it.
(Um not sure how to save drafts here so I will be adding to this post continually until it is complete. Please feel free to comment or whatever any input is appreciated.)


")