I finally joined!

GoldenMotor.com

JerryAssburger

Active Member
Mar 11, 2017
208
124
43
Salem Oregon
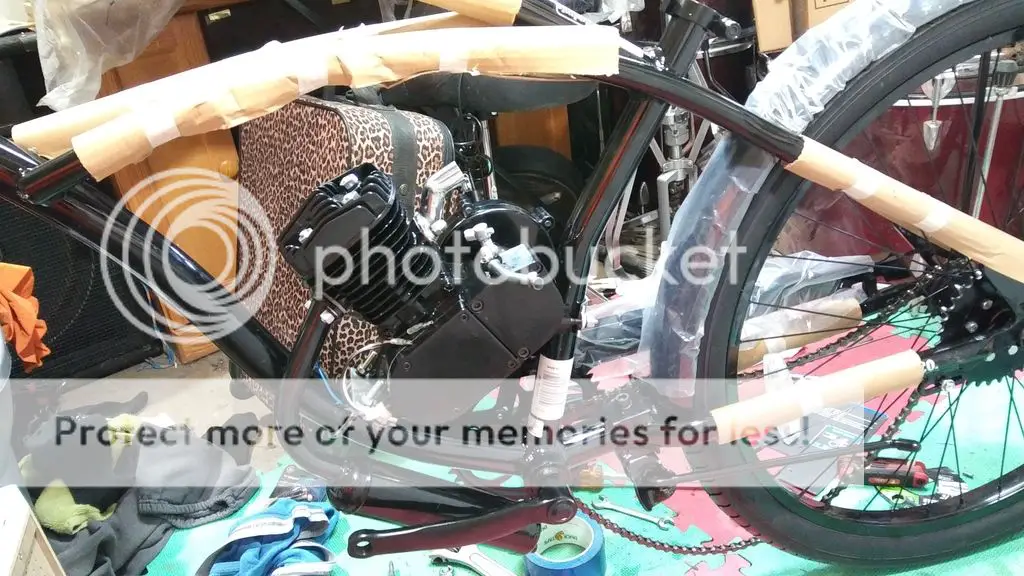
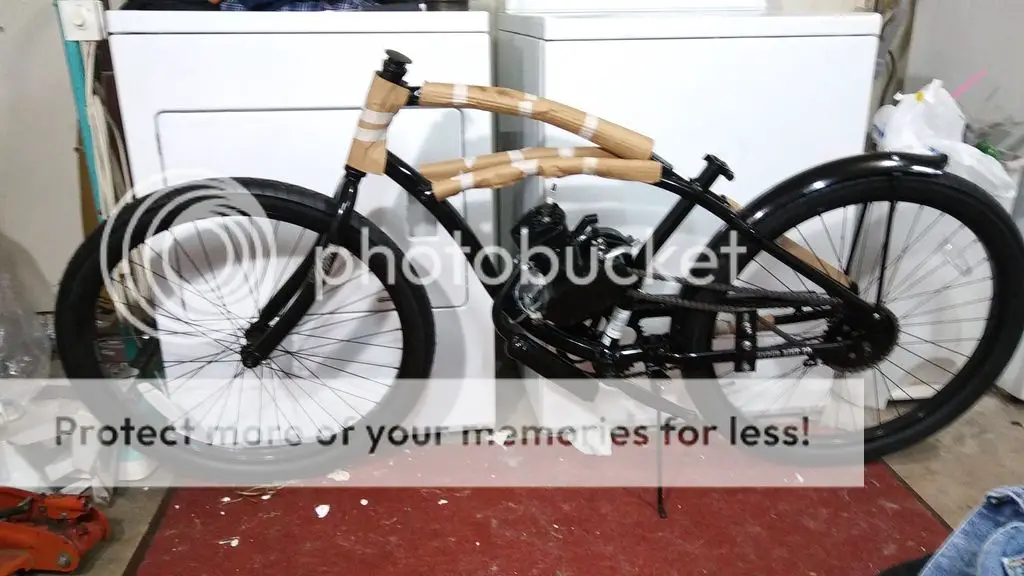
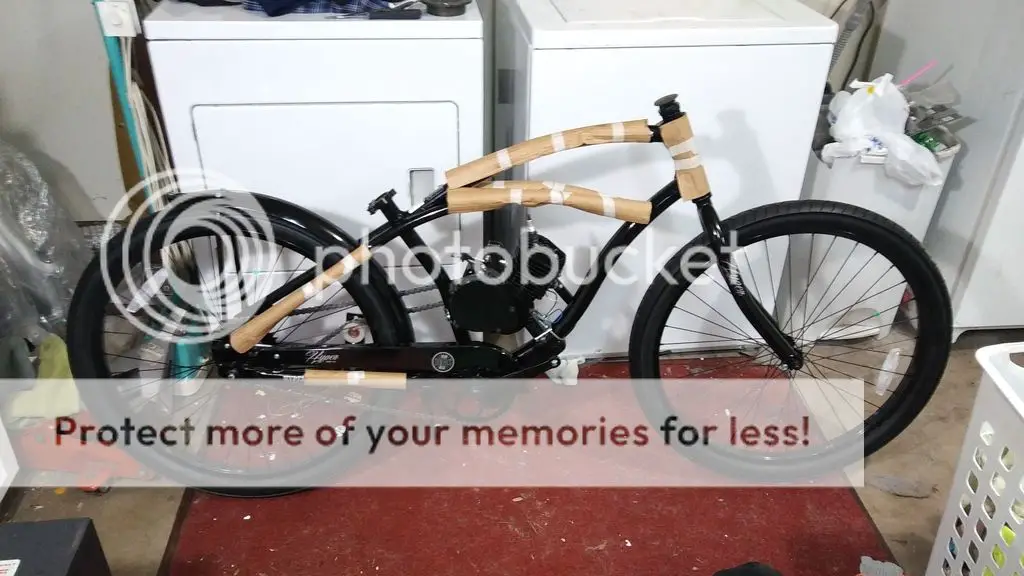
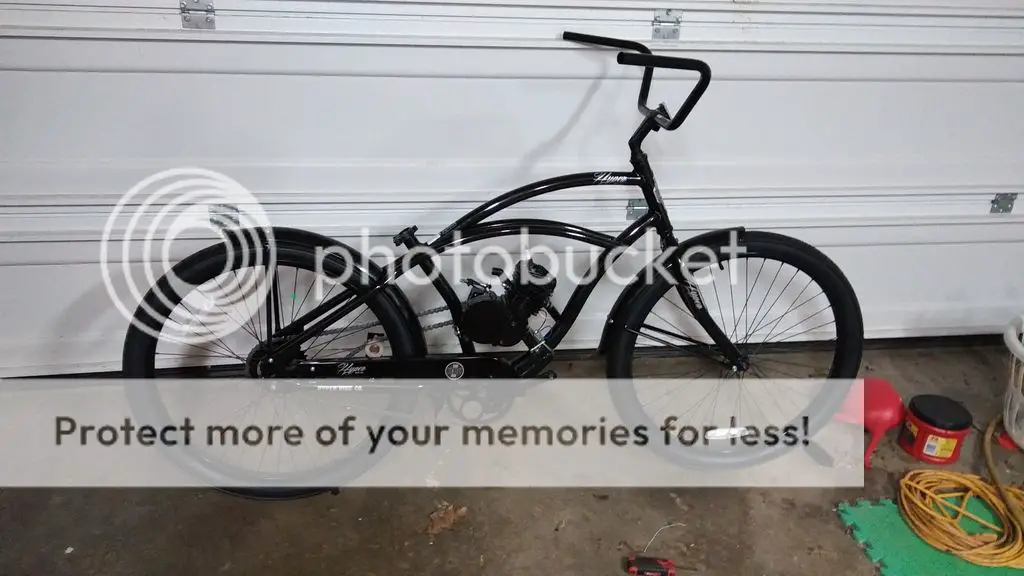
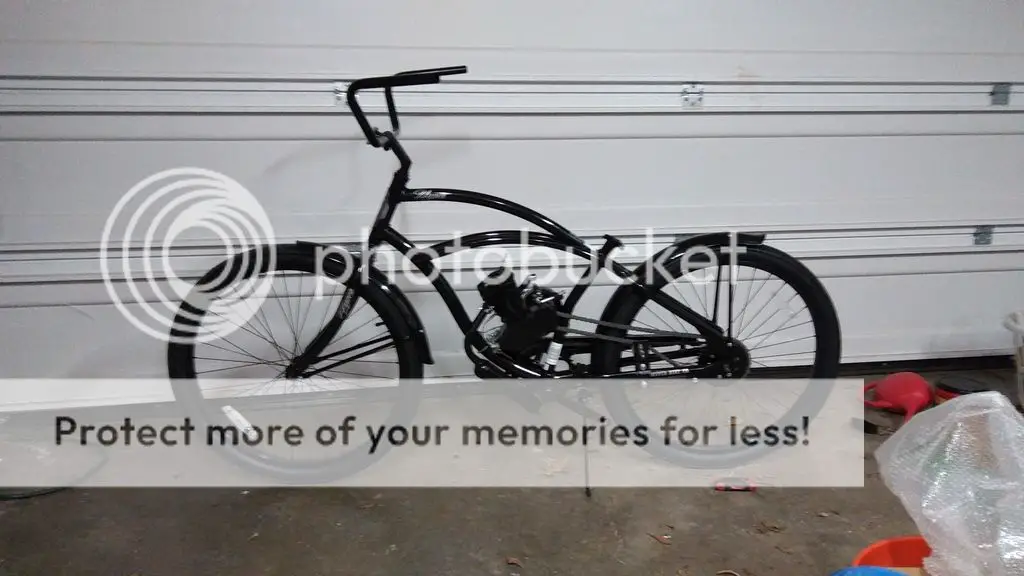
Hi. My name is Jerry Assburger and I am an incurable tinkerer. I have been putting small engines on just about anything with (usually) weird results, but it's always been fun. Back in 2004, one of my projects was powering my poor MTN bike with just about anything BUT pedal-power. It started with a weed-wacker motor, (Unreliable), then electric, using a car battery and a heater-motor from a Cadillac. (Good for silently tooling around the neighborhood at jogging speed), and then finally mounting a B/S 3hp and a B/S 5hp engine onto a rear rack that I welded on. It was a deathtrap that could reach 38mph and sort of use the 5 gears of the rear shifter, and ended up being my transportation to and from work for about a month when my car broke down and I was waiting on a vital part. I guess where I going with this is, ever since these 80cc bike kits have come out I've wanted to do one, but they used to e a lot more expensive. I bit the bullet about a moth ago and got a kit for $105 on Ebay, and am now waiting to receive a WalBox bike I ordered for $99. This is going to be fun, and I have your forum to thank for pushing me "over the edge" !! Pictured is my poor MTB project with the 5hp, which provided almost nothing but more vibrations than the 3hp, which was the motor of choice.

 
Jan 21, 2015
610
25
18
Portland, Oregon
You're going to have to spend a lot more than the $105 you paid for the kit if you want to have something even remotely reliable. Most of the parts in the kit are absolute garbage and should be replaced.
 

sbest

Member
Nov 3, 2015
343
2
18
Nova Scotia
Ahhh, Necro is so negative...
Some of us have managed a lot of reliable miles on our 2 stroke "China Girls", even with the stock parts. You definitely have the skills to make one last.
Some hints:
Mount it securely to the frame. No drilling the frame. No welding.
Level the carb and clean the tank of any manufacturing debris.
Check the engine over carefully, retorque all the bolts with a torque wrench.
Check wheel spoke tension and true before installing the rag joint, true the sprocket.
Put the tensioner on the bottom chain and align everything very carefully.
Make sure tensioner is tight on the wheel stay, torque the bolts. Very important.
Use quality premix oil, 24:1 for 3 tanks to break in and 32:1 there after.
Lube the clutch gear at a minimum every second tank of fuel, just a tiny drop of grease.
Check bolts and chain tension (slight slack) before every ride. Use a torque wrench.

These rules will carry you for thousands of miles on the stock engine.
If you want more power, remember this:
More compression and RPM will shorten the engine life
2-3mm of squish band on the stock head at 0.030" gap works well for power.
Widen the ports at the cylinder window, go conservative.
Portmatch the exhaust, but not the intake.
The stock carb works great, learn how to jet it. (Look up "plug chop")
Less modifications, rpm and compression generally mean more life.
 

JerryAssburger

Active Member
Mar 11, 2017
208
124
43
Salem Oregon
Cool! Thank you VERY MUCH for the advice! ALL is welcome!
I didn't expect a whole lot for $105, but I do know it's enough to "get me in the door". I would like to get one of the nice rear-hub kits, and a spring-load tensioner (or come up with my own solution)... and as you can see from the picture, my old bike WASN'T a model of beauty, engineering and refinement! (It WAS fun, though). Question: When I do the build, do you guys want me do post it in this thread, or do I start it elsewhere? I plan on using a $99 Walbox "Hyper Men's Beach Cruiser" for the bike. (Here's the link.) https://www.walmart.com/ip/26-Hyper-Men-s-Cruiser-Bike-Blue/54985549
 
Last edited:
Jan 21, 2015
610
25
18
Portland, Oregon
I generally stay clear of aluminum frames, they fatigue fast, and when they fatigue, they crack. Steel frames fatigue much slower, and bend instead of cracking, which is much less dangerous if you're riding when it happens.
 

JerryAssburger

Active Member
Mar 11, 2017
208
124
43
Salem Oregon
Well, Crud. It's a done deal, heading to my local Wally as we speak (type?). I didn't notice the aluminum frame part... I just liked the look of the bike (or the Kent LaJolla). I was going to try my NEXT mountain bike, but there was too many things to tear-up and/or modify, just to get it to work.
 

ZipTie

Active Member
Jan 8, 2016
750
82
28
Mpls Mn
Welcome, that is a beautiful bike and will be great for the china girl.
If you get the hub adapter and a engine mounted spring chain tensioner right away you will have a sweet trouble free ride that looks awesome right out of the chute. Many opinions on here. I for one have no less than 5 alum frame motorized bikes and they are all running strong. The huffy should have nice thick 12 gauge spokes. Also add front and rear rim brakes, the c shaped ones that are called long reach. That way you won't have to use the coaster brake and will be able to stop fast. The huffy has the hole or em ready to install. I then get a 12 dollar double pull brake lever for the throttle side for one pull for font and rear braking and smooth stops.
I'm always happy to provide parts links... Just Let me know if ya need any.

Zip.
 

Kioshk

Active Member
Oct 21, 2012
1,152
10
38
Connecticut
PS: My experience with Walmart bikes...specifically cheap aluminum Kents...more specifically, the 29ers. They're not bad for the price, and although I've had one frame's down-tube fail non-catastrophically (stress-fracture at the motor-mounting point) after a couple thousand miles, I'd have to say they're a great bargain, and fare well under the punishment of motorization. Weaknesses: hub bearing-cups, axles, and spokes. I also ended up replacing a frame after crushing the left chainstay when I tightened the tensioner-assembly down too much; rode like that for many hundreds of miles before a fracture appeared.
 

JerryAssburger

Active Member
Mar 11, 2017
208
124
43
Salem Oregon
...sorry about the absence. Work n stuff.... As an update, I have followed recommendations on this forum regarding the "pre-flight" check of the engine. So far not too bad... my kit has the welded intake manifold, which to me is the shakiest thing about the motor... lots of flash and chunks to block airflow and break off into the motor! So I DID clean it up with a dremmel, but I ordered a cast one to monkey with, since they might offer better opportunities for a smooth set-up. The motor fits the frame perfectly- this might be one of the easiest beginner builds ever. So far the rear fender will need to be notched for the chain and the chain itself will come close to the tire (26 x 2.125)... otherwise, it's been pretty easy. Thanks, Zip tie and Kioshk! I can't wait to see what some of the experienced builders do with this bike.


JerryAssburger

Active Member
Mar 11, 2017
208
124
43
Salem Oregon
Brief Update: I received the cast intake manifold, and it is WORLDS better than the welded-up manifold- glad I tried. Seems to have plenty of "meat" to carve on and smooth out.
AND, an added bonus is that the carb is angled more sharply.... which is good for me because as it sits, the engine appears to be tilted a bit too far forward. (But that's how both mounts squared up with the frame the best.) In the instructions, they seem to be most concerned with how the mounts square up to the frame tubes, and whether the muffler parallels the front frame tube. Any experience on how far the carb can tilt?
 
Last edited:

Tyler6357

Well-Known Member
Mar 15, 2012
1,293
294
83
Santa Barbara, CA
That's looking good! You will be surprised at how far the carb can be tilted forward and still work fine, from the picture it looks like you should be fine. How is the clearance for the chain? Will it clear the tire and fender ok? It's best to use as wide a tire as possible that the chain will still clear.
 

JerryAssburger

Active Member
Mar 11, 2017
208
124
43
Salem Oregon
It is real close, as in just clearing the tire. I'm hoping I get to use the tires that came with it- they're nice and beefy and I'm too cheap to buy other tires! Fingers crossed.scratg
 
Last edited:

Tyler6357

Well-Known Member
Mar 15, 2012
1,293
294
83
Santa Barbara, CA
Yeah, good luck. When I did mine the chain was hitting the tire. I decided to go with a really strong BMX chain. It now clears the tire by about 1/8 ", still very close, but it hasn't been a problem and I don't have fenders either.
 

JerryAssburger

Active Member
Mar 11, 2017
208
124
43
Salem Oregon
Tyler6357, you rock! I went out and checked clearance and it's about 1/8" with the stock kit chain..... thanks to your advice, I CAN gain a little extra if need be by your BMX chain fix. The bike on my 1st post in this thread used a stock bike chain from the jackshaft to the rear wheel, and it gave me NO problems. ONLY when I tried to work the shifter (under full power) did it unravel on me.So- the bike chains can put up with the torque of a 3hp Briggs geared down to a 4.5:1 ratio. Thanks for the info. I'm gonna go check the price of some BMX chains!
 

Tyler6357

Well-Known Member
Mar 15, 2012
1,293
294
83
Santa Barbara, CA
Well, I'm using the Wipperman conneX 1R8 chain, It has nickle plated side plates and won't get twisted after regular use under heavy loads. It cost me a bit more but I found that it seems to feed through my engine sprocket with less drag as well be being thin enough to clear my tire. If your chain hits the bottom part of your engine sprocket case plate you might have to shave some of the metal off with a dremel or bench grinder to keep the chain from hitting it. Make sure you leave some slack in the chain when you put it on, if it's too tight it has a better chance of jumping off the rear sprocket.

brnot
 

JerryAssburger

Active Member
Mar 11, 2017
208
124
43
Salem Oregon
Some updates on this slow, careful build.... I got the chain mounted ......aaaaand that's about it. Here are the pix; one of them showing how the tension bar bolts up to the frame I cannot wait to play with this thing!
scratg


It looks like as long as the tensioner is tight (but not over-torqued) it will maintain alignment with the wheel and not fly into the spokes. I'm going to get some nylon nuts for the mount.
 

ZipTie

Active Member
Jan 8, 2016
750
82
28
Mpls Mn
Looking good Jerry! Like the all black. I always have to buy the Non resistance wire on ebay as nobody seems to stock it anywhere around here in Minnesota. Also non resistance NGK boots are a nice upgrade while you are switching CDI wire. I get em at fleetfarm.