Roughing clutch plate surfaces helpful?

nimblebee

Member
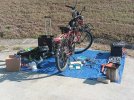
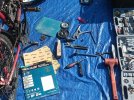
I've got a clutch shaft replacement coming up today.

Reviewed videos before starting the job, just in case there's something I'm missing.

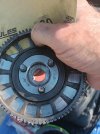
One thread said something that I hadn't heard anywhere else: use sandpaper to "rough up" gripping surfaces of clutch pressure plates for superior traction.

One can hear anything on the internet; doesn't make it true.


Maybe nobody else has heard of roughing pressure plates? That would make me suspicious as to truth/efficacy of procedure.

How does one sort out the liars? Well, ask around and see what other people have experienced.

Doesn't mean you're necessarily going to find the definitive answer, but it's a good start, knowing what other people have experienced.

Part describing roughing pressure plates starts about 4 minutes 19 seconds into video:

 
Last edited:
its what i do when they first start to slip works well rough grit seems to work best and i leave about 5 pads out when i put it back together higher clamping force when you have less surface
not positive about that but it seems to work
 
Good to hear your reply. This is troubleshooting repair gold.

No need to reinvent the wheel when instead can learn from others, without having to go through pain of trial and error discovery. Sharing information saves time, money and frustration. :)
 
Last edited:
Test drive today outlined further issues needing addressed with clutch engagement.

Pretty nearly convinced I'm going to have to take the clutch back apart and use sandpaper to roughen clutch engagement surfaces. Experience shows I'm getting insufficient friction grab when disengaging clutch.

Conclusion reached due to having full engagement of clutch lever with clutch slightly dragging but still not sufficient engagement to turn motor over when clutch disengaged.

Learned workaround for assisting a questionably engaging clutch, giving just enough "omph" causing motor to turn over.

Pushing motorized bicycle backwards with clutch disengaged, until motor produces resistance. Clutch is then engaged, having this brief space the motor actually can turn with applied friction when clutch is dumped.

This allows a short distance motor turns to produce momentum, before piston meets resistance (which slipping clutch can't overcome).

Harder to describe than to understand: extra bit of momentum with motor turning, before piston compression causes resistance, is sometimes enough, allowing clutch's slipping friction to move past piston's braking effect and cause motor to turn over.
 
Yes sand the friction surfaces
Ended up having to take everything on the clutch back apart and sand engagement surfaces, also tightened clutch preload spring slightly, as demonstrated in video at time index 11 minutes and 32 seconds.

This produced sufficient clutch friction engagement, without clutch's slipping, providing enough "grab" to spin motor over for starting.

Before these modifications, wasn't enough friction in clutch's "grab" to turn motor over, as clutch was slipping against motors' inertia force.


Even though clutch issues sorted for now, will be installing pull start kit, & using oxy acetylene torch with BFH to reform pedal crank arm's profile out of way from striking engine.

Pedal clearance being crucial, caused by pull start kit's additional thickness being added to motor, but modification is subject of additional thread.
 

Attachments

  • 3 minutes 32 seconds adjust begins.jpg
    3 minutes 32 seconds adjust begins.jpg
    29 KB · Views: 7
  • Organized tools and parts.jpg
    Organized tools and parts.jpg
    214.8 KB · Views: 2
  • Tools to tighten tension on spring.jpg
    Tools to tighten tension on spring.jpg
    201.7 KB · Views: 2
  • Coarse sandpaper used to rough up surfaces.jpg
    Coarse sandpaper used to rough up surfaces.jpg
    195.1 KB · Views: 2
  • Pressing down sandpaper while rotating 3 pins.jpg
    Pressing down sandpaper while rotating 3 pins.jpg
    92.4 KB · Views: 3
  • Brake cleaner cleaning any oily residue from pads.jpg
    Brake cleaner cleaning any oily residue from pads.jpg
    190.2 KB · Views: 2
  • Following advice removing 5 brake pads.jpg
    Following advice removing 5 brake pads.jpg
    160.1 KB · Views: 2
Last edited:
Back
Top