Testname111
Active Member
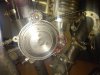
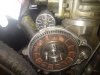
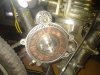
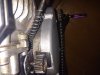
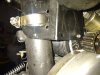
This is how I decided to Mount the new alternator/brushless motor
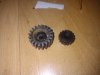
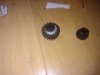
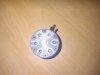
I braised a m5 bore gear to a brushless motor until it fit and braised it together with same gear as bike
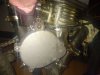
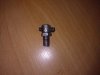
Then I drilled I small hole behind the clutch plate to Mount the rc brushless motor 3 phase sensorless to a 3 phase rectifier
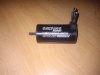
Note I think I fried my electronics as its producing more than 24v ADC Alternating DC.... I just got a new multimeter and will have test by next day or so...
I braised a m5 bore gear to a brushless motor until it fit and braised it together with same gear as bike
Then I drilled I small hole behind the clutch plate to Mount the rc brushless motor 3 phase sensorless to a 3 phase rectifier
Note I think I fried my electronics as its producing more than 24v ADC Alternating DC.... I just got a new multimeter and will have test by next day or so...