Ez motorbike q-matic troubles, please help!

Rusalko

New Member
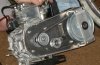
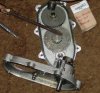
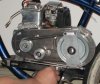
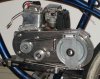
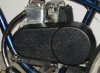
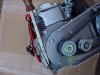
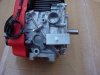
I bought an Ez-motorbike q-matic kit 4 stroke kit from Motorized Bike | Motorized Bicycle | Motorized Bicycle
and i'm here over a month later with no kit.

This dealer has not returned any of my phone calls or emails, in fact several of the email addresses given on the website were either fake or deleted accounts.

The dealer's name is Robert Mathias and he operates out of hobe sound florida, and at the time of my order was a registered dealer on EZ MOTORBIKE COMPANY
but has in the past week been removed from their directory.

I've been working for weeks now trying to figure this out and i'm getting to the end of my rope. It is looking like i'll probably have to make a call to the local station in Florida but if anyone has any information they think would help me I would so appreciate it,

Thanks
 
I don't think I know this guy :(
I wish I could help, have you contacted Quenton or Mike (pres and vice-pres of EZM) ?
 
Sorry,this is the second person to get burned by this guy in Florida.What a creep.It would be worth a good road trip.You know stop by for a little test ride of one of his(YOURS) Ezm bikes.And just keep on going.I don't know why you guys don't buy from a dealer in your own state or close by?Hope this one has a happy ending...
 
If you paid him by credit card or PayPal, the first thing to do is contact the credit card company or PayPal to get the payment reversed. If you paid by check, contact your bank to stop payment. Quenton has been working with those who have contacted him regarding this individual to bring their situation to a successful conclusion.
 
I actually first encountered the Florida website after building a 2-stroke bike and watching the videos etc. i got the impression that they were the manufacturer and not just a dealership. I guess i just figured the seeming prized domain name made it reputable...


Obviously not receiving what i paid for inspired me to do a little more research... and yeah i would have bought from an illinois dealer
 
I paid by debit card, so i guess that's pretty much like paying with cash, i asked my bank but they said they couldn't revoke it, Quenton has given me some helpful suggestions but I just haven't been able to reach him for awhile.
 
I paid by debit card, so i guess that's pretty much like paying with cash, i asked my bank but they said they couldn't revoke it, Quenton has given me some helpful suggestions but I just haven't been able to reach him for awhile.

Actually, you can contest the charge. It may take a little while, but after they investigate you should get your money back. You do have certain protections when using credit cards.
I find it odd that your card company said they couldn't reverse it, as one of that dealer's other customers did get his bank to reverse the charge.
 
Hi Rusalko,

If possible contact me via phone Tuesday if possible. 252-475-0406

We have currently suspended his dealership.

We have managed to help several complete their transaction with him, and will do our best to help.

Have fun,
 
Got mine today!!!

My Qmatic transmission arrived today on drop shipment from Terry at Blow By U. Can't believe how well built this is. Could use it by itself as a weapon.

Here's the pix I took with the webcam as I unpacked it.

Opening up the case...found everything in there was metal...including the fan tensioner. The belt looked heavier than the ones I use in my car.

More will be coming as we build it in the following days.
 

Attachments

  • Box for transmission.jpg
    Box for transmission.jpg
    35.4 KB · Views: 322
  • Outer Wrapping.jpg
    Outer Wrapping.jpg
    48.5 KB · Views: 259
  • Transmission Front.jpg
    Transmission Front.jpg
    37.8 KB · Views: 414
  • Transmission Rear.jpg
    Transmission Rear.jpg
    35.7 KB · Views: 348
Re: Got mine today!!!

My Qmatic transmission arrived today on drop shipment from Terry at Blow By U. Can't believe how well built this is. Could use it by itself as a weapon.

Here's the pix I took with the webcam as I unpacked it.

Opening up the case...found everything in there was metal...including the fan tensioner. The belt looked heavier than the ones I use in my car.

More will be coming as we build it in the following days.

You know it makes me feel really good to see a happy customer. EZ makes it easy for me to satisfy my customers with this bullet proof design. One of the best things about this trans is you can walk into any hardware store and buy the parts you if IF you just happen to beak one GOOD LUCK WITH THAT LOL.
All I can say is thank you Quenton for making me look so good :)
Cheers
Terry
 
Took about a week to get my buddy and I together to get some work done with hooking the Q-Matic to my HS. With my buddy having worked on many different types of vehicles from tractors to firetrucks...he made the comment that it was the easiest replacement he's ever done. For the hour we worked on it...it took over 2/3'rd's of that time getting the Grubee gearbox/clutch off. He was expecting just the opposite to happen. brnot

Note: Even though it does not show...we did get the tensioner under the belt before putting on the cover.

Today...I got the gas line and filter hooked up...as well as using some hanging tape to support the muffler and hooking up the speedometer.

As promised in my earlier post...here's some more pix of what we did last evening. If you are thinking about getting one of these...hope the pix help you out.
 

Attachments

  • Just Strapped to HS 142.jpg
    Just Strapped to HS 142.jpg
    200.6 KB · Views: 495
  • Old Grubee Gear Transmission.jpg
    Old Grubee Gear Transmission.jpg
    148.1 KB · Views: 415
  • Installed Being Put on Platform.jpg
    Installed Being Put on Platform.jpg
    124.3 KB · Views: 394
  • Being Tightended Down.jpg
    Being Tightended Down.jpg
    128.4 KB · Views: 432
  • Cover On.jpg
    Cover On.jpg
    275.5 KB · Views: 330
Note: Even though it does not show...we did get the tensioner under the belt before putting on the cover.

Are you saying that you have the belt above the tensioner, and not like it is shown in the photo? The photo shows it correctly, with the tensioner pushing downwards on the belt. It does not pull upwards on the belt.
Looking at the photos shows that the drive also needs to be moved backwards a little bit. The slots in the plate will allow you to do that. You have too much slack in the belt. When mounted correctly, the belt should be competely tight, without the tensioner causing it to bow downwards. Also, you should get a bolt and washer to screw into the end of the driveshaft to make sure the front pulley doesn't pull loose.
 
Last edited:
Hi phoobarnvaz,

Thanks for the great post on installing the Q-Matic, as it will help others considering the upgrade.

I was elected to work in the shop tomorrow and I will take photos of installing the drive on one of the EZM kits, including the "safety" washer on the crankshaft, belt tension, etc.

Version #7 has slotted mounting holes, whereas the earlier versions did not. Might be wise to edit the installation instruction sheet [looks like I have more work to do]to detail the more adjustable Q-Matic. Version #7 will accept a much wider choice of primary belts than earlier versions.

BTW your drive was one of the first production #7 to ship [serial number will start with 7].

Have fun,
 
Hi Everyone,

As promised, I took a camera into the assembly section, and will post some of the photos here. The pictures will show the new version 7 Q-Matic during the assembly process and a quick way to get the belt tight.

One of the pictures will show a small plate attached to the front of the motor to use as a wedge to assist in belt tension during assembly.

Originally the front top bolt was installed, and the plate lifted to tension the belt [versions 1-6], however the slotted plate requires a different assembly method. The minor changes to version 7 are limited to slotted mounting holes, and the spring pivot bolt moved slightly forward. Moving the spring pivot bolt forward allows for a thicker or wider profile spring, and the mounting bolt slots double the optional belt choices.

Also note the wide washer on the end of the crankshaft, used to make sure pulley can not move outward.

Have fun,
 

Attachments

  • Series7A.jpg
    Series7A.jpg
    132.9 KB · Views: 300
  • Series7B.jpg
    Series7B.jpg
    126.6 KB · Views: 323
  • Mvc-570f.jpg
    Mvc-570f.jpg
    128.2 KB · Views: 286
  • Mvc-572f.jpg
    Mvc-572f.jpg
    131.8 KB · Views: 387
Last edited:
Wow, using that metal plate is brilliant! Are you going to patent it?

You have made all the changes I tried to get you to make when I got your gearbox # 1
7 tries to get it sort of right....
Moved the pulley from the outside to the inside after much resistance
Slotted the plate

Any plans on making that big black plastic cover a little less uugly and narrower?

Making the rear shaft not spin in the bearings would be another improvement.

Longer boats are coming to win us.....
 
Last edited:
Are you saying that you have the belt above the tensioner, and not like it is shown in the photo? The photo shows it correctly, with the tensioner pushing downwards on the belt. It does not pull upwards on the belt.

I will take a look at it tomorrow. Since it hasn't been run yet...still have a few things to do like...the kill switch...put some air in the tires and putting on the chain. Am expecting not to need to run with a tensioner on the rear. If so...I will be VERY happy!
 
Back
Top