Micargi Puma with twin 97cc flat top lifan's

GoldenMotor.com

Intrepid Wheelwoman

New Member
Oct 29, 2011
2,830
61
0
Hauraki District, New Zealand
Well as I posted I did order amber ones for the front the same day you posted this on the 19th today is the 21st and I just got a tracking number from china. Ordered on Friday after hours shipped Monday. Awesome seller fair price considering delivery by pidgin mail from Asia.
I buy bicycle and computer parts and clone Lego bricks from China all the time. I've had nothing but the very best service from Chinese traders. :)
 

LabRat

New Member
Dec 24, 2011
596
20
0
Ruston, Washington
Ok, Clone Lego bricks. The really do knock off everything. I should ship myself over there and have myself knocked off. Hay wait a minute, that didn't sound pleasant. Having myself knocked off sounds permanent.
 

LabRat

New Member
Dec 24, 2011
596
20
0
Ruston, Washington
Used an old rock crushing pad of my Dad's. If my memory serves me he must have purchased the pad when he was a bit younger than I am now. I think it was 1978 that would put me in the 5th grade at the time. I remember this because we used them to sleep on the ground - in Alaska!

Same pad was used on the FSC and RMLL builds, its similar to memory foam. The small dots you see are from 'arks of sparks'.

The roughly cut seat pad was glued in place with spray adhesive then trimmed with a hot knife both purchased from a craft store. (Craft store charges much less than a specialty store and Home Depot etc.) Spray adhesive is expensive as is foam so do make sure your choice adhesive will not eat your chosen foam.

There you see I sit on the U-Haul moving pad that was used to cover the foam pad. Covering your pad with something plush before you pull your leather over will soften the edges. Tacked down and trimmed. Then the seat was covered in leather. Plush soft leather! (from a Jacket read below)

How to find Plush Soft Leather (or Leather) for re covering motor assisted bicycle seats.

1) Second hand clothing store
2) CL free section see sofa/chair
3) Scrap yards

As you can see in the test fit photo the process is not complete. There was suddenly a shortage of thumb tacks and the time was past 11pm.
 

Attachments

LabRat

New Member
Dec 24, 2011
596
20
0
Ruston, Washington
Did I mention redesign of the jack shaft. Sketched out as follows along with the parts. JAF Retainer type ball bearings made in Japan. $28 ea. But after showing mass iPhone pix of motor assisted bicycle builds I was offered/accepted a discount and was charged $18 ea. SCORE!

Sometimes its not what you know or who you know, its how you get to know someone that makes all the difference in the world/price.
 

Attachments

Intrepid Wheelwoman

New Member
Oct 29, 2011
2,830
61
0
Hauraki District, New Zealand
Ok, Clone Lego bricks. The really do knock off everything. I should ship myself over there and have myself knocked off. Hay wait a minute, that didn't sound pleasant. Having myself knocked off sounds permanent.
I only buy the clone bricks because I can't afford the real thing. When i wasn't well I used Lego as a way to get my mind working again and to improve my hand-eye coordination. It really does work and even my doctor approved of what I was doing and acknowledged the results of my self chosen therapy.
 

LabRat

New Member
Dec 24, 2011
596
20
0
Ruston, Washington
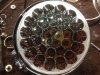
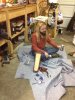
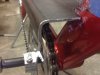
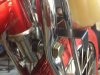
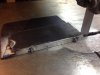
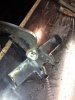
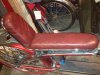
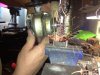
First photo - shocking - is forward progress in reverse. Made me sad to see her guts on the floor again! Taking her down to rebuild from the back sprocket forward.

When we originally started the build not all parts were available and as such not everything was aligned intended. The previously designed system would have worked. Its design was not flawed. Its appearance was less than desirable and detracted so much so from the final build that it was tossed aside.

Unfortunately (and obviously) we are unable to cut precision machine holes with our HF drill press. The machine shops machinist we barter with has not any time to cut two holes for a few days - this is because we are attempting to have these holes cut on the hush hush.

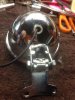
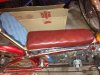
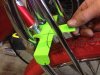
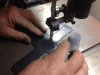
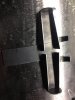
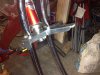
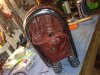
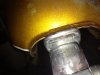
Photo two, precision fit front engine mount. This mount will be one with the frame. No bolting all welded in place. This will mark the first solid mount ever produced by Rat's Laboratory.

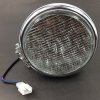
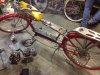
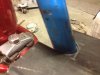
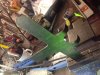
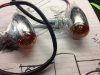
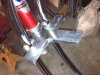
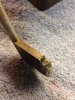
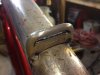
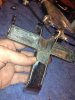
Photo three, shows the rear fit to the seat post. Note the offset. The other plate was not offset. This offset is required for the redesign and will be understood in upcoming post.

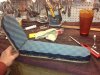
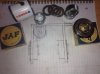
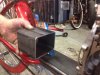
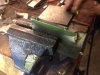
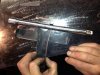
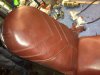
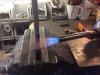
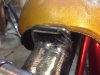
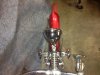
Photo four, shoes the box that will house the axel shaft, clutch and cast iron pulley. The boxed steel is the part that is waiting the machine cuts for the bearing assemblies shown in the previous post sitting on the sketch pad.
 

Attachments

Last edited:

LabRat

New Member
Dec 24, 2011
596
20
0
Ruston, Washington
The JS progress stalled. So working on the other end now. Mentioned the head lamp arrived. The yellow LEDs ordered just last week from China arrived yesterday!

Photo one, on paper. Photo two, cut it out. Photo three, shape it. Photo four test fit. Now if your looking you can see the tabs folded down they will hold the turn yellow LEDs.
 

Attachments

LabRat

New Member
Dec 24, 2011
596
20
0
Ruston, Washington
Your all reading this and thinking that's sure thin steel to be making something to hold that huge steel lamp and turn lights. Well your all correct! So here is what we do. Take some scraps clamp them together and file one edge true and square. Then weld them together. Cut out one part to produce four matched parts. Then trim them down to fit. More to follow....
 

Attachments

Last edited:

LabRat

New Member
Dec 24, 2011
596
20
0
Ruston, Washington
Tacking the pieces together. Testing the fit. This takes a lot of time, much of the work being done by file.

This small project - the lamp bracket - solidifies the need for a bench grinder and belt sander. Suppressed we got through this small part of the total build with out the need of band aids and all fingers attached. Small parts and a cut off tool are not so much fun to work with. The band saw is proving to be a game changer in the shop.
 

Attachments

Intrepid Wheelwoman

New Member
Oct 29, 2011
2,830
61
0
Hauraki District, New Zealand

LabRat

New Member
Dec 24, 2011
596
20
0
Ruston, Washington
In the mean time... $60 to for set up and cut of the two holes in the box that will house the shaft and bearings. Sucks and its still not in hand!
 

maniac57

Old, Fat, and still faster than you
Oct 8, 2011
4,484
22
0
memphis Tn
You have to be careful using a drill press to mill with because the quill might not be robust enough to take side thrusts and the chuck can come loose and fall off.

How do i know this.......? Been there, done that, got the T shirt (sigh).
^^good advice. I've ruined a few drill presses doing vertical mill work with a milling table.
Best done on light stuff like aluminum.
For heavy work, use a real mill.
 

Pluto

New Member
Sep 3, 2013
89
0
0
Chicago
Unbelievable the amount of time it takes to fabricate parts by hand with crude tools.[/QUOTE]

Aint that the truth...

Great work and can't wait to see the finished product.