another 99 cc Predator build :)

GoldenMotor.com

silverbear

The Boy Who Never Grew Up
Jul 9, 2009
8,325
670
113
northeastern Minnesota
Gearnut,
That's what I was planning to do, but thought there might be something simpler. I remember seeing that method used by Scotto a year or two ago and thought it was a real good idea and much better than all the Mickey Mousing I did when I had to mate up a Greyhound with the Qmatic at that time. I used a piece of manila file folder and did a "rubbing" with a screwdriver handle to locate the holes. I think your method is a whole lot better.

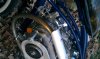
You have to first create a hole in the plexiglass for the engine drive shaft to pass through, right? Else you can't get the plexiglass up against the engine mounting holes.

Thanks,
SB
 

jowens

New Member
Jul 25, 2011
128
0
0
Webster Fl
Hey JB,
Quick question on the adjustable pulley you got from Grainger. Did you have to enlarge the ID bore to get it to fit onto the Predators drive shaft?
 

silverbear

The Boy Who Never Grew Up
Jul 9, 2009
8,325
670
113
northeastern Minnesota
I see that the engine shaft won't be centered in the transmission backing plate which I suppose doesn't matter and the idler pulley is going to need a new spot.

Can anyone tell me what size the bolts are for mounting the transmission to the engine?
Thanks,
SB
 

wayne z

Active Member
Dec 5, 2010
1,743
5
38
louisiana
Hey JB,
Quick question on the adjustable pulley you got from Grainger. Did you have to enlarge the ID bore to get it to fit onto the Predators drive shaft?

The
predator's shaft is not 5/8". It is 16 mm. Everyone has to sand down the shaft, or get a $12 reamer off Ebay and ream the pully(my recomended way).
 

jbcruisin

Active Member
Oct 10, 2008
1,118
7
38
Lebanon, Pa.
Hey JB,
Quick question on the adjustable pulley you got from Grainger. Did you have to enlarge the ID bore to get it to fit onto the Predators drive shaft?
Yes. my neighbor is a Tool & Die machinist & he did it for me. great guy to have as a friend & neighbor. :) It was only a few thousandths of an inch difference.
 

Tinsmith

Well-Known Member
May 15, 2009
1,056
259
83
Maryland
Nice job Jay. I will probably see Silverbear's project this weekend. Thanks for all the information. Hello to Bonnie!
Dan
 

silverbear

The Boy Who Never Grew Up
Jul 9, 2009
8,325
670
113
northeastern Minnesota
Wayne & Bill,
Thanks to both of you for the bolt size. I made up the plexiglass template and drilled the new mounting holes in the transmission backing plate, put the new belt in place, picked up the bolts I asked about. Tomorrow I'll relocate the idler pulley, hook up the drive chain and throttle cable, mickey mouse the exhaust, ream out the variable speed pulley a bit and hopefully be ready to take it for a ride Saturday. I started the engine again today just to listen to it... vroom. Sounds good!
SB
 

jbcruisin

Active Member
Oct 10, 2008
1,118
7
38
Lebanon, Pa.
Tomorrow I'll relocate the idler pulley, hook up the drive chain and throttle cable, mickey mouse the exhaust, ream out the variable speed pulley a bit and hopefully be ready to take it for a ride Saturday. I started the engine again today just to listen to it... vroom. Sounds good!
SB
I moved my idler a little less than 1/2 inch back & 1/2 inch down. Be careful, if you move it back too far the spring will hit the rear pulley.
 

silverbear

The Boy Who Never Grew Up
Jul 9, 2009
8,325
670
113
northeastern Minnesota
I moved my idler a little less than 1/2 inch back & 1/2 inch down. Be careful, if you move it back too far the spring will hit the rear pulley.
Thanks Jay,
Getting close to liftoff. All that's left is hooking up the drive chain and rigging up the exhaust, hopefully later this afternoon.
SB
 

silverbear

The Boy Who Never Grew Up
Jul 9, 2009
8,325
670
113
northeastern Minnesota
I put in a pretty long day working on the bike. I did the reaming of the pulley with my dremel tool using a small drum sander with fine grit drum... I ran the tool at medium speed, took my time and checked frequently for fit. Perfect.
I took the bike for a late afternoon test run of just a half mile or so. Lots of torque and I was able to accelerate on a couple of hills I lost speed on with the HS engine. So far so good. Tomorrow I'll give it a longer ride with Tinsmith. Always good on a shake down cruise to have either a riding buddy or a cell phone with someone half expecting a call to come to the rescue. I don't expect trouble, but also don't want to worry about it.

Thanks to all of you guys for the help in making this switch. I think it's going to work out fine.
SB
 

wayne z

Active Member
Dec 5, 2010
1,743
5
38
louisiana
Looks kinda weak if that is your only top engine mount. Those clips only have enough structural integrity to hold a loaded conduit to a wall. you can grab a conduit fastened with these and pull it off the wall by hand.

I devised a top mount off the front downtube, with a left over HT engine mount adaptor u-bolt, piece of all thread, tweaked crescent rag joint piece (all the holes were in the right place allready LOL), and alum. angle, bolted to the stock gas tank stantion. I just stuck a lotta oversize nuts on there to make quickie spacers. prolly make tubing spacers later...or not LOL


If your valve cover touches the seat tube, you will get a lot of rattling and frame vibration from there, I did.
 

Attachments

Last edited:

jbcruisin

Active Member
Oct 10, 2008
1,118
7
38
Lebanon, Pa.
Looks kinda weak if that is your only top engine mount. Those clips only have enough structural integrity to hold a loaded conduit to a wall. you cam grab a conduit fastened with these and pull it off the wall by hand.

I devised a top mount off the front tube with a left over HT engine mount adaptor u-bolt, crescent rag joint piece, and alum. angle, bolted to the stock gas tank stantion.


If your valve cover touches the seat tube, you will get a lot of rattling from there, I did.
The strap's for Rigid conduit not EMT. I had it out for a good ride today & had no problems. I held it there with 3 wire ties for the first ride & they held.
 

wayne z

Active Member
Dec 5, 2010
1,743
5
38
louisiana
The strap's for Rigid conduit not EMT. I had it out for a good ride today & had no problems. I held it there with 3 wire ties for the first ride & they held.
Wait, I thought Electrical Metal Tubing was rigid conduit. Now, they do make cast heavy duty conduit clamps that are for schedule 40 conduit, and they are a lot stronger. the one in the pic doesn't look like one of them. If what you have works, that's good enough.

We are all experimenters here , doin the DIY thing. Only time in service will tell :~)