My foose cruiser, and dyno board track build

GoldenMotor.com

joelnotroll

Member
Jun 11, 2009
59
0
6
san diego
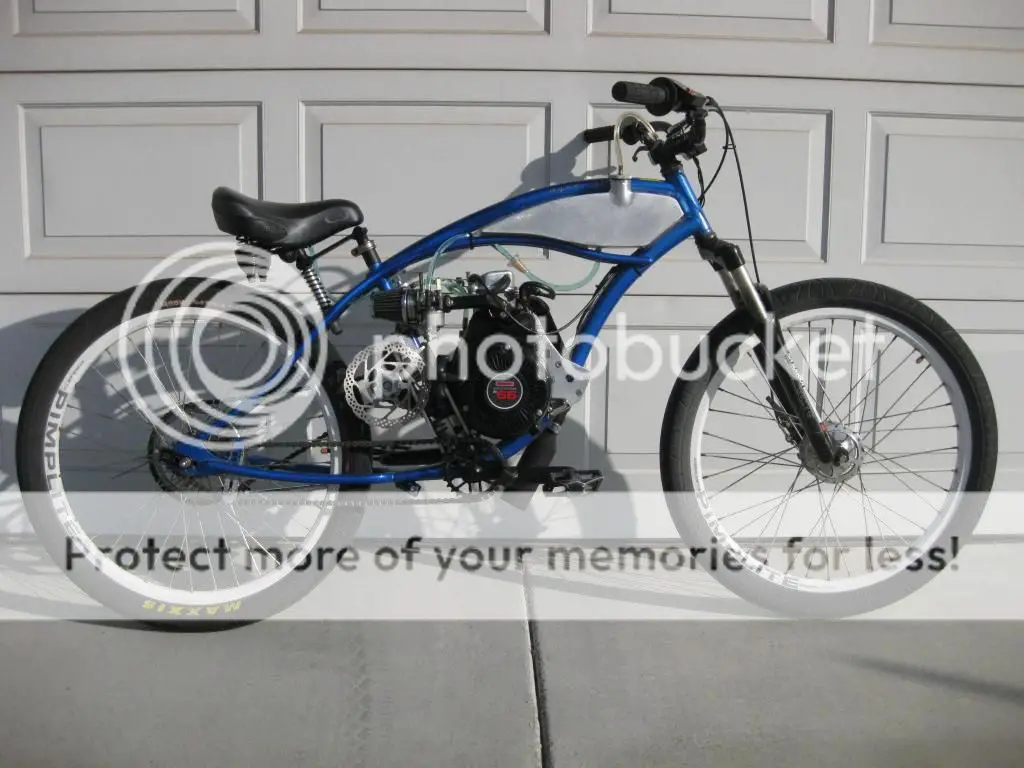
Well this is my first motorized bike build, so I figured I would make a build thread to update as I go, and post any questions of my own in here.

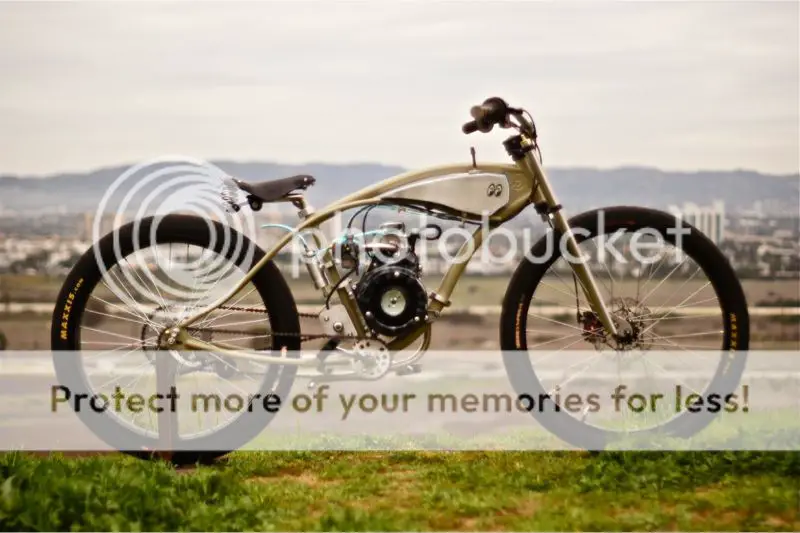
My goal for this bike is just a simple board track racer styled bike. Nothing too crazy. My purpose for this bike will be just to ride around for fun, and I'm hoping I will be able to take it on the local motorized bicycle rides.

I originally wanted to use a felt styled bike. I really love the way the felt cruisers look, especially when the top tube is made to work as a tank. So I cruised Craigslist for a few days or so looking for something. I couldn't find any felts for cheap, or even any Nirves which have a similar look to me, so I would have been happy with one of those.
Then I found this bike. I went to check it out,and it seemed sufficient, so I bought it right away.


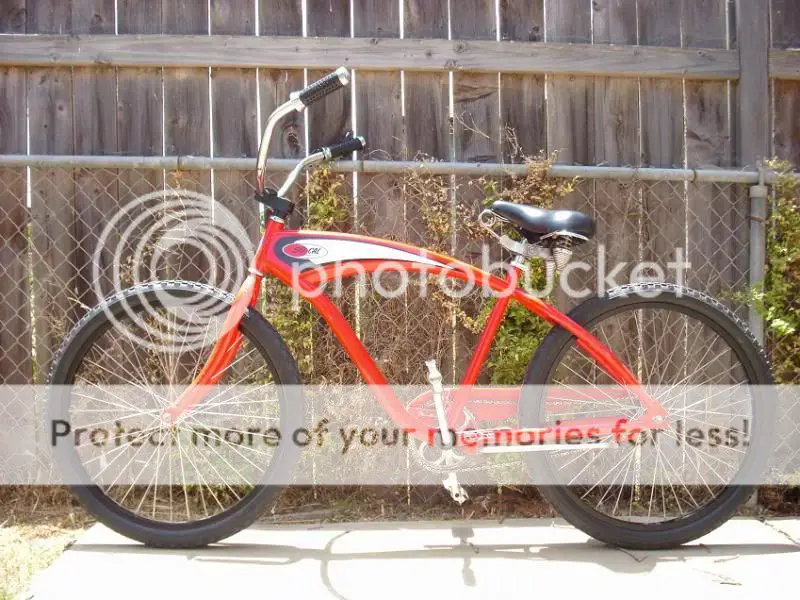
I was really excited about the bike, so I started trying to find information about it online. I couldn't find anything anywhere. To make a long story short, from what I found out, the so-cal speed shop Nirves were produced in limited numbers. So I decided it wouldn't be right to ruin it like I had planned.

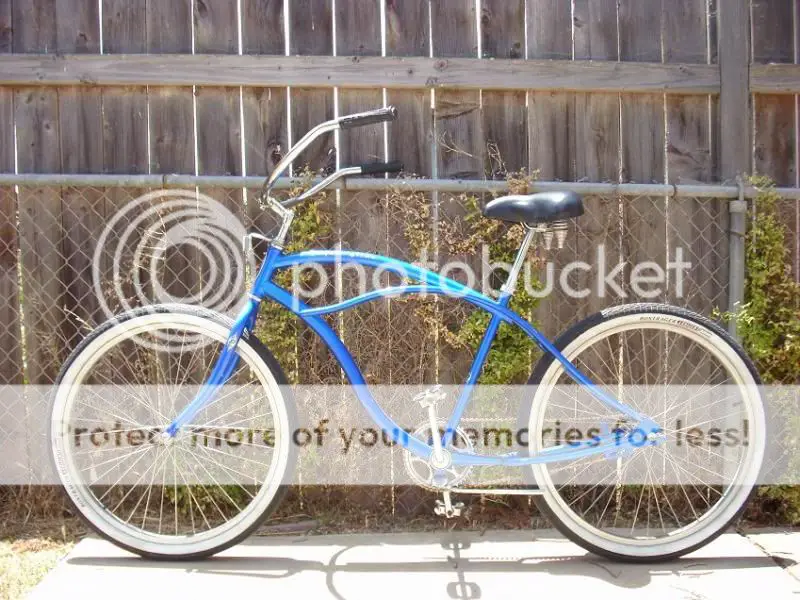
So back to Craigslist I went. I found this blue dyno-glide to use.


Friday evening I ordered my engine kit, so I am now waiting for it to arrive. dance1
 
Last edited:

Master-shake

New Member
Feb 24, 2013
315
0
0
texas
man, I would wreck that first frame. That's my next style build. I consider it a kids bike, but hey. they look cool. how much did that first bike go for?
 

maurtis

New Member
Dec 14, 2011
707
0
0
Kyle, TX
Awesome, both bikes look great and you cannot go wrong with a Dyno. But I would not worry about "ruining" the Nirve frame, I highly doubt it has collectible value. They brand bikes all the time. People are constantly marking up Fat Tire, Magic Hat, Bohemian Highway, etc. branded Nirves around here and they languish on CL for months until the price finally comes down.
 

joelnotroll

Member
Jun 11, 2009
59
0
6
san diego
Thanks maurtis.
As far as the nirve goes,I just figure I would rather someone else have it that wants it for what it is.

Some updates:

I got my "80cc" engine kit on Tuesday. I honestly wasn't that excited,until I pulled the tank out and test fitted it on my frame. Now I am really excited about this!

I want to do everything I can to make sure I set up the engine properly. I want to get all new bolts for it because I have read that they come with low quality bolts. Are there any other recommendations for things to do/replace before mounting it or starting it up? (links to other threads would be greatly appreciated)

Today I got my low rise bars in the mail. They're motorcycle bars I ordered on ebay. I mounted them right-side-up right now, but may eventually mount them up-side-down for that "board track" look.

Here is the picture of the day with the new bars. I also threw the tank on there to see how its going to look. I wanted to put the engine on there for the picture, but it would have been to difficult. (I hate the tank that comes with these kits. I plan on making an aliminum tank to place in the frame at the end of summer when my welding class resumes.)


maniac57

Old, Fat, and still faster than you
Oct 8, 2011
4,484
22
0
memphis Tn
I suggest you replace the kit chain with a HD chain. I use #41 from the local hardware store but it requires grinding inside the sprocket cover for clearance. I see people here using hd bmx chain with good results, but I'm a big man and I like things stout.
 

joelnotroll

Member
Jun 11, 2009
59
0
6
san diego
Thanks for the comments guys.

maniac57, I'm semi-new to this stuff. What does "HD chain" and "#41" mean?

I'm trying to do everything as right as possible the first time, so any more recommendations are greatly appreciated :)
 

joelnotroll

Member
Jun 11, 2009
59
0
6
san diego
Master-shake, scotto- and culvercityclassic both have very nice dynos. But like I stated in my first post the goal for this bike is "a simple board track racer styled bike."

And for an update, Monday I hope to get time to start working on the bike. :)

Question for anyone with advice:
When replacing the bolts in the kit with quality bolts, Should I replace every bolt and nut in the kit? Or are there some bolts/nuts I should replace, and some that dont need to be replaced?

Thanks in advanced for the answers.
 
Last edited:

Master-shake

New Member
Feb 24, 2013
315
0
0
texas
That chain tensioner will need new bolts. Also, I don't know if it was just mine but the plastic wheel thingie on that tensioner is going to need a spacer to make it able to roll freely.
 

joelnotroll

Member
Jun 11, 2009
59
0
6
san diego
I feel like this is a cheap "update" but i have a few questions to ask, so I might as well post some pictures also.

So I haven't done much it seems.

I cut my handlebars down 2" on each side to shorten them. I plastidipped the chrome ends on my grips(and tank cap) and installed my clutch lever and throttle. I also painted all the kit pieces black, as well as my cranks and crank sprocket. I also mounted the drive sprocket, but I believe something is wrong with my coaster brake. Right now the rear wheel is barely even spinning when I try to spin it by hand(anyone have any input on this?)


One HUGE problem Ive been having, that has been delaying me on putting the engine on is finding upgraded hardware.
I was able to find most of the nuts and bolts I need, but some seem to be impossible to find. I wanted to use upgraded m6x1.0 U bolts, to keep from having to carry a bunch of different tools, but I wasnt able to find any metric U bolts, so i went with 1/4" instead.
I cant find engine head studs anywhere, If anyone knows where to get upgraded engine head studs, please let me know.
I also cant find the engine rear mounting studs anywhere. Again, if anyone knows where I can find those please let me know.
And I wanted to open up my engine, to check everything out before starting it up(make sure there was no metal shavings or anything like that) but I have no idea how to open it, the lowest screw wont fully unscrew.

One more thing...
I have been going mad trying to find upgraded forks. I want something that goes with the style Im trying to go for(which is a board track/early 1900's look) but something that is also quality. Ive been considering the schwinn style springer forks, but those dont appear to be quality(If anyone has any recommendations, i would greatly appreciate it).


Oh and last thursday was my first day getting to ride a motorized bike. I picked up a Nirve switchblade for real cheap a few weeks ago when I went to buy myself another bike(GT corrado,already planning my next build,haha). I got the switchblade with my friend in mind, and he happened to like it, so it went to him for his build. After one ride I was addicted, so now I cant wait to get my bike running.

heres a link to his thread; http://motorbicycling.com/showthread.php?t=48623
 

maurtis

New Member
Dec 14, 2011
707
0
0
Kyle, TX
Have you checked out Sick Bike Parts? They have a hardware kit for $10 that has higher quality mounting studs and intake/exhaust studs. They also have the head studs too.

Sick Bike Parts

For the fork, while not period, the Monarks are a good looking fork: Monark forks

Good luck!
 

joelnotroll

Member
Jun 11, 2009
59
0
6
san diego
Well its almost fully put together. I have really been lagging on finishing it, the rear sprocket has been driving me crazy,trying to get true(well it did the first time, and ive just been too lazy to get back to it).

Basically all I need to do to have it complete is install the spark plug, connect the wires, true the sprocket, and attach the chain. For some reason my rear wheel seems like its not spinning too freely, would this be caused by the coaster brake being too tight? Im no bike expert, but it does seem likes something isnt right with the coaster brake.

(and heres some pictures, if you notice anything thats been done stupidly, let me know so i can correct it before I add gas)


scotto-

Custom 4-Stroke Bike Builder
Jun 3, 2010
6,505
24
38
Ridin' inSane Diego, CA.
I feel like this is a cheap "update" but i have a few questions to ask, so I might as well post some pictures also.

So I haven't done much it seems.

I cut my handlebars down 2" on each side to shorten them. I plastidipped the chrome ends on my grips(and tank cap) and installed my clutch lever and throttle. I also painted all the kit pieces black, as well as my cranks and crank sprocket. I also mounted the drive sprocket, but I believe something is wrong with my coaster brake. Right now the rear wheel is barely even spinning when I try to spin it by hand(anyone have any input on this?)

One HUGE problem Ive been having, that has been delaying me on putting the engine on is finding upgraded hardware.
I was able to find most of the nuts and bolts I need, but some seem to be impossible to find. I wanted to use upgraded m6x1.0 U bolts, to keep from having to carry a bunch of different tools, but I wasnt able to find any metric U bolts, so i went with 1/4" instead.
I cant find engine head studs anywhere, If anyone knows where to get upgraded engine head studs, please let me know.
I also cant find the engine rear mounting studs anywhere. Again, if anyone knows where I can find those please let me know.
And I wanted to open up my engine, to check everything out before starting it up(make sure there was no metal shavings or anything like that) but I have no idea how to open it, the lowest screw wont fully unscrew.

One more thing...
I have been going mad trying to find upgraded forks. I want something that goes with the style Im trying to go for(which is a board track/early 1900's look) but something that is also quality. Ive been considering the schwinn style springer forks, but those dont appear to be quality(If anyone has any recommendations, i would greatly appreciate it).


Oh and last thursday was my first day getting to ride a motorized bike. I picked up a Nirve switchblade for real cheap a few weeks ago when I went to buy myself another bike(GT corrado,already planning my next build,haha). I got the switchblade with my friend in mind, and he happened to like it, so it went to him for his build. After one ride I was addicted, so now I cant wait to get my bike running.

heres a link to his thread; http://motorbicycling.com/showthread.php?t=48623
Any and every metric nut or bolt you need can be found at Marshall's hardware off of Miramar Rd.
Stainless, Grade 10, cap socket, pan head.....you name it. http://www.marshallshardware.com/

Marshall's Hardware: Industrial Hardware in San Diego
www.marshallshardware.com/‎
San Diego Industrial Hardware store specializing in all facets of hardware needs including nuts, washers, hex bolts, socket head screws and more! Hard to beat ...
4.6
8 Google reviews · Write a review
8423 Production Ave San Diego, CA 92121
(858) 271-5555
 
Mar 31, 2013
295
8
0
RI
I cut my handlebars down 2" on each side to shorten them. I plastidipped the chrome ends on my grips(and tank cap) and installed my clutch lever and throttle. I also painted all the kit pieces black, as well as my cranks and crank sprocket. I also mounted the drive sprocket, but I believe something is wrong with my coaster brake. Right now the rear wheel is barely even spinning when I try to spin it by hand(anyone have any input on this?
...high man, i don't know if you've sorted this out yet but i recently had my rear wheel lock up on me, fortunately it was as i was coming to a stop in my driveway and not at speed on the open road so i didn't get tossed off my bike but it scared the crap out of me.

...anyway i decided to get me some new and better wheels and in the process of switching the sprocket and adapter from the old wheel over to the new wheel i had to learn how to dismantle the hub which btw is not really all that hard and a necessary skill if you want to ride safely, better you should learn how to repack your bearings and regrease your coaster brakes now so you fully understand how the brake functions.

...and like i said, it ain't all that hard, especially with all the how-to videos there are to walk you through it, take the time to watch as many as you need to until you feel even half-way confident and then just go for it.

...and feel free to review the vids as you go, lol, you don't have to do it fast, you just have to do it right.

coaster brake teardown videos

peace, bozo
 

joelnotroll

Member
Jun 11, 2009
59
0
6
san diego
thanks scotto- all I really have left to replace is the engine head studs,and the rear engine mount studs, Ill check that place out.

and thanks bozo. i found out what the problem was though, my drive sprocket was hitting the dust cover, i widened the hole on the sprocket and now its spinning smooth.

Funny thing, I rode it a week ago or so for the first time, the engine chain was too tight and the masterlink popped off(at night). The biggest piece to the master link got caught in the engine, but the other pieces seemed to be lost. So today I decided to ride my non motorized bike down the street in hopes of finding the other pieces that fell off the link. I had thought I heard metal hitting the ground when I first rode it, so that is where I checked, and surprisingly I found the outer piece to the masterlink. Then I found an inner link piece in my garage on a work table that must have been left from my friend when we were building his bike. I through it all together and finally got to ride it!

so here it is, pretty much all put together(pictures are from earlier today,before I got the chain back on)