HF Qmatic in modern Schwinn

GoldenMotor.com

LS614

Active Member
Dec 22, 2009
1,236
3
36
CT and MA
Well everyone,
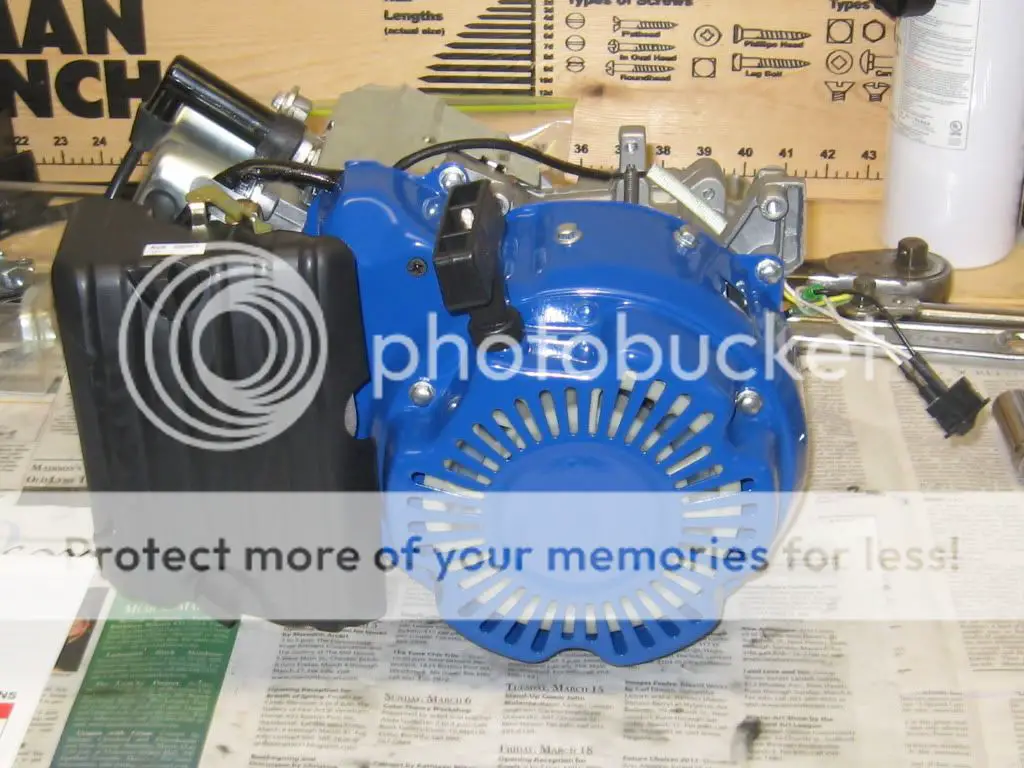
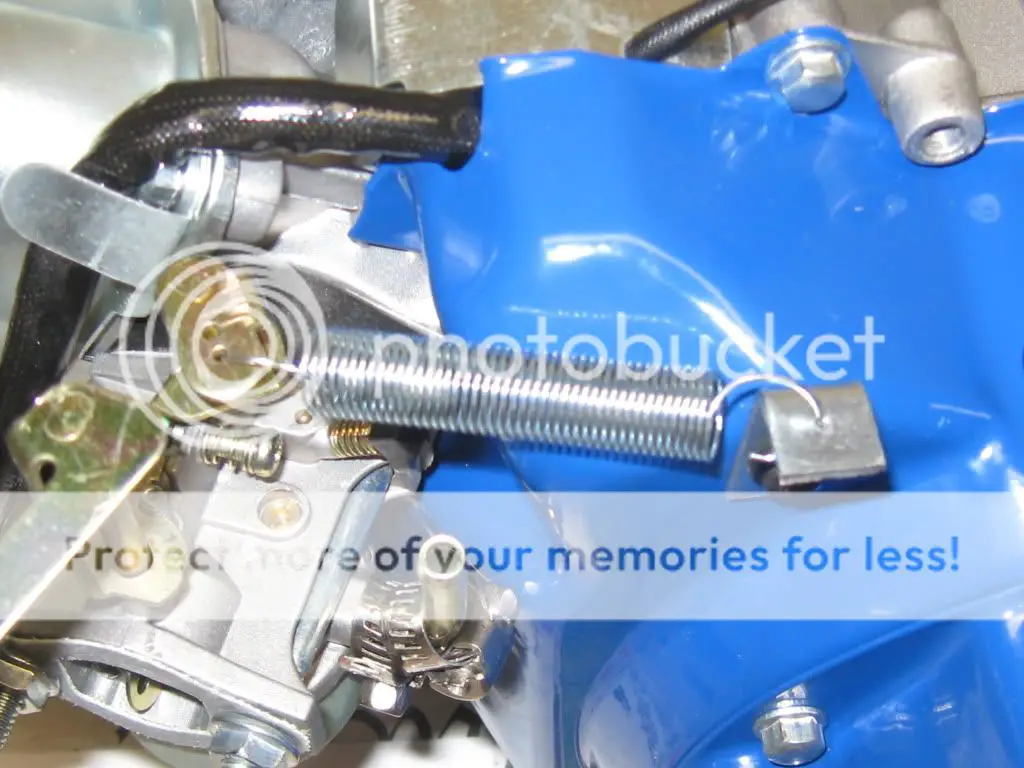
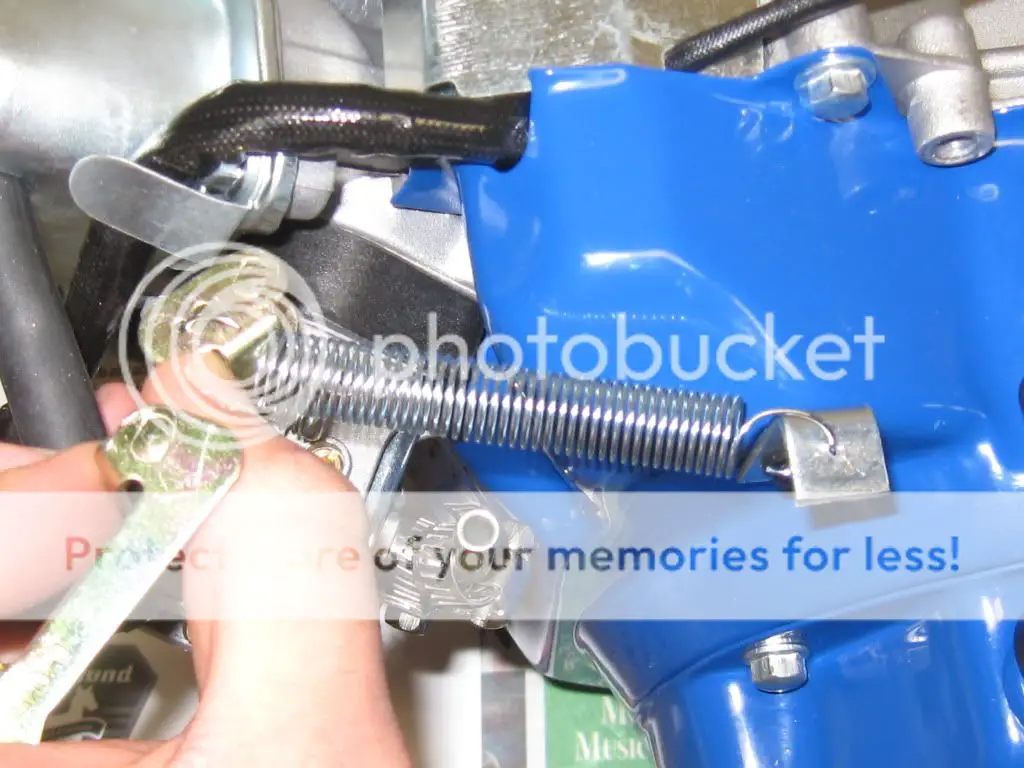
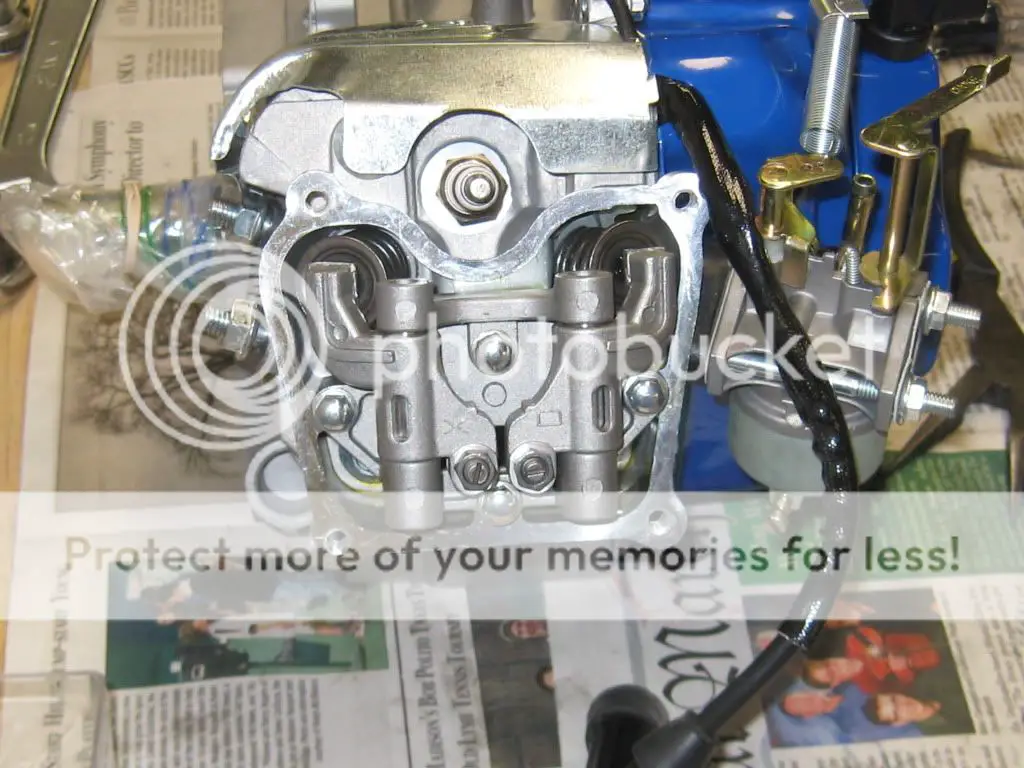
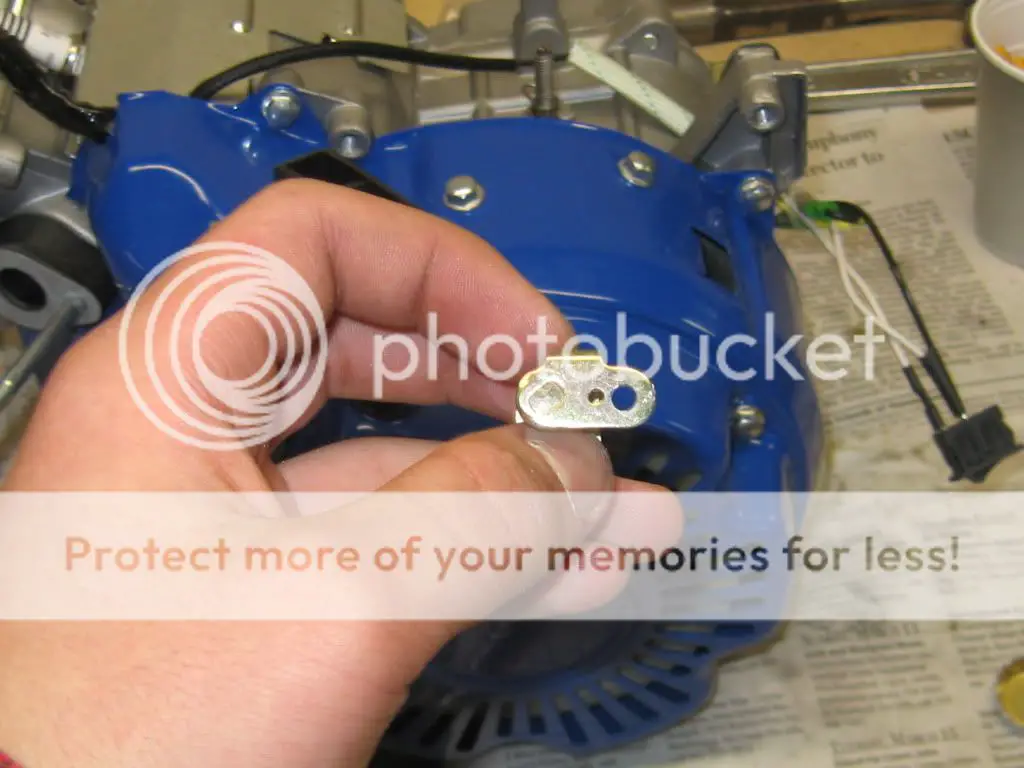
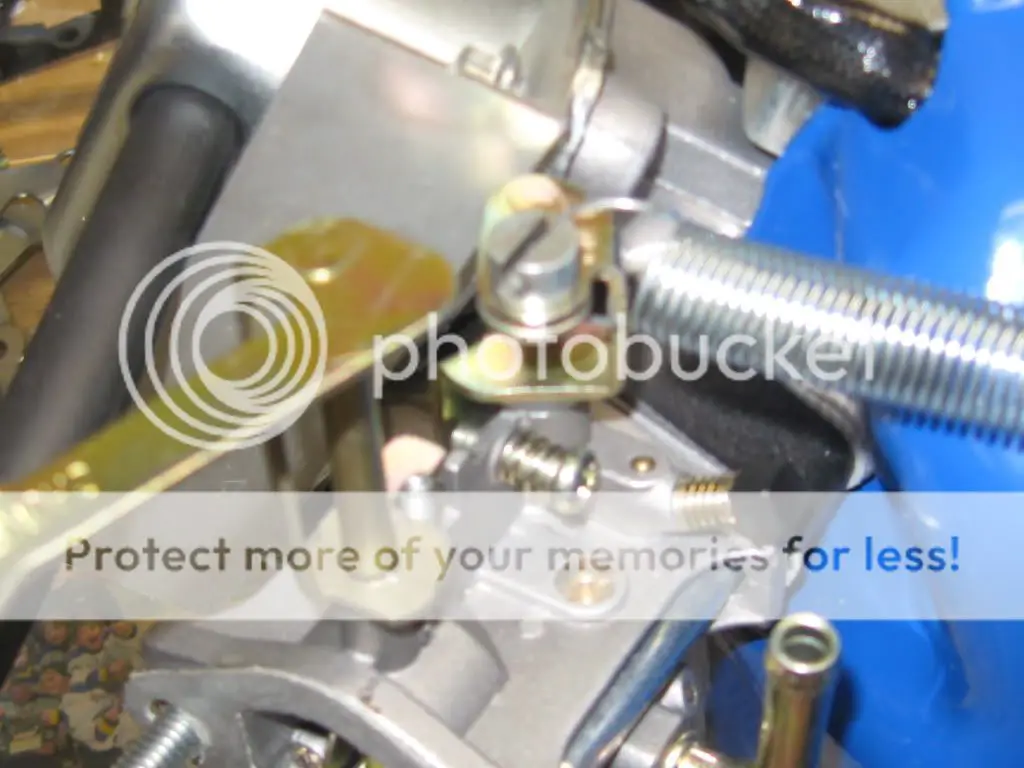
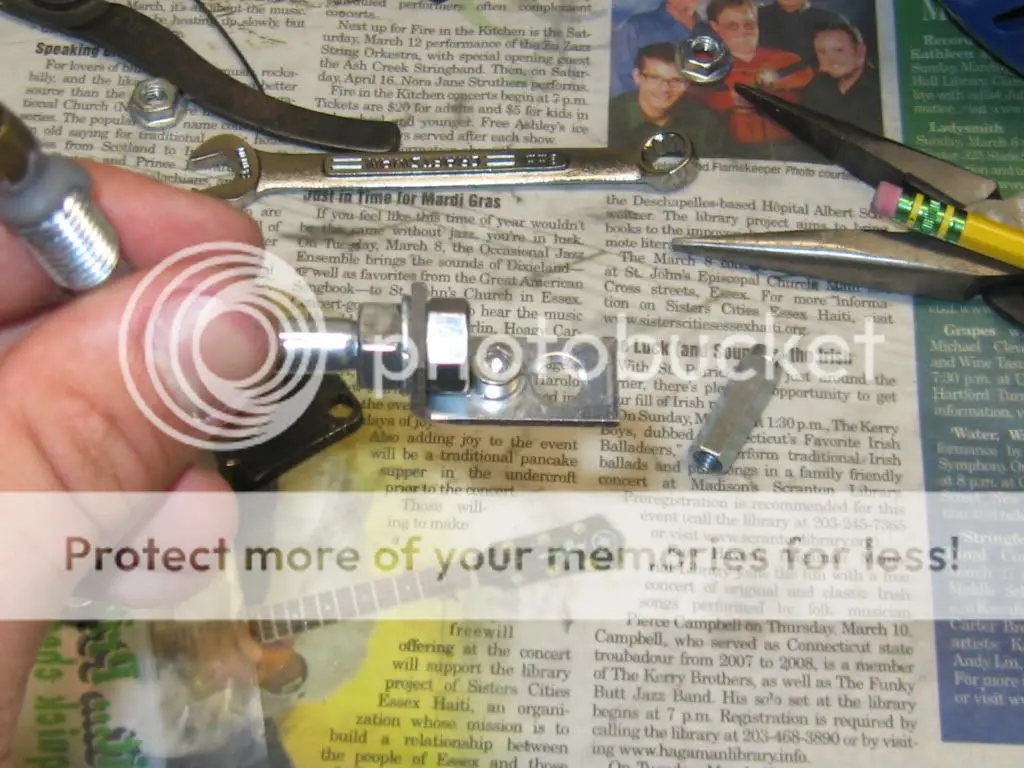
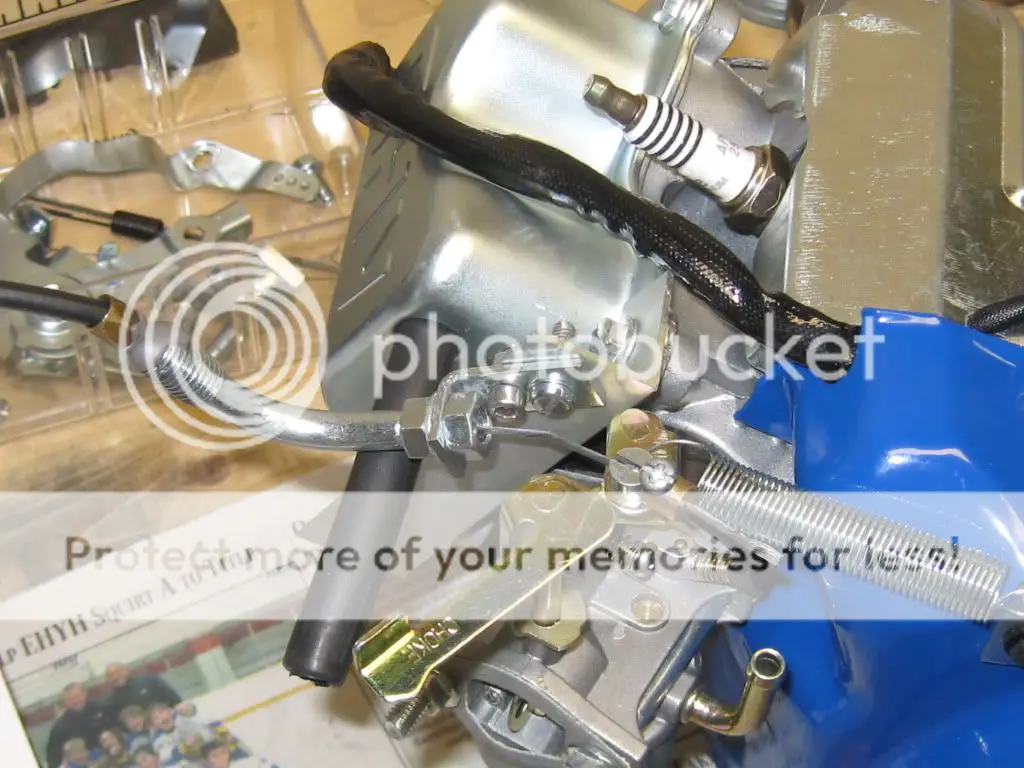
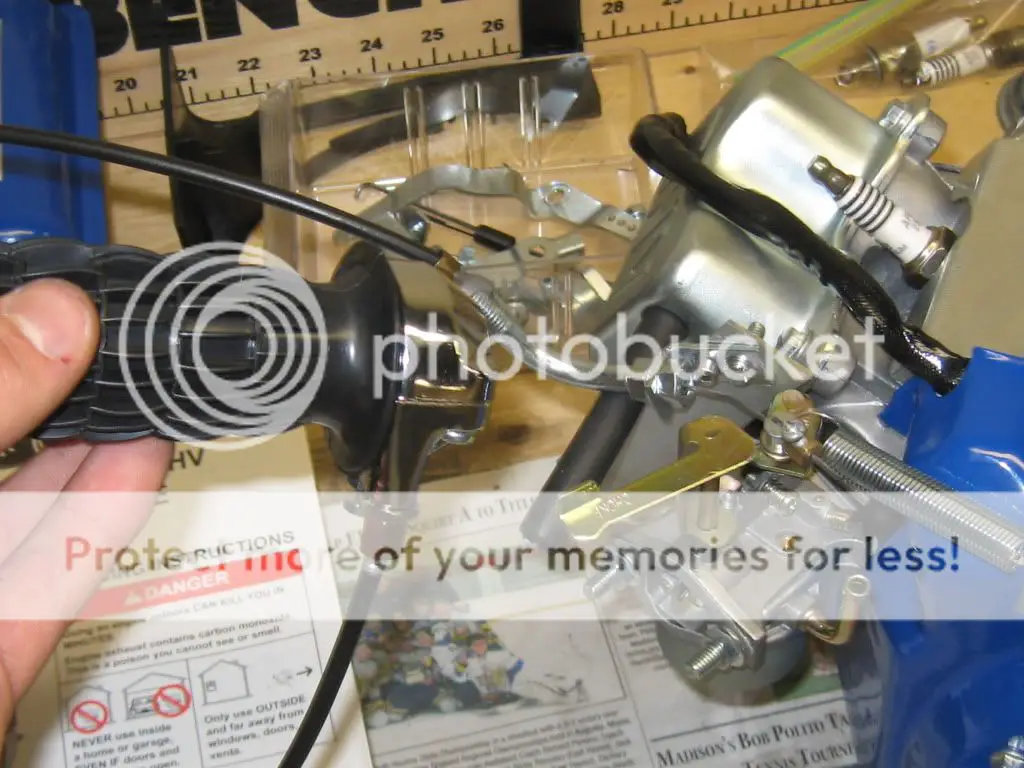
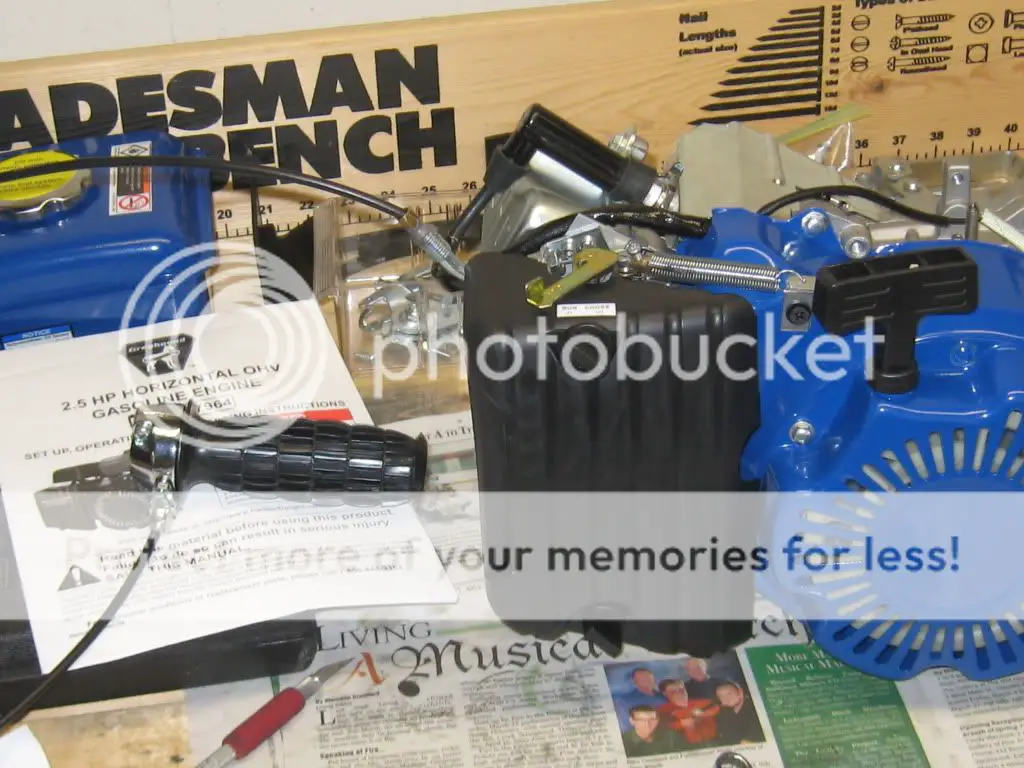
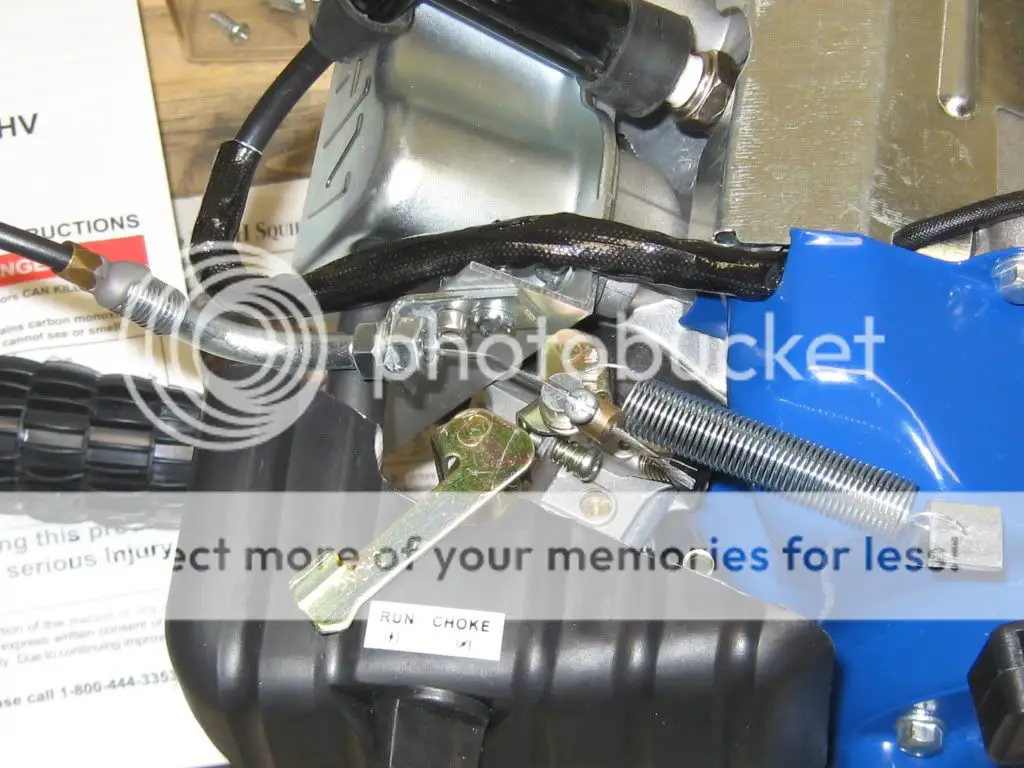
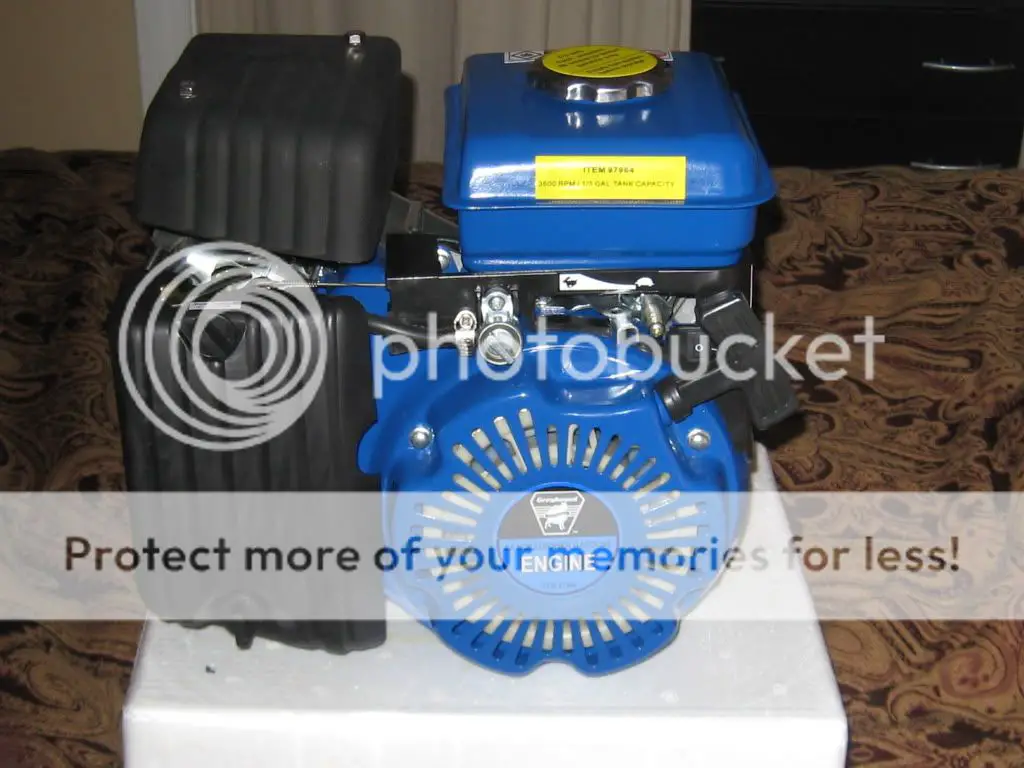
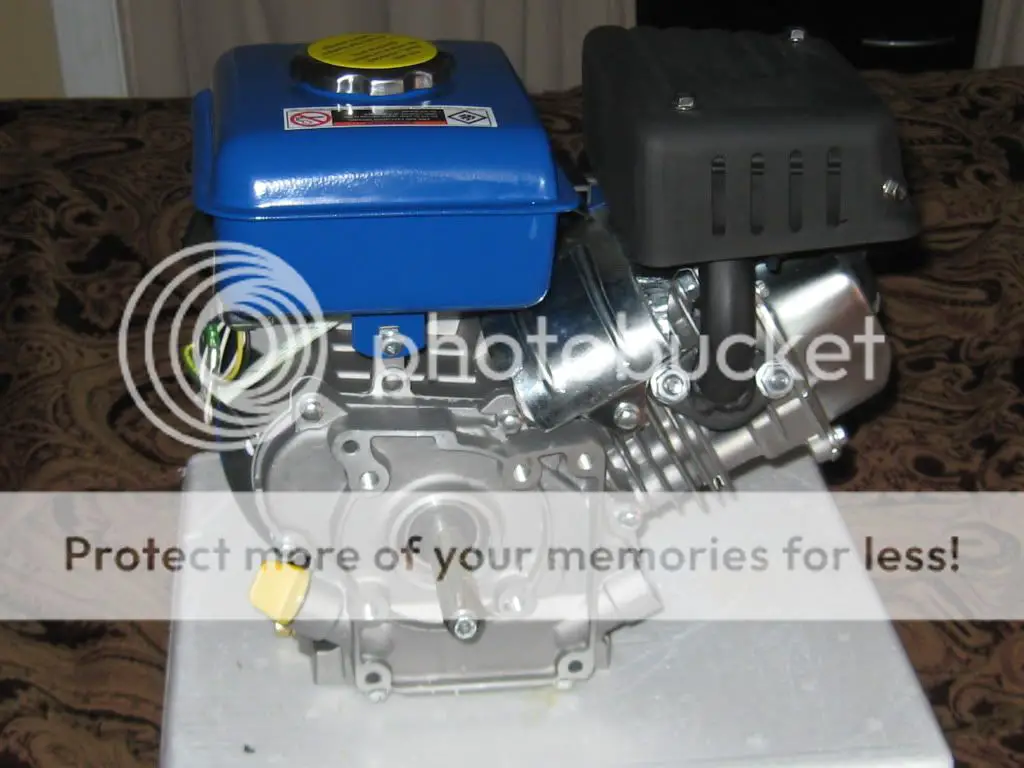
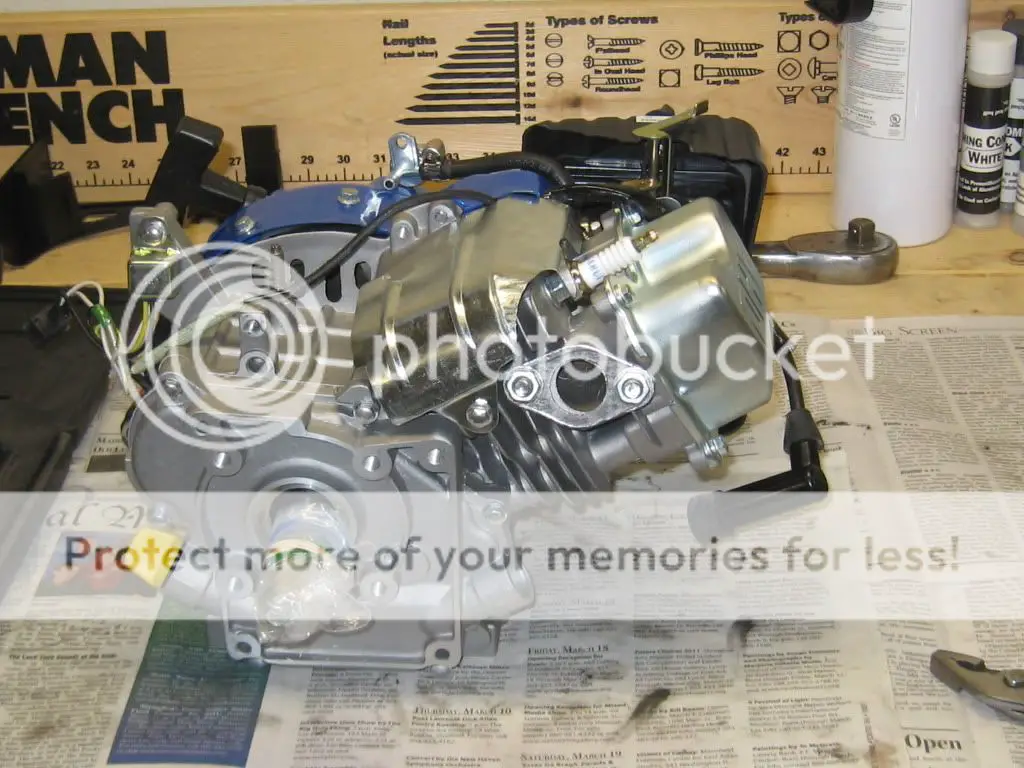
I'm starting my build for my Schwinn Riverside. I bought the HF 79cc Greyhound today at Harbor Freight with a 20% off coupon. It totaled $101 with CT tax. Not bad for a darn sturdy engine. I really like the look and design, it feels like you could throw it at people, kill them, and still have a working engine rotfl. Here are some pictures of what I did today. I removed the tank, muffler, and the external governing system. Please tell me someone if I removed too much of the governing system, I just left the shaft that comes out of the engine. I also have a side by side comparison of the cheap chinese spark plug, and a US made autolite double platinum which I gapped at .028" I hope to run this thing some time this week. I'm starting with normal castrol for break in, then switching to synthetic after. Also, I've heard that people have removed the low oil sensor, what is the advantage to that and how do you do it without making an engine that will not run at all ? Peace
-LS


LS614

Active Member
Dec 22, 2009
1,236
3
36
CT and MA
The other pics are a comparison of the plugs, the bike I'm using, and the pull starter in a better position. Enjoy :D


silverbear

The Boy Who Never Grew Up
Jul 9, 2009
8,325
670
113
northeastern Minnesota
I would leave the oil sensor in place and just remove the wire going to it. If you leave it connected the engine will quit every time you tip the motor. I kept killing my motor when I mounted the bike because I tip it a bit when I swing my leg over. That wire is where I connected my engine kill switch coming from the throttle. Handy.
I think you'll like the Greyhound with Qmatic. I like mine quite a lot. And the cantilever Schwinn is a good choice for that engine since it fits nicely. Good luck with your build.
SB
 

LS614

Active Member
Dec 22, 2009
1,236
3
36
CT and MA
Silverbear, I saw your build, I really like it :) I'm hoping you can instruct me on how to wire the kill switch when that time comes ;) Peace
-LS
 

chainmaker

Well-Known Member
Jan 19, 2010
2,634
69
48
Ma USA
Nice!!!! That motor looks sweet . Im sure you will post every step of the way on this build.Lots of info and pics. Looking forward to seeing this come alive. Good Luck.
 

LS614

Active Member
Dec 22, 2009
1,236
3
36
CT and MA
Thanks chain :) I'll keep the info coming. I bought an EZ Qmatic drive from jbcruisin, who has been wonderful to work with :) With a transmission like that there is no need for a shift kit :D Quenton is building the drive custom to suit my needs, but I'll post pics when I get it.
 

jbcruisin

Active Member
Oct 10, 2008
1,118
7
38
Lebanon, Pa.
Your engine looks exactly like mine that's sitting on my work bench waiting to go in my tandem. I took off the same stuff as you. For now, I'm going to run the stock air filter on it. We'll have to fabricate a throttle cable setup. Maybe someone will post a picture for us on how they did it (hint, hint).
Jay
 

LS614

Active Member
Dec 22, 2009
1,236
3
36
CT and MA
I'm glad to hear that it seems I'm going in the right direction :) I'm so excited to get the Qmatic I can hardly control myself :D The thing I found about the engines, at least the one on my mom's power washer which is made by the same company in china, is that there is a little bleeder jet on the carb that soaks the air filter with gasoline to get a good amount of vapor built up so it is easier to start. My concern, unless it is okay to plug this bleeder jet, is that switching to a different filter could mean fuel soaking through and dripping everywhere. Any feedback on this?
 

LS614

Active Member
Dec 22, 2009
1,236
3
36
CT and MA
Alright everyone, well, I said that I would wait until I was finished with the throttle setup before I posted pics, but I wanted to post pics so badly, so here it is :D I got some springs at the hardware store today as well as some 3 foot long 1/16" thick, 1"x1" aluminum angle stock for 7.99. I figured aluminum would be a good choice since it is easy to carve with files and saws, but still pretty strong. I started by taking an l bracket, cutting it down, and drilling a hole in it. I mounted it with the same screw where the plastic face plate used to mount. The spring, obviously, is used as a good strong idle return so I don't get stuck in full throttle :)


LS614

Active Member
Dec 22, 2009
1,236
3
36
CT and MA
In the first few pics I had the spring in the outer hole, but I moved it inward because I liked it better put there. The next few pics are of the piece of aluminum angle stock that I shaped to fit around the valve cover I used a hacksaw and files to shape it. That part I guess is pretty intuitive. The reason I'm mounting a piece of angle stock is so that I have a nice place to mount an L-bracket with my throttle ferrule in it. I also included a pic of the rocker arms with the valve cover off. It's a strange configuration. Also, I used a scraper and some acetone to get that stupid label off, poor planning on my part :)


LS614

Active Member
Dec 22, 2009
1,236
3
36
CT and MA
Lastly is a pic of the throttle shaft assembly with an enlarged hole to accommodate a walbro type carb swivel. This will allow for smooth easy motion of the throttle. My final addition to this setup will require just a few loose odds and ends in terms of hardware; you'll see that soon if not tomorrow. here is the last pic of the night
 

LS614

Active Member
Dec 22, 2009
1,236
3
36
CT and MA
Well everyone, my first version of the throttle assembly for the HF is completed. I don't think there will need to be many modifications to the design I have, but there are always a few little things to tweak. I have worked REALLY hard on this throttle setup so I hope it shows. To start, I used the 90 degree tube from the old china twist throttle as the tube to guide the cable to the carb while giving the cable a reasonable angle that will not be an impossible bend. My "doh" moment at the end of the day is when I realized that when I went to the trouble of drilling out the bent tube so I could fit a brass fitting for the cable, I could have just drilled it out so that the cable would have fit on its own. FAIL! Oh well, live and learn. Everything else though I think I did pretty darn well! The first pics are of the angled tube I'm talking about. I had to find some M7 nuts that I could use to secure it to my custom made plate. The next few pics are of the swivel linkage that I found that allows my carb to be operated by the cable.


LS614

Active Member
Dec 22, 2009
1,236
3
36
CT and MA
sorry for the blurriness on any of the pics. I think you get the idea though :) The next few pics are of the throttle tube with the plate that I made from an L bracket. I had to drill out the throttle tube side to 9/32", being very careful to drill it so that I could still turn the M7 nut to tighten it. I also had to drill a washer to 9/32" so that the nut spacing was right. It was important to adjust it carefully because I needed to be able to fit two screws so it would mount up well to the angle aluminum plate I fashioned yesterday. If it had only one screw it would twist around, so I made it a two screw system. You can see in the second pic that the tip of the throttle tube barely clears the head of the allen screw. I did need to do some filing on the tip of the tube and grind the hole for the screw a bit with the dremel to get it to fit just right. There seemed to be A LOT of that. If you do not have the patients to spend 90% of your project tweaking things with files and a dremel with diamond abrasive bits, don't do this! One of the bolts on the valve cover had too little room to turn after I but on my angled piece of aluminum, so I got out the hacksaw and a file and I made it into a slotted screw. This prevented it from misthreading by being installed at an angle. I drilled two holes in the aluminum plate to 5/32" so I could mount up the throttle tube assembly I made.


Last edited:

LS614

Active Member
Dec 22, 2009
1,236
3
36
CT and MA
In the third pic in my last post you'll note how smoothly the knarp from the clutch cable fit into the swivel on the carb. DO NOT THINK THAT HAPPENED ON ITS OWN! I got out my heavy duty glove so my hand could take the heat better, put the diamond coated ball bit in the dremel, and carefully bored the inside of that swivel out for about five minutes. When I was done with that I took the knarp and hit the small end with a file to reduce the diameter. After that, the two fit together perfectly! I used the throttle cable from the HT, but I had to cut the sheath to allow the inner cable to be the correct relative length. I Also attached my napa all metal throttle. I'm going to lubricate the throttle assembly so that the cable and throttle break in well. The only thing that really needs to happen now is applying blue loctite to the hardware that I will not need to adjust much after initial adjustment. I also noticed that the c-81 spring I used has just barely enough strength to return the throttle back to idle position so I'm going to upgrade to the more beefy c-83 tomorrow. The last few pictures are of the filter assembly, plug wire, and breather tube carrying on their normal positions, unimpeded by my new setup


dvddtz

New Member
Feb 15, 2009
162
0
0
Gulf Breeze, FL
Really nice job LS,I think Im going to build a 4 stroke next.After 17 two strokes its time for a change.I will be keeping up with your thread.Thanks
 

LS614

Active Member
Dec 22, 2009
1,236
3
36
CT and MA
Thanks :) I'm glad people are looking :) I'm going to start tearing down my bike tomorrow to prepare for repainting! Peace
-LS