

A really good front brake and just a C brake attached to to rear fender hole with both going to a self-adjusting SBP dual pull lever brake lever would serve you better than trying to mount V brake bosses on a frame I think, and cost you way less.I have seen brake boosters clamped to seatstays forever, I'm adding epoxy to make it stronger. It will be a secondary brake.
Identiti makes clamp on fork bosses but I'm not pay $40 just to see if they fit my seatstays.
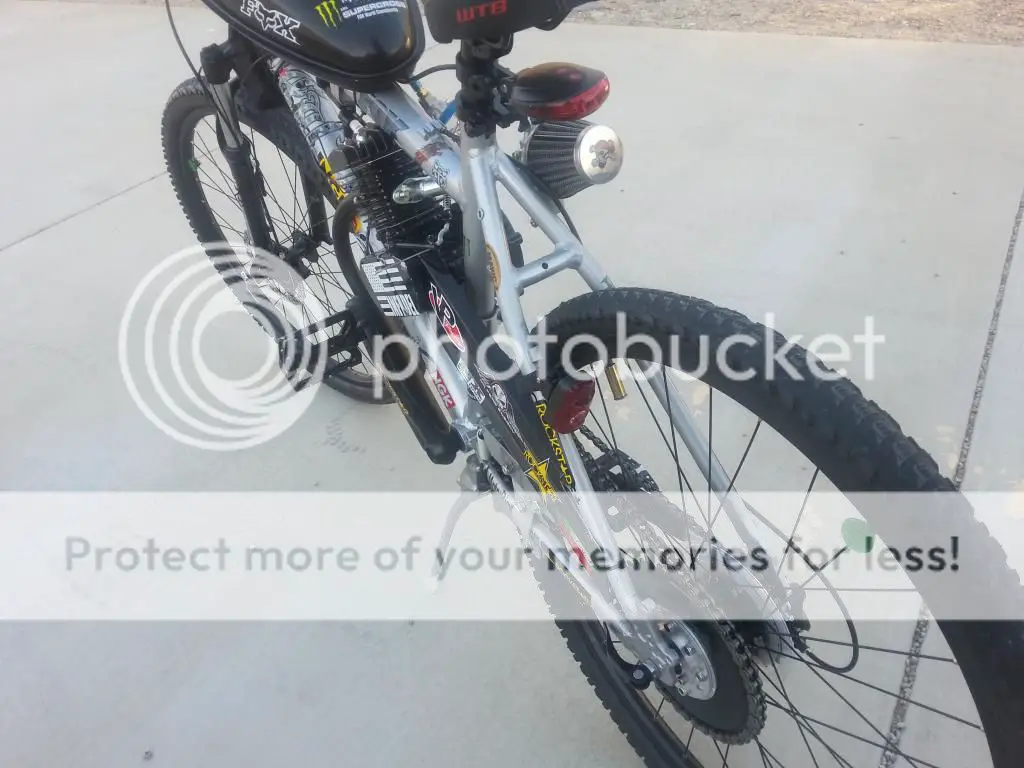
I couldn't fit the 203 mm broke rotors, didn't feel comfortable grinding down my aluminum frame. All I need is it to snap a chainstay while I'm doing 20-30mph
First build - the journey begins
- Thread starter Rudz
- Start date

A note on "dual pull" brake levers, as you're applying both brakes with just the one hand - you're effectively reducing the possible maximum braking force by 50% as well as relinquishing any independent control over which brake you may choose to use as the primary in any given situation.
While these consequences may indeed not be of concern for some, beyond certain weights, speeds & conditions it can become a problem. Emergency stops & braking on wet/icy surfaces will both be affected.
While these consequences may indeed not be of concern for some, beyond certain weights, speeds & conditions it can become a problem. Emergency stops & braking on wet/icy surfaces will both be affected.
Don't I still need bosses to mount a cantilever brake?A really good front brake and just a C brake attached to to rear fender hole with both going to a self-adjusting SBP dual pull lever brake lever would serve you better than trying to mount V brake bosses on a frame I think, and cost you way less.
True, and why I like non-clutch power trains like 4-stroke and electrics, but the simple fact is keeping independent brake levers with a manual clutch lever leaves you with 3 levers that often need to be operated at the same time, and only 2 hands.A note on "dual pull" brake levers, as you're applying both brakes with just the one hand - you're effectively reducing the possible maximum braking force by 50% as well as relinquishing any independent control over which brake you may choose to use as the primary in any given situation.
Again true, and you can even add in if the single brake lever breaks you have no brakes, but ALL operation requires frequent use of all levers and everyone has one great position for a lever to operate it.While these consequences may indeed not be of concern for some, beyond certain weights, speeds & conditions it can become a problem. Emergency stops & braking on wet/icy surfaces will both be affected.
With two levers on the left one will awkward to use ALL THE TIME.
Nope.Don't I still need bosses to mount a cantilever brake?
A 'C-brake' is a single unit with one blot in the center that fits the hole in the front or rear where a fender would attach.

You can put them most any bike without V-brake bosses front and rear.

Heck, sometimes I put front and rear C-brakes with a dual pull on a coaster brake for 3 brakes!

Note a C-brake on the rear usually works best under the fender bar.
Glad I could help, just remember they usually fit and work best mounted under the rear fender mount and the Sick Bikes dual pull brake lever has a teeter-totter self adjuster in it to make in the difference in pull between your front disc and back C-brake.Thanks buddy, definitely going with the c brake rear and disc front. I never heard of c brakes, I always used v's and now disc.
Your front disc is more efficient and will do a larger portion of the work which is good, but the back brake will help and absolutely no motorized bike should be operated without front and rear brakes.
...keeping independent brake levers with a manual clutch lever leaves you with 3 levers that often need to be operated at the same time, and only 2 hands.
I meant only to remind of the often unmentioned effects of the dual pull systems as it is somewhat of a safety consideration, it only becomes more so for those preformance oriented and/or adverse conditions....but ALL operation requires frequent use of all levers and everyone has one great position for a lever to operate it.
With two levers on the left one will awkward to use ALL THE TIME.
I must however dispute one minor assertion you've made, that "all levers often/must be operated, awkwardly, frequently/all the time".
...this is at best, an overstatement as it regards to the specific utilization of the predominant type of motorized bicycle clutch, which is used only when coming to a complete stop. The relevance of your explanation would be appropriate for the operation of a motorcycle clutch lever, disengaging multiple shift points during both acceleration and deceleration as well as coming to a stop.
In practical application such could be compared to claiming a parking brake should be placed on the steering wheel of a car to facilitate the ease & comfort of it's rapid & frequent use. If you're a delivery driver, conceivably this is true - for the rest of us it would be a superfluous accessory, if a novel one.
There are two predominant reasons for a dual pull brake lever in our application, the most common is aesthetic - three levers and their assorted cables can look messy and cluttered, particularly if that build favors style over function, my vintage '43 Rollfast has one as an example of that. The second is less commonplace, dual wheels of which braking must be applied both simultaneously and equally regardless of the reduction in force, my tadpole trike's front wheels as an example.
If these are not important considerations, three levers should not be discouraged as "awkward", dangerous or difficult to use. In proper arrangement - the brake being primary, clutch secondary and staggered for ease of reach in that order, one can use either or both as the situation dictates, the only encumbrance the strength needed to pull both, which is not dissimilar to the force needed to apply a dual pull lever to achieve the same as one.
My Schwinn as an example of layout;

Again - I am not attempting to discourage the use of dual pull levers or recommending to those that have them that they shouldn't, I was simply stating what often isn't even in the fine print when such accessories are promoted, that there can be a detrimental effect on emergency, high speed & adverse condition braking if a dual pull is used.
If you know that and get one anyway for whatever reason, that's fine by me lol
")
Thanks for all the information, I already have a dual pull lever. I considered two brake levers but I simply don't have the space for it, if I deem it necessary I will add it, but after a year on a road bike, I learned to avoid obstacles rather than trying to stop at anything over 18mph.
I have long open stretches of road between my home and work, I have two stops in almost 8 miles, and I can California roll those two most likely of the time.
I understand all the points Barely Awake is making, and I greatly appreciate it. KC has helped me as well. I only wish I joined the forum prior to starting my build, it would have been easier using a bigger frame. Lmfao.
In the future I may swap everything to a gta frame. I believe the headtube is 1 1/8 so everything except the seat post will transfer easily.
No worries, I will admit I just find it difficult to empathize with "cluttered" or "awkward" when it comes to having three levers. I'm sure some folks find it so & as it's their bike it's their call - I'm just convinced there's solutions that could be suggested that don't necessitate compromising maximum braking ability as the only alternative.
...and personally, provided the layout is intuitive for the operator, no controls that might be needed while riding obscured or "found" by looking (eyes on the road) and all within easy reach without letting go of the bars - there's no limit to the number of levers, buttons, switches & doodads that can be considered & made to fit if they must... ask any pilot lol
The number of levers & control layout on my hybrid tadpole is admittedly overwhelming at first, it's not a suggestion but rather an example of what had to be done, necessitated by design and the limitations of "only two hands" and a lack of a dashboard ofc.
(pardon the pic, it's old)
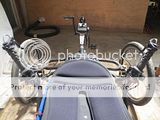
If you're courious this be what the doodads do, from top down;
2 Triggers (black) - left, ICE throttle & right, electric throttle
2 Twist shifters (grip) - left, 7sp rear derailleur* & right, 3sp front
2 Brake levers (silver) - left, front brakes (dual) & right, rear
2 Switch boxes (black) - left, blinker 3 way toggle & right, horn
2 Switch Assemblies (red buttons) - left, ICE kill & start & right, lights high low & off
1 Remote choke lever (not in pic, added later) - left bar, lowest
*7sp shifts both pedals & ICE as it's a jackshaft drive
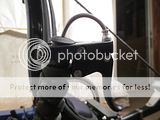
Here's one of the trigger throttles, they're uncommon but can be found aftermarket for four wheelers, weedwackers & etc. can have them too, but they're usually cheesy plastic;
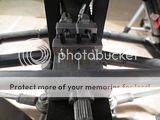
Example of a DIY, balancing cable splitter - does the same thing as a dual pull but doesn't need an oddball lever, so they can match and/or in this case, allowed me to use switched levers for brake lights;
None of that is particularly appropriate for your build, you've found what works for you & that's what counts - I mostly posted it to show truly "busy" controls heh, but also that there's more to be had then what the motorized bicycle retailers offer. That checkin' out a few other toy stores (motorcycle & ATV, lawnmower repair, etc.) & a little bit of thought, a lotta bit of head scratchin' and jus' about anything no matter how silly, can be made to work somehow lol

...and personally, provided the layout is intuitive for the operator, no controls that might be needed while riding obscured or "found" by looking (eyes on the road) and all within easy reach without letting go of the bars - there's no limit to the number of levers, buttons, switches & doodads that can be considered & made to fit if they must... ask any pilot lol
The number of levers & control layout on my hybrid tadpole is admittedly overwhelming at first, it's not a suggestion but rather an example of what had to be done, necessitated by design and the limitations of "only two hands" and a lack of a dashboard ofc.
(pardon the pic, it's old)

If you're courious this be what the doodads do, from top down;
2 Triggers (black) - left, ICE throttle & right, electric throttle
2 Twist shifters (grip) - left, 7sp rear derailleur* & right, 3sp front
2 Brake levers (silver) - left, front brakes (dual) & right, rear
2 Switch boxes (black) - left, blinker 3 way toggle & right, horn
2 Switch Assemblies (red buttons) - left, ICE kill & start & right, lights high low & off
1 Remote choke lever (not in pic, added later) - left bar, lowest
*7sp shifts both pedals & ICE as it's a jackshaft drive
Here's one of the trigger throttles, they're uncommon but can be found aftermarket for four wheelers, weedwackers & etc. can have them too, but they're usually cheesy plastic;

Example of a DIY, balancing cable splitter - does the same thing as a dual pull but doesn't need an oddball lever, so they can match and/or in this case, allowed me to use switched levers for brake lights;

None of that is particularly appropriate for your build, you've found what works for you & that's what counts - I mostly posted it to show truly "busy" controls heh, but also that there's more to be had then what the motorized bicycle retailers offer. That checkin' out a few other toy stores (motorcycle & ATV, lawnmower repair, etc.) & a little bit of thought, a lotta bit of head scratchin' and jus' about anything no matter how silly, can be made to work somehow lol

Last edited:


415 chain didn't fit my chain breaker. Tried a standard 410 chain and it doesn't fit the sprocket on the engine.
Looks like I'll be hammering and punching the 415 chain in a bit to break it.
Also pulled a wire out of the crimp, so I'm praying it still works, put it back in and crimped it better.
But just in case, what size wire crimp are those?
Rudz,
We usually always suggest to get rid of the crimped, push-together connectors supplied with the kit. They are not considered good electrical connectors. Most experienced builders will tell you to solder those connections then protect them with heat shrink tubing.
As an example I had a factory crimp on a blue wire that was crimped onto the insulation and there was no metal to metal contact between the conductor and the connector. Imagine how that would have effected a new inexperienced builder.
As for too many levers on the handlebars; control comes with experience. After some miles the action becomes automatic and you don't even think about what your hands/fingers are doing. You simple squeeze the right thing at the right time. I know it looks confusing and even intimidating but trust me, having a brake lever and a clutch lever on the same bar becomes second nature....if you ride enough.
I agree with Barely Awake in that dual pull levers take away some of your decision as to how much brake to apply to which wheel. I would never be comfortable with that limitation. Motorcycles don't do it that way. Why should we?
Tom
I'll ride with the dual pull, if I don't like it, I can always put new levers on. I went dual because that's what everyone said to get.
I want to solder the connections, but I have no soldering kit, and I can't solder. Every time I try I screw up, my old roommates were into computers and rc, they soldered everything for me. Lmfao
I think I'm going to have to learn to solder myself. I seen a nice kit online with the station equipped with magnifying glass and alligator clips
Right now I have to get the 415 chain on
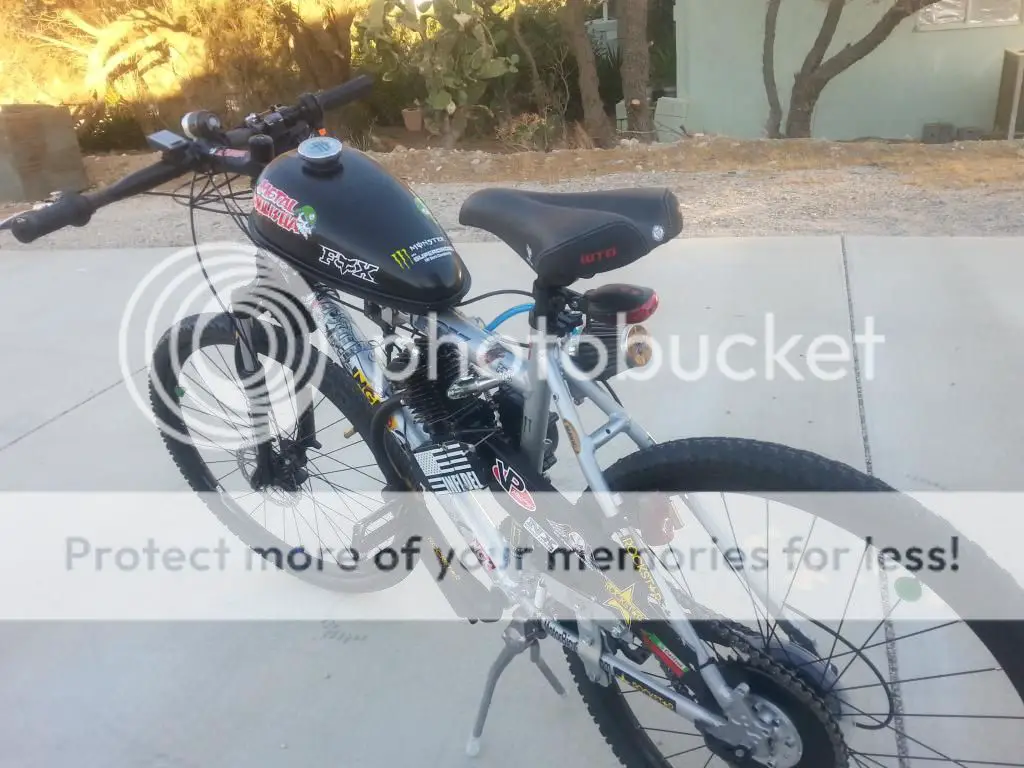
Lookin' real good Rudz ")
I'd not worry the dual pull, didn't mean to make a deal out of it lol - s'long as ya know is all
As for soldering - it's actually far easier then it seems, if two little things are done first. The first being getting this (sounds like the one you're thinking of has it tho);
http://www.mediacollege.com/misc/solder/tinning.html
...after tinning the wire tips, use the third hand tool to hold them right next to one another, put the tip of the soldering gun under the paired wires & it'll melt the two together w/just a touch. For a stronger connection/larger gauge wiring, add a dollop of solder to the tip of the gun before* touching the paired, tinned wires - again, done w/just a touch lol
*before keeps the heat down for thinner wires (melting insulation) but you can put the tip of the gun on/under the paired wires & then apply the solder too - this obv gets the wires very hot & is usually for much larger, thicker wires - stuff we'd likely not use on a gasbike.
...Another trick is to take the rounded, needle point of a new soldering gun tip & flatten just one side a little on a grinder (or with a file/dremel/etc), after retinning - now you have a tiny "spoon" to hold that drop of dribbly solder to tin all the easier, as well as the pin point for poking about
...oh & BTW, thin strand flux core solder is easiest for our stuff (thick works too) & I've been soldering for years with just a $10 junky pencil gun from ol' wallyworld - sure, a nice one is nicer but you can solder jus' the same with no more then a hot nail heh
I'd not worry the dual pull, didn't mean to make a deal out of it lol - s'long as ya know is all
As for soldering - it's actually far easier then it seems, if two little things are done first. The first being getting this (sounds like the one you're thinking of has it tho);
The second is a step oft not known by those new to soldering & if it's not done - soldering is virtually impossible, even if managed the result is poor & weak... but it's the simplest, easiest thing in the world if ya know about it & it's called "tinning" - I've included a link for tinning wires but you need to tin the tip of a new soldering gun as well, same kinda deal tho;...what's called a "third hand/helping hand" tool to aid proper soldering: http://www.amazon.com/SE-MZ101B-Helping-Hands-Magnifying/dp/B000RB38X8/

...if you've not got one, get one (or make one ofc) - trust me it'll be one of the best $10 ya ever spent!


http://www.mediacollege.com/misc/solder/tinning.html
...after tinning the wire tips, use the third hand tool to hold them right next to one another, put the tip of the soldering gun under the paired wires & it'll melt the two together w/just a touch. For a stronger connection/larger gauge wiring, add a dollop of solder to the tip of the gun before* touching the paired, tinned wires - again, done w/just a touch lol
*before keeps the heat down for thinner wires (melting insulation) but you can put the tip of the gun on/under the paired wires & then apply the solder too - this obv gets the wires very hot & is usually for much larger, thicker wires - stuff we'd likely not use on a gasbike.
...Another trick is to take the rounded, needle point of a new soldering gun tip & flatten just one side a little on a grinder (or with a file/dremel/etc), after retinning - now you have a tiny "spoon" to hold that drop of dribbly solder to tin all the easier, as well as the pin point for poking about
...oh & BTW, thin strand flux core solder is easiest for our stuff (thick works too) & I've been soldering for years with just a $10 junky pencil gun from ol' wallyworld - sure, a nice one is nicer but you can solder jus' the same with no more then a hot nail heh
Last edited:
The alligator clips are just for heat sinks when working around delicate components and as useless as a magnifying glass.I want to solder the connections, but I have no soldering kit, and I can't solder. Every time I try I screw up, my old roommates were into computers and rc, they soldered everything for me. Lmfao
I think I'm going to have to learn to solder myself. I seen a nice kit online with the station equipped with magnifying glass and alligator clips
I need 'eyes' when I solder as well but I just us a $5 pair of 1X magnifying glasses off the display rack in most drug stores.
I have been soldering nearly 40 years and this is what suites my needs for $26.
http://www.testequipmentdepot.com/products.htm?item=SL5&ref=gbase

Adjustable voltage with a holder for the wand and most importantly a sponge holder.
Dampen the sponge and use it to wipe the tip of your iron off often and leave it clean when you turn it off.
Thin lead/acid flux core solder works best for wires.
Get all your wire ends striped to about 1/4", put a little solder on the tip and hold it to the wire, put the solder on the opposite side of the wire, when the wire is hot enough the solder will suck in and penetrate.
Always stagger your inline 2 wire splices ~1", and if you put a 2" piece of shrink wrap over one wire set first you won't need to use any tape, the soldered wires are separated and using the shaft of the iron as a heat source the shrink wrap will seal it up.
I can't think of a single build that I didn't solder something on, even 4-strokes for the kill button wire and I replace all the stock ignition wiring on 2-strokes with hard soldered good shielded wire, like power tool AC plug wire.
Ya, a 410 bicycle chain breaker won't break 415 chain unless you break the breaker itself (the bottom tab that determines width).Right now I have to get the 415 chain on
Though you can use a grinder to break 415 chain, Harbor Freight has an $8 chain breaker that will even do 41 chain but still do even the thinnest of chain.
You will use both tools many more times than just this build so handy to have around ;-}
Last edited:
I ordering the chain breaker when I get paid. And the soldering set as well.
Is rosin core better than flux core?
Looking at it, the crimp I screwed up was the kill switch, so it'll at least be able to get this thing running even if I messed up the wire.
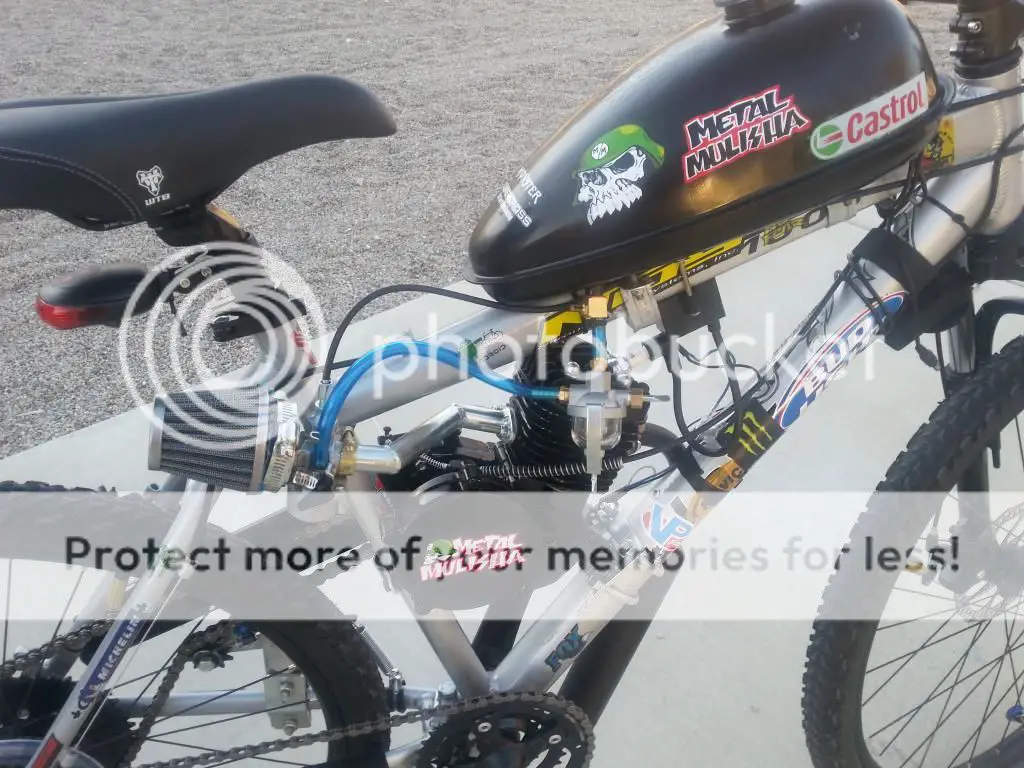
I installed some 44 caliber valve caps and a new air filter today, didn't get around to installing the chain. I don't have money for gas until Thursday anyways.
Is rosin core better than flux core?
Looking at it, the crimp I screwed up was the kill switch, so it'll at least be able to get this thing running even if I messed up the wire.
I installed some 44 caliber valve caps and a new air filter today, didn't get around to installing the chain. I don't have money for gas until Thursday anyways.
Last edited:
No worries, we have all broke the wrong link and ended up with the fat side with no roller on one end.Modified my chain breaker and broke the 415 chain, but I'm a moron and now I need to break one more link. Tomorrow.
I'm off to take a nap before work.
I find feeding the chain through the motor sprocket clockwise so you don't loosen the sprocket nut until the top part of the chain is half way down the back sprocket and then putting the other end on the sprocket to see the break point works best.
A Sharpie is your best friend with this.
Just mark the actual link pin you want to remove while it on the sprocket and you don't make a mistake.
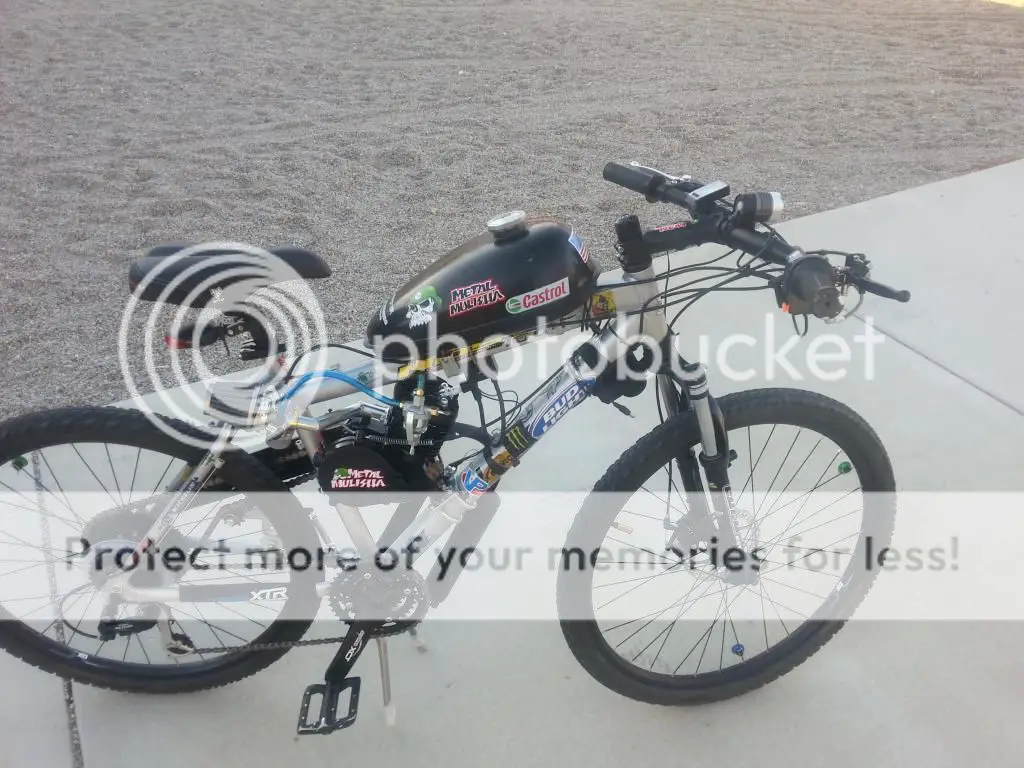
I woke up and attacked the chain, got the extra link off, mounted it, assembled the tensioner and adjusted it.
I trimmed and mounted my chain guard.
Then I made an idiot move and screwed up the clutch cable. I had loosened the screw on the cable so I had room to bolt the chain guard on, my idiot self forgot to assemble it back together before I grabbed the clutch handle. The end cap flew off and the cable frayed, luckily I had a spare.
Took it outside for a dry run, I have no gas. I had to adjust my seat height and tighten a couple things. The rear derailleur is working fine as is my front disc brake.
Chain jumped off once, but I think everything is getting settled in, because it was fine after.
I should wait till dark and siphon my neighbors gas.....


