New here, first build.

GoldenMotor.com

crawler

New Member
Aug 5, 2011
63
0
0
Wichita, KS
I think it looks awesome the way it is. Would make a cool lil rat bike. Would look neat with the engine painted hammered copper and brass fittings. Why use the shell for the tank instead of... well, the tank? It'd be ok either way tho. I'd just be weary of the fenders, and I'd hate to trim the rear one up for the drive chain.
The tank has a working horn in it, and I was going to mount the coil inside of it, also. It would be a lot of work to make it into a functional gas tank, anyway.

The fenders will be reinforced at mounting points for sure. As for trimming, there should be no need to with the shift kit (I don't think, anyway).
 

Redbeard1204

New Member
Jun 18, 2011
15
0
0
United States
Ah, I wasn't sure if you were still planning on running the shift kit as it looks to be a single speed. But yes, it would save you from trimming the fenders. Wouldn't mind a closer look :p Definitely is a unique ride.

Really, a working horn? That's pretty sweet, I've been trying to figure out a good loud horn to mount to mine... too many idiot drivers out here in CA that aren't looking for a crazy cyclist zooming by at un-natural speeds. xct2 Was thinking of recycling a camping propane tank to use for a compressed air horn...
 

crawler

New Member
Aug 5, 2011
63
0
0
Wichita, KS
It'll get the eight speed hub. I'm waiting on the worksman rims (starting to tick me off, going over three weeks, and today they promised to ship them for the third time) so I can get the new wheels laced up.

If I decide to paint it, I'm going to get a monark disc brake springer front from Venice motor bikes.

I started fitting the shift kit tonight. Once it's all installed, I'm probably going to modify some of the mounts to use shaft collars instead of muffler clamps.


crawler

New Member
Aug 5, 2011
63
0
0
Wichita, KS
I got a little more done. I'm getting down to waiting on the wheels, just chucked the new tires on some mountain bike wheels I had (which will probably end up on the schwinn).


Redbeard1204

New Member
Jun 18, 2011
15
0
0
United States
The lines on that are great. Though, with the bright freewheel and the sweet job on the engine, the patina of the frame kinda looks... off. Just my .02 Still planning on painting it?
 

crawler

New Member
Aug 5, 2011
63
0
0
Wichita, KS
The engine is actually for my other bike, I'm just using this one for mockup. The engine on this bike will probably be left plain. I'm thinking about candy apple red metalflake with silver metalflake trim. It's going to be too hard keeping it looking old with welding new bits and pieces on it, and new forks. I think I'll be waiting for the sportscar pat (might have butchered that) abraham linkage front forks.
 

crawler

New Member
Aug 5, 2011
63
0
0
Wichita, KS
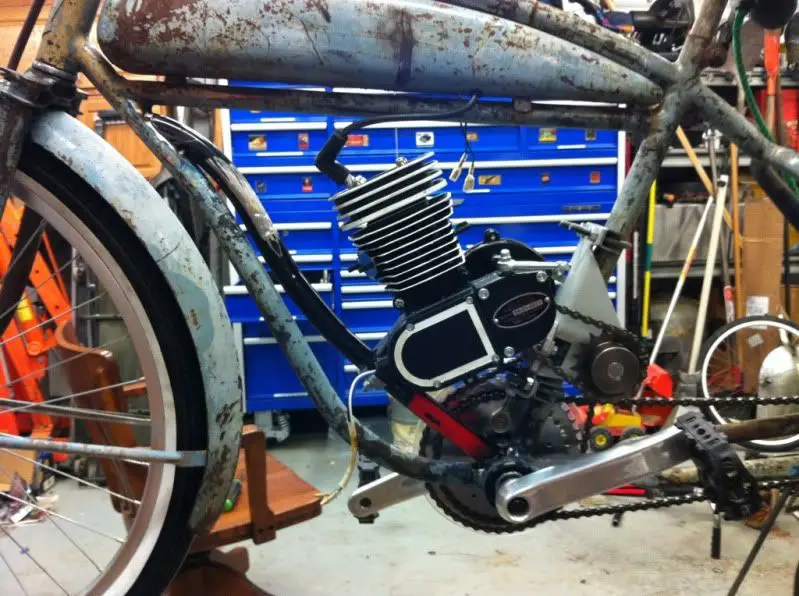
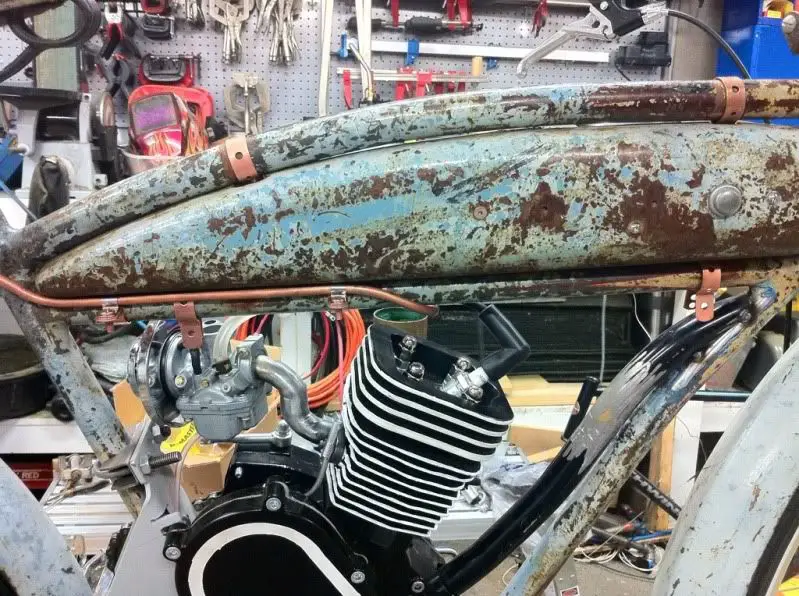
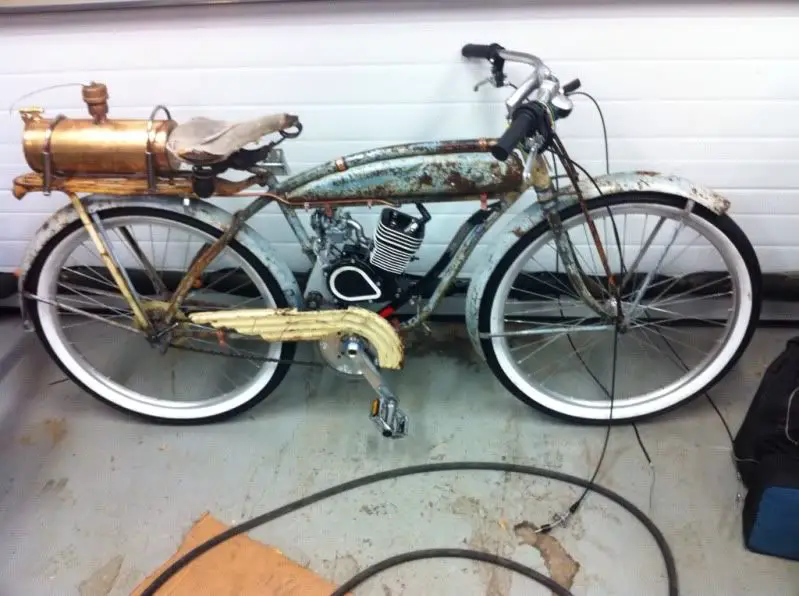
Well, I got a little more done. I picked up an old ladies bike for the bent tubing, and after straightening a bend in the press, making a new bend in the bender, and increasing an existing bend...I ended up with the tube for the front motor mount. It's a 1" tube to match the existing tube on the frame. Instead of centering it in the mount to make for an easy 1/16" shim, I put it all the way forward and will make a tapered shim to wrap around it. I did that so it allows the engine to drop down further once the shim is removed, and I'm hoping the chain will be able to be removed without taking anything apart (we'll see).


Yeah, I forgot to clean the paint off the tube before I tacked it in...I'll deal with that when I do the final welding. On a side note, this frame is welded from the factory, not brazed. That made me happy since I don't have to bother brazing anything that hits a joint. It's been years since I've brazed something.

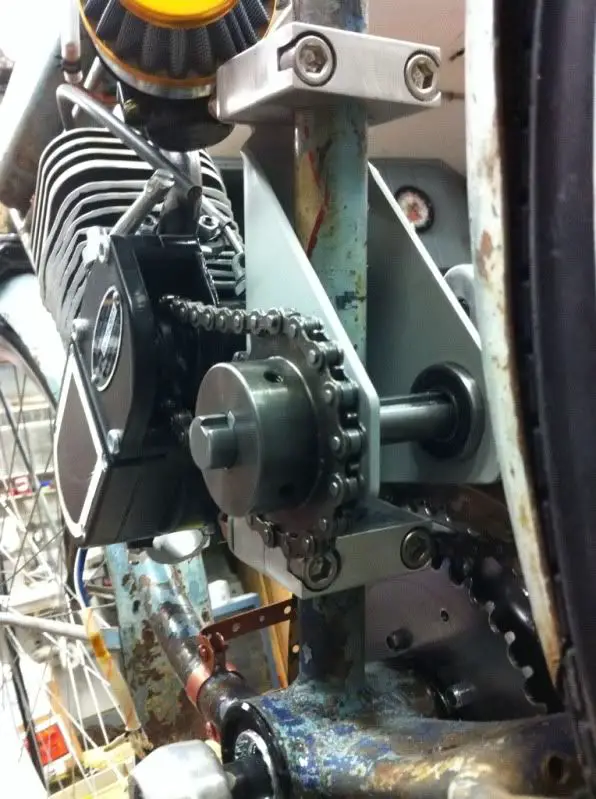
I installed a rod end on the bottom of the shift kit bracket. I'm going to weld two plates between the tubes there to bolt that rod end to, and use that as the adjuster, rather than the muffler clamp/angle iron/all thread setup that comes with the kit.

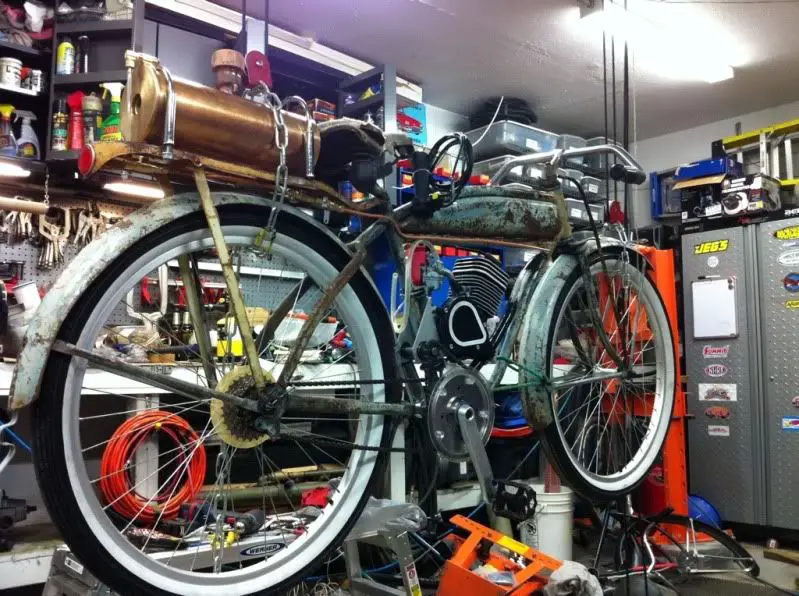
You can also see the plug wire going into the stock tank.

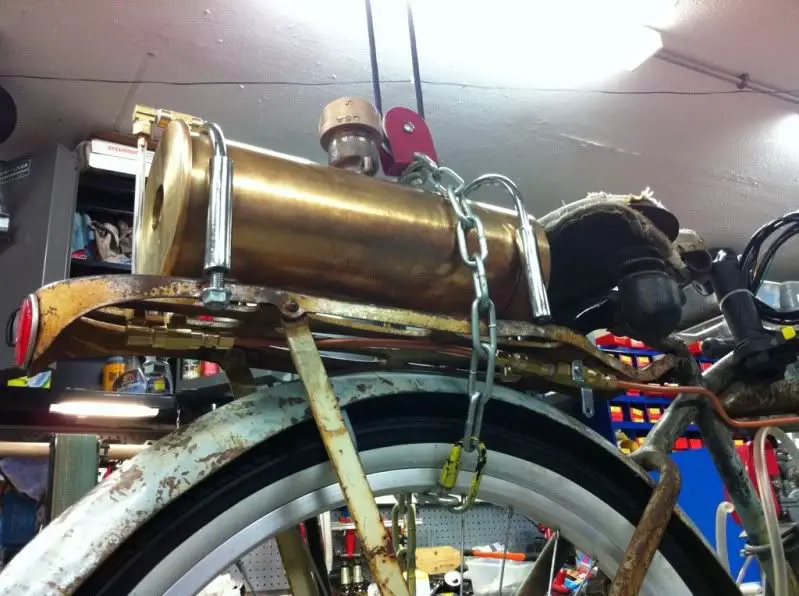
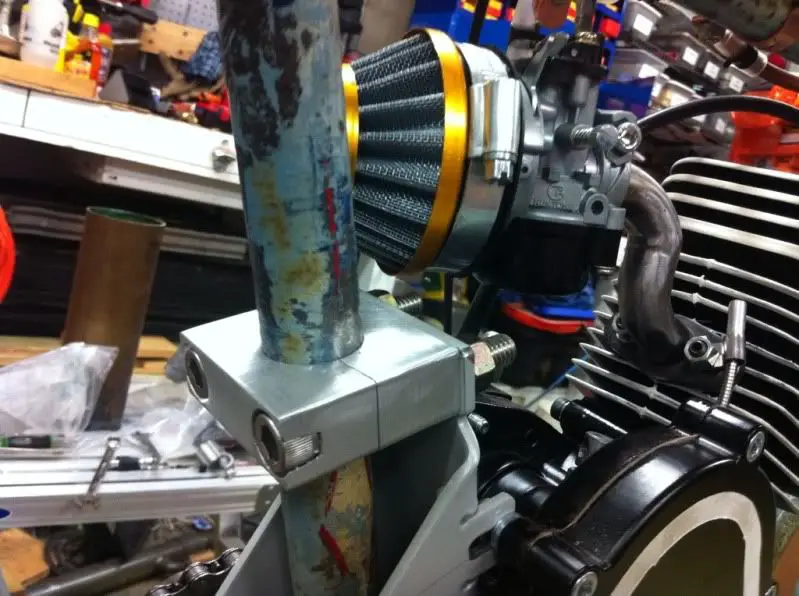
I made a mount inside it for the ignition coil. I cut the mount ears off the , and then made a clamp from plumbers strap and welded it inside the tank.


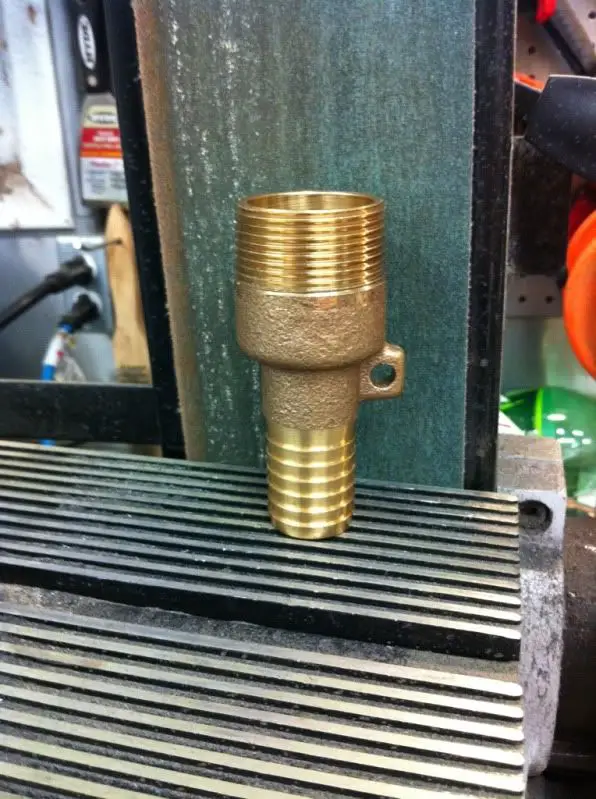
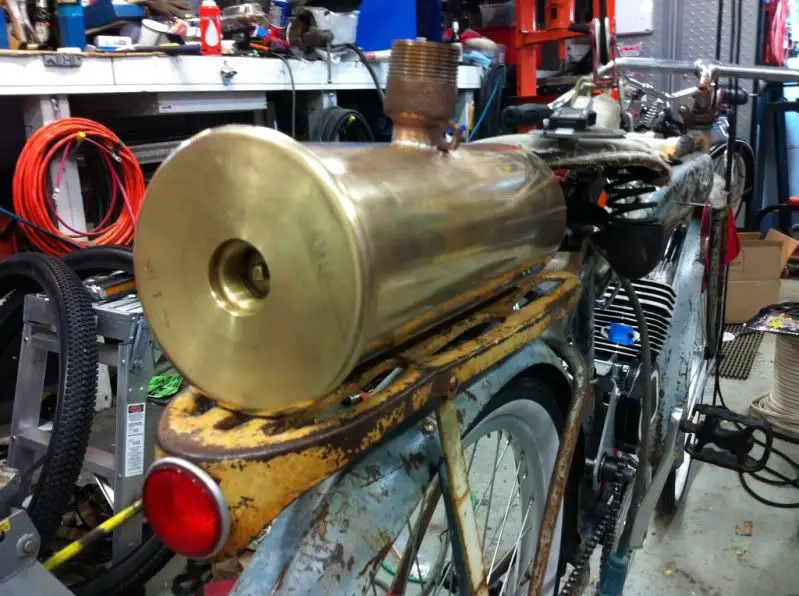
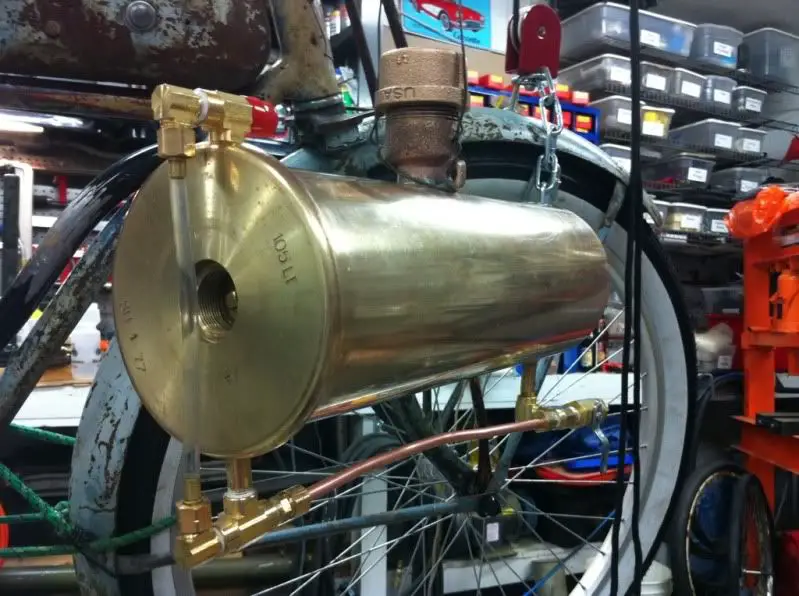
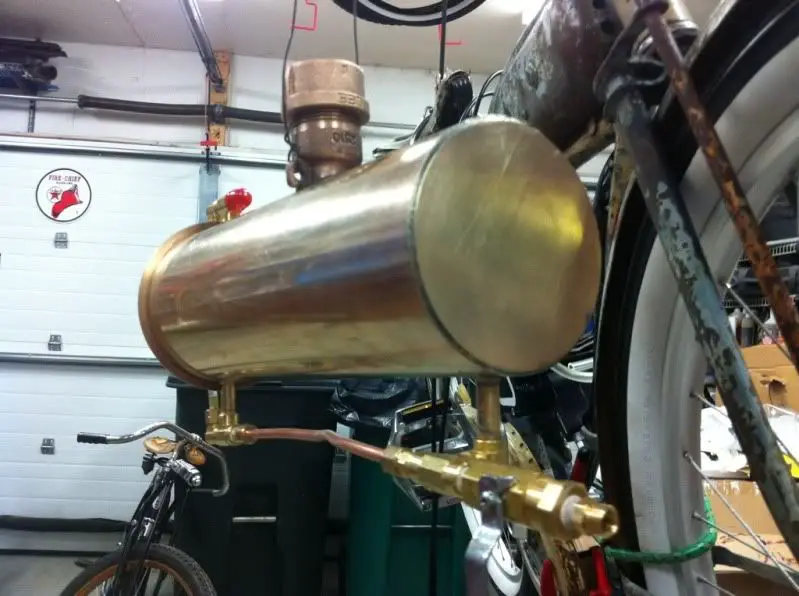
I also found the perfect fitting for the fill port on the brass howitzer shell (gas tank) at menards. I'll solder it in the top of the tank and get a brass cap to go with it. I think I'm going to solder a fuel pickup in the front and rear of the shell, so it'll feed even with low fuel on steep inclines/declines.


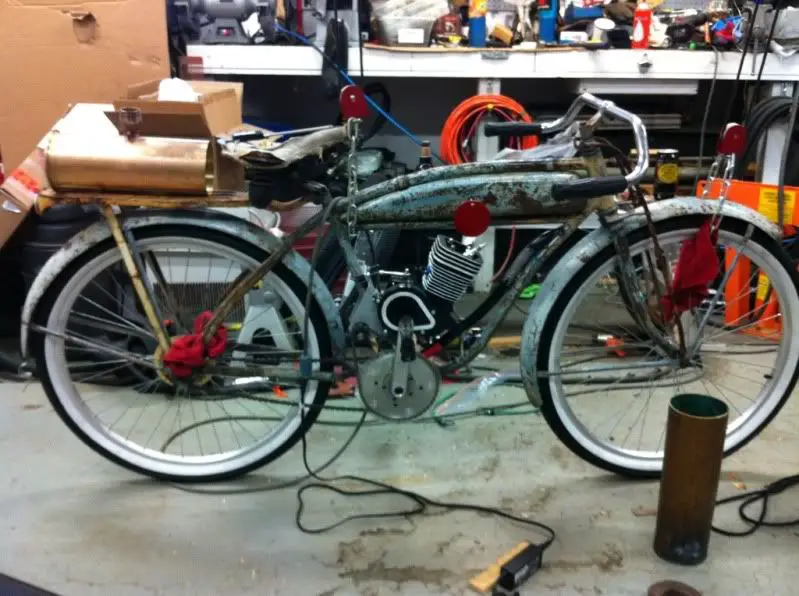
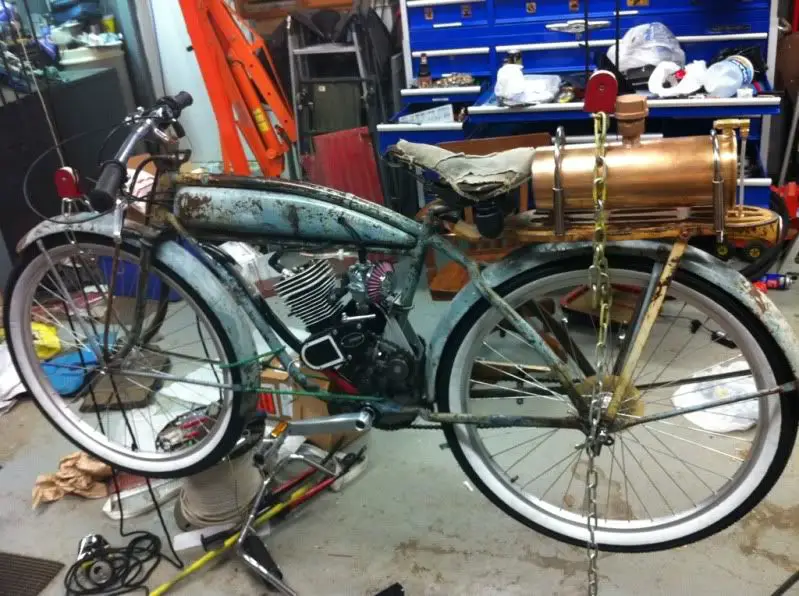
I'm not going to start the tank until I decide how far back I'm moving the seat, since it's going to sit on the rack and be right against the seat.

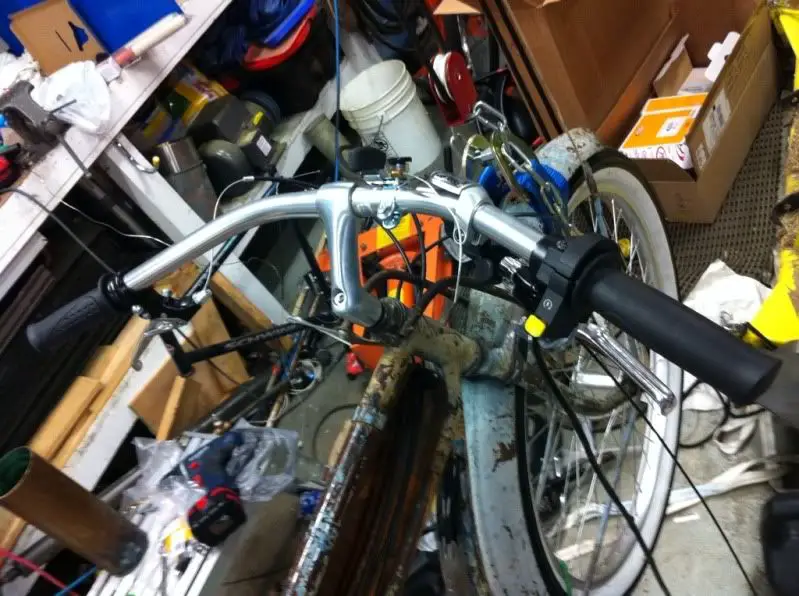
The forks are stretched to fit the hubs now, I'll have to put a string and tape measure on them and be sure it's square, but I need the engine out of the way to do that.
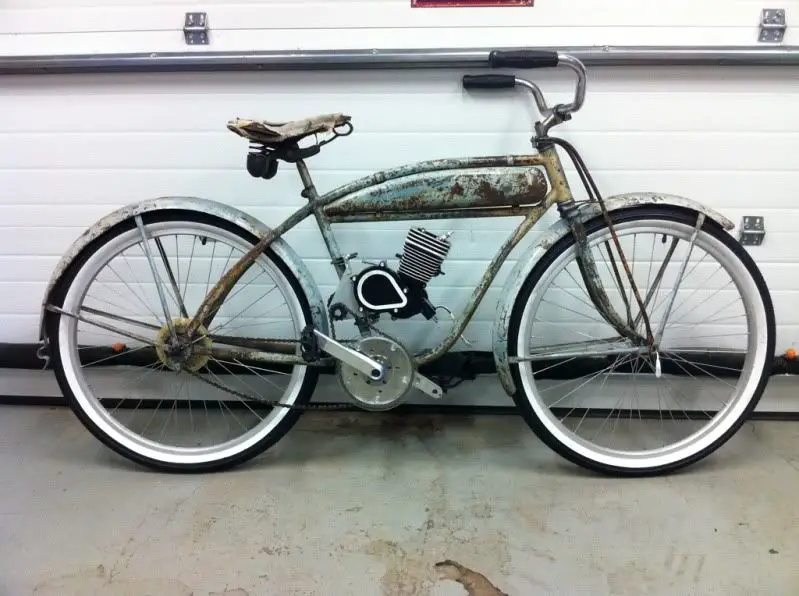
 

crawler

New Member
Aug 5, 2011
63
0
0
Wichita, KS
Well, got a wee bit more messing around done on it. The howitzer shell will only be the length of the rack, obviously. I don't want to cut it until I'm sure I'm done playing with seat posts to get it where I like it for comfort, and can still somewhat pedal the thing, if need be.


The worksman wheels showed up, and are sitting at the powder coaters waiting on the candy apple red (gets sprayed on thursdays, I missed it by two hours, boo).

I'm still debating leaving the black tube I added for the front mount, or making a front mount that just clamps on the original frame and getting rid of the black tube (it's barely tacked in, no problem to remove).

I think I'm going to order some cream fat frank tires for it...
 
Last edited:

crawler

New Member
Aug 5, 2011
63
0
0
Wichita, KS
I got a little done on the tank tonight. I drilled and tapped the primer hole for an 1/8" brass pipe plug. I drilled a hole and soldered in the filler neck, also. Unfortunately, I didn't pay attention to the stampings on the shell when I drilled the fill hole, so they aren't vertical. Oops. Oh well, no biggie. Bar keepers friend cleaned this thing up in no time.


I have a brass plate on order to solder in the end of the shell. The tank is good for 3 quarts, which should get me a good 100 miles.
 

crawler

New Member
Aug 5, 2011
63
0
0
Wichita, KS
that thing looks sick as h#ll what kind of paint did you use. looks like spray paint but im not sure.
It's just the old paint. I like the looks of it, but I'm modifying too much to be able to leave the paint alone. It's going to be powdercoated candy apple red.
 

crawler

New Member
Aug 5, 2011
63
0
0
Wichita, KS
Re: road bikes

Road bike is also called road bicycle. Road bike is also the terms used to refer to racing bicycle. Racing bicycles are designed with drop handlebars and multi gears. There are likewise road bikes available in single and fixed gear varieties.

Road bikes are used primarily on paved road. While you can ride a road bike even on unpaved road, its construction is usually designed for paved road.There are different classifications of road bikes. We will discuss a bit about these road bikes to help you understand what road bikes are as against off-road bikes or mountain bikes.
What does this have to do with anything? Spam?
 

crawler

New Member
Aug 5, 2011
63
0
0
Wichita, KS
Some more puttering. Gas tank is just waiting on the brass to solder in the back of the shell, should be here Tuesday.


I think I have an intake that will work great, waiting on a low clearance filter to be sure everything fits before I weld it solid. I made it from the oil pump pickup tube for an '89 Nissan pickup.


The wheels are out of the powdercoaters and waiting on spokes, and the silver set of shimano deore front/Alfine rear hubs to come in.

I threw the springer front on the schwinn, also.


crawler

New Member
Aug 5, 2011
63
0
0
Wichita, KS
Well, the gas tank is done (pending leak check). It's plumb full of water, no leaks for 3 hours so far. If the leak check is good, I'm sealing the inside once it's dry. Apparently, corroding brass tanks is yet another problem with ethanol.

The red cap is covering a sintered bronze vent, just there to keep water from leaking out at the moment.

The brass plate for the back of the tank was from cut2sizemetals.com, they not only sell metal by the fraction of an inch, for $12 they cut the thing to within .002" of what I spec'd. I didn't have to touch a file to it, just tapped it in and soldered it. :thumbup:


crawler

New Member
Aug 5, 2011
63
0
0
Wichita, KS
Well, the low profile air filter showed up, so the intake manifold is welded. I'll smooth out the welds on it later. The fuel line/filter is in, I'm waiting to drill the frame for the fuel line clamps until I'm 100% sure of the position of the tank and fuel line routing. I trimmed the chain guard, and bought an identical one on eBay to cut up to cover the jackshaft portion of it. I think I'll have enough left of the second one to cover up the engine to jackshaft chain on the left side, also.

I started figuring out cable routing. I'll make new cables before it's said and done, these feel awful. I'll be working on a clutch cable/ roller setup next.


crawler

New Member
Aug 5, 2011
63
0
0
Wichita, KS
Well, I got the intake cleaned up.


New handelbars and stem. There's too much crap to put on them. I'll have to think about how to eliminate some levers and such. I'm already thinking of the thats dac dellorto carb clone to ditch the choke on the handlebars.


Here's the new wheels and tires. I'm waiting on the spokes, should be here in 3 weeks or so, that's the big wait at the moment.


I have a few other things to tidy up, figure out some chain guards, clutch setup, and different front engine mount.
 

crawler

New Member
Aug 5, 2011
63
0
0
Wichita, KS
Well, I got a little more done. I got some copper plated steel and made clamps for the fuel line, fake tank, and the chain guard.


The front mount on the chainguard is looking a little too erector set-ish for my liking. I might modify the original front mount (studs are too short to fit the second crank sprocket), and get it copper plated instead.


I'm debating getting the fenders copper plated, also.
 

crawler

New Member
Aug 5, 2011
63
0
0
Wichita, KS
I didn't like the exhaust clamps that came with the shift kit for mounts. I didn't even have them tight enough to stop it from moving, and they had already started to dent the tubing.

So, I made my own:

I drilled the two bolt holes, countersunk the bolts with a drill bit, then used an end mill to get a flat countersink for the bolts to sit on. After that, I cut the mount to length in the dry cut saw, then split them with my jigsaw. After that, I bolted the two halves back together, drilled a 1/4" pilot hole, drilled a 7/8" hole, ran a .99" reamer (all I had) through to straighten the hole up, then finished it with a 1" bit. Since it had little to cut, and the reamer had made it round, the 1" bit still made a perfect hole.


Now I have to figure out a front mount. I have an idea in my head, we'll see how it turns out. I want it to be fully adjustable, so the engine can be raised or lowered to adjust the chain tension.

Oh, I also got a RT carb. The main reason was to eliminate the handlebar mounted choke, I have too much crap to fit on the bars as is.

For people that have used the sick bike parts throttle assembly...how? It's smaller i.d. than the ht one, and doesn't fit on the bars. What am I missing?
 
Last edited: