Pics and Video of My first chainsaw engine powered bike!

GoldenMotor.com

kyle86

New Member
Nov 22, 2012
23
0
0
Ga
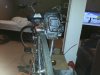
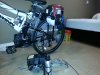
Some of you might remember this from my help thread but thought I would show off my bike and a little info about it. This engine came off a 36cc craftsman chainsaw which is the same as the 36cc poulan. This bike has been extremely reliable. I have driven almost an entire gallon of gas through it so far which seems to be about 80 miles total (80-100mpg). Most of it has been at wide open throttle. According to the GPS it has topped out at 34mph and I was using a 7/8 drive socket which is 1.25 diameter.

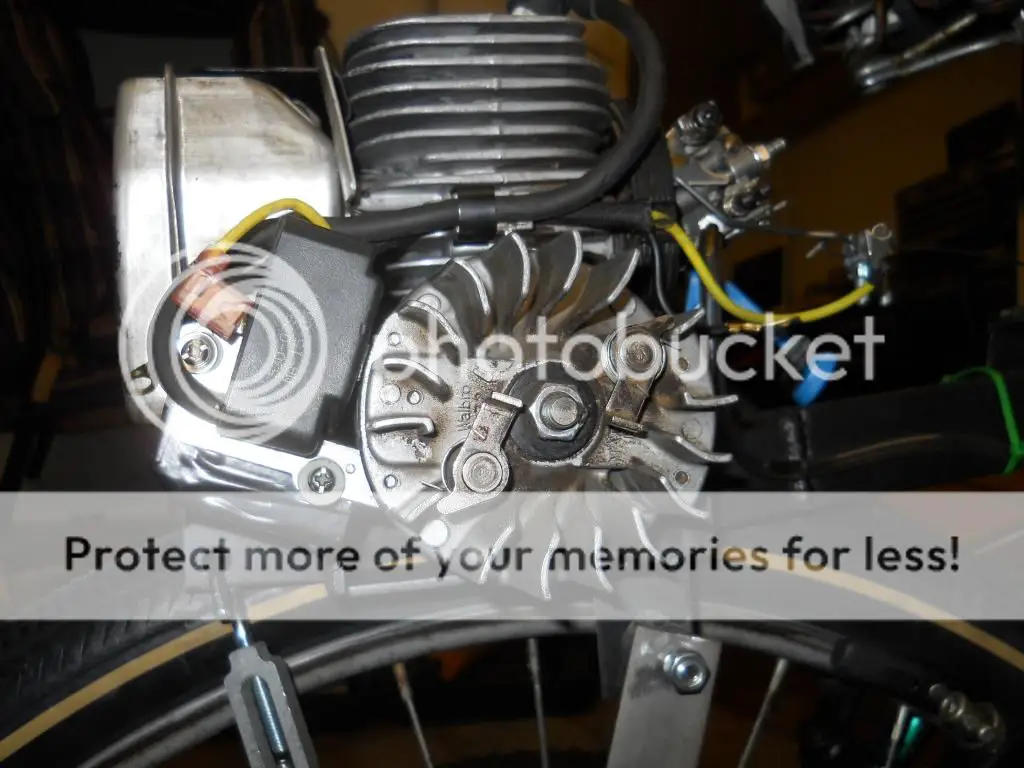
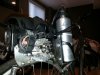
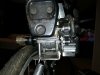
Hardest part was probobaly the custom mount. Since the plastic case holds the magneto, I had to carefully mark it's position to the flywheel and build it into the motormount. Also I had to insulate it with electrical tape and fiber washers since grounding it kills the igntion. Since the case bolts holds the crankcase and cylinder together, the whole engine came apart when I took it out of the plastic case.

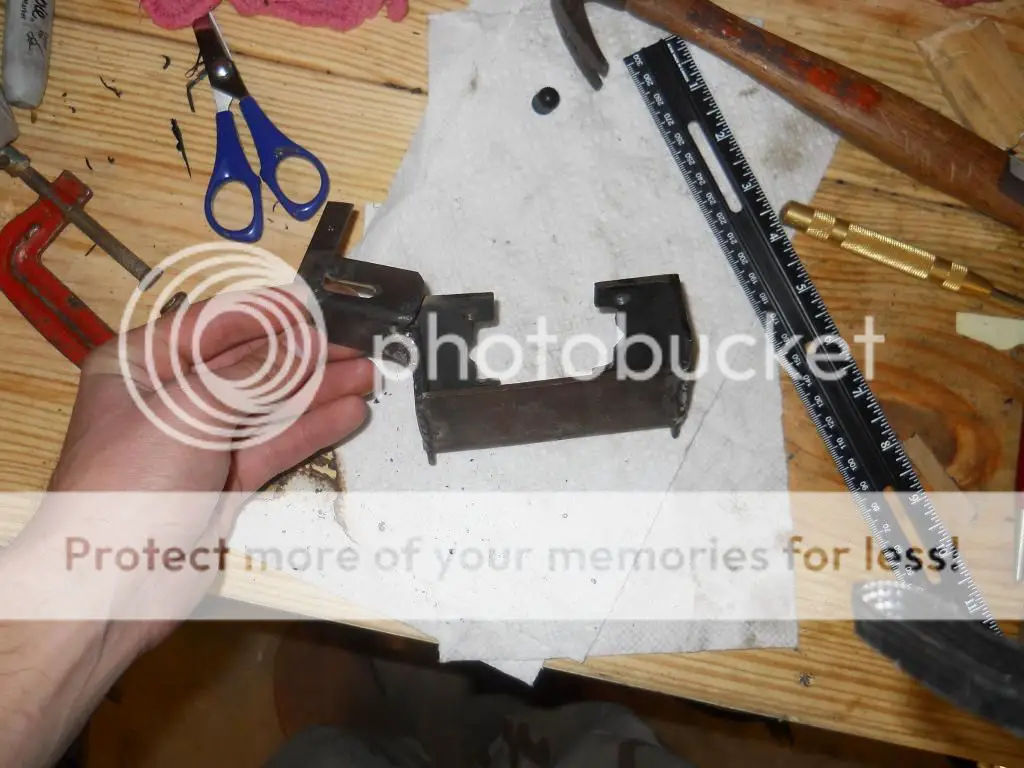
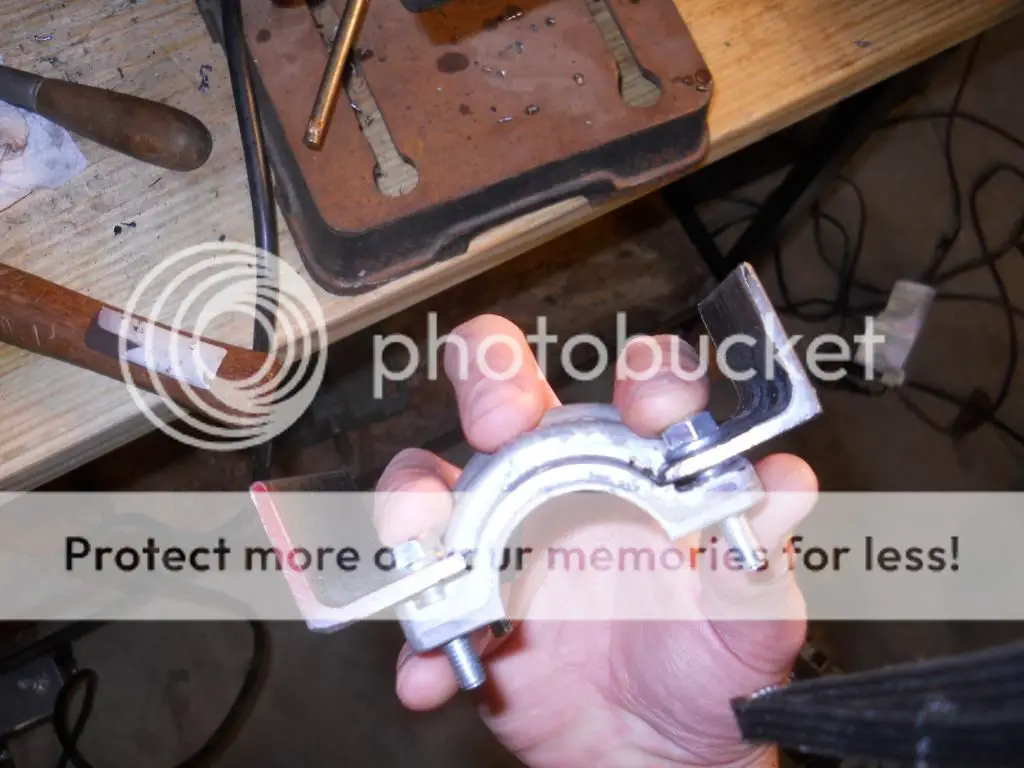
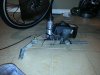
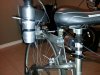
Gas tank was a gatorade bottle which did not hold up well. The new tank is 1 liter fiji water bottle which has worked great! Hmm what else.. I had a gravity/scisor clutch but took it off due to cable strech. Seems to run just fine as direct drive though. Petal to start, and it stalls the engine when you stop. Works awesome! I do have a brace to raise the motor in case of a breakdown that I strap with a wrench to the bike frame. Throttle is connected to the pedal gear selector. Who needs more than 5 gears anyways!! Built the hinge and mount out of 1/8x1 angle steel which is bolted to the frame on the bike side. I can shim it out with washers to help align the drive roller on the wheel where I want it.

I could not find an M8 1.0 reverse thread nut to fit the driveshaft anywhere in town or on the internet so what I did was disassemble the clutch and cut the center out of it. I was going to weld a nut to it however I left it in an oval shape so I could tighten it with channelock pliers. Works great! The socket is a 3/8 drive drilled out slightly bigger to fit over the shaft. A washer sits on the driveshaft shoulder and keeps the socket from sliding onto the cyclinder. Spring came from a trampoline. Only problem I keep having is the case seal keeps leaking.. Had it apart about 4 or 5 times now with permatex motoseal and #3 formagasket. I'm about to just use some black rtv and see how long it holds up.

Anyhow here are the pictures! Hope this gives some ideas for your build.


kyle86

New Member
Nov 22, 2012
23
0
0
Ga
Hey thanks BoDean!

Looks like I'll be pulling it back apart for the 5th time. I used permatex motoseal on the crank halves and I believe it is not curing as is supposed. I stuck it as a test between two washers and after 24 hours was still gooey on the inside. I'm thinking maybe it's set on the shelf too long at the store. Anyone else use this stuff?
 

RicksRides

Member
Feb 22, 2012
864
6
18
osceola IN
Hey thanks BoDean!

Looks like I'll be pulling it back apart for the 5th time. I used permatex motoseal on the crank halves and I believe it is not curing as is supposed. I stuck it as a test between two washers and after 24 hours was still gooey on the inside. I'm thinking maybe it's set on the shelf too long at the store. Anyone else use this stuff?
Kyle I would use a case sealer its a thin grey goo called kawasakibond used to put drag bike case halves together available from shnitz racing out of decatur indiana
 
Last edited:

kyle86

New Member
Nov 22, 2012
23
0
0
Ga
Okay so I called permatex and they said it had expired. I used ultra copper RTV and it has been about 3 weeks and no leaks at all! I know it says not for use in gasoline but I decided to give it a shot anyway. My friend wrecked it and broke the fins off the flywheel and bent a lot of stuff. a little hammering and welding and it's back in one piece!

Here is a much better video
http://www.youtube.com/watch?v=rMcNeMr5Mcg&feature=youtu.be
 

a_dam

New Member
Feb 21, 2009
351
0
0
Momence, IL
Nice work. Simple - in a good way!

I like how the drive shaft is on opposite side from flywheel. I've never seen a motor like that before; very good design for a friction drive.

I'm surprised the roller (socket) doesn't slip on the tire. I use rubber rollers made from hockey puck. I've also heard of people getting good results from wood rollers and rollers made from compressed disks of leather. If yours grips good then that's great; ain't gonna wear out for a while!

Happy cruisin'
 

kyle86

New Member
Nov 22, 2012
23
0
0
Ga
Hey thanks!! It seems most chainsaw mototors used this design and some weedeaters but mosy don't. Since the ds is on the opposite side it has 2 bearings instead of one which is why it does not need a support bearing on the end of the roller to stay durable.

As for slippage, there is some. I have found that if it does not slip at least some, it will bog the motor down and prevent it from getting into the powerband. On a larger cc motor or smaller diameter roller this might not be a problem.
 

MotoMagz

Well-Known Member
Aug 2, 2010
1,817
1,154
113
Michigan
Cool lil engine and build...nice Job.I'm not a fan of rear mounts but that lil engine looks great back there.
 

strangerbynight

New Member
Apr 4, 2013
4
0
0
canada
I have a question, I am working on a poulin 36cc chainsaw friction bike, I am trying to make similar to your bracket, I want to know how do you mount the coil? Does it have to be line up like the original location? I took my housing plastic off and use only the engine, but the coil use to be mount on the plastic housing, can you show me, Also how is your engine been? Any problem mounting the way you mounted? Any air or oil leak? Thanks and I really appreciated your help..

UPDATE
I got everything figured out, just waiting for snow to melt and do the actual test ride, will upload some photos and maybe youtube...
 
Last edited:

strangerbynight

New Member
Apr 4, 2013
4
0
0
canada
Here are some of my photos, I test rode it and works really nice, so much power, only test for 5 minutes, still cold up here in Canada, snow has not completely melted yet..this engine are from a poulin chainsaw, its same engine as op, except i did not make an engine bracket, i took out the 4 original spacer and bolt it on the bracket i make, also i have to carefull mark my coil possition and put on a new bracket, cause the original is mounted on the chainsaw plastic housing..just like the op mention obove, this kits are made from stainless steel from my work, its very sturdy, It's all in a self contain and can be put on any bike, all I have to do is hook it to the brake lever for my gas thotle, and kill switch sorry for my English, its not my native language... Enjoy
 

Attachments

Last edited:

kyle86

New Member
Nov 22, 2012
23
0
0
Ga
I have a question, I am working on a poulin 36cc chainsaw friction bike, I am trying to make similar to your bracket, I want to know how do you mount the coil? Does it have to be line up like the original location? I took my housing plastic off and use only the engine, but the coil use to be mount on the plastic housing, can you show me, Also how is your engine been? Any problem mounting the way you mounted? Any air or oil leak? Thanks and I really appreciated your help..

UPDATE
I got everything figured out, just waiting for snow to melt and do the actual test ride, will upload some photos and maybe youtube...

Hello!!! Glad to see my post helped you build a bike!!!!!! Sorry I didn't check my e-mail for a while I've been busy on a much bigger project ha ha. Anyways glad you got it figured out. For those who may be wanting to do the same, the hardest part of this engine kit is getting the coil mounted. What I did was turn the flwheel to where the magnet is and line it up on the coil where I could destinguish exactly where it was. Then I marked the flywheel to the cylinder jug before I pulled it out of the case. That way when the case is off, you know exactly where the coil is to be positioned outside the case.

This is very important because if you do not perform this correctly your ignition timing will be off which will cause you to loose power. Next problem is if the coil is grounded it will kill the ignition and the bike will not run so the coil must be insulated from the steel mount and even the screws (originally used a plastic case to hold coil). What I did was wrap the mount in electrical tape and use nylon washers, also what I did was wrap my screw threads with electrical tape before putting them through the coil into the mount. This took quite a few tries to get it right. Use a multimeter and test for continuity between mount and coil, if it goes to zero it won't run.

Lastly the distance from the coil to the flywheel is important. Too close and it will rub and damage the parts. Too far and it will not generate spark. It is wise to make some adjustibility to your mount so that you can adjust the distance between coil to flywheel.

As far as my bike....... Well..... the motor runs great but my petal/crank bearings gave way and it won't run. Heck though it was a $20 bike so i got my money's worth. I have another $25 bike to transfer all the parts to but right now in the middle of an LS1 vet motor swap in my 86 camaro.

I plan on doing the bike swap in the next 2 weeks will try to remember to post pics when I do. As for the RTV used to hold the cylinder/crank halves together. It is still holding up wonderfully and no oil, air, or fuel leaks. I used permatex copper.

Another thing here, I tuned the carburetor before the bike broke. I leaned it out until it wouldnt run and then richened it until it hit the powerband of the motor and WOW this thing must go 35mph now, it really responded to the tuning.

Hope this helps doing a similar swap.usflg