A couple of shots BTR

GoldenMotor.com

rickenbiker

New Member
Aug 30, 2011
29
0
0
Bay Area, CA
Off in another direction...a Whizzer build with Schwinn frame, Roadmaster fork, handmade tank, vintage lighting, and a set of Pat's super-cool handlebars. Engine-turned electrical panel, stripped harness, alloy rims, front drum brake, auto clutch. Running, but I haven't ridden it yet, as it still needs fuel line and a bit of wiring yet...


truckd

Well-Known Member
Oct 19, 2010
2,837
134
63
palmdale calif
This bike is definitely in the top ten of best looking M/B's, looks to be very well planned & executed! LOVE! the carb cover & lights.
 

Allen_Wrench

Resident Mad Scientist
Feb 6, 2010
2,784
26
36
Indianapolis
Mr. rickenbiker, that bike is stupendous. Glorious even. Please indulge a couple of my questions though, if you have a moment: 1) Where on earth did you get that tail light? I badly want one just like it. BADLY. 2) Did you make the engine-turned panel yourself? If yes, what is your method? Because I think it turned out well. 3) Did you ride it yet? Because a Whizzer engine packs a bit more punch than a China Girl. You may feel a bit more wind on your face there. Not that it would be a bad thing.
 

rickenbiker

New Member
Aug 30, 2011
29
0
0
Bay Area, CA
Just checked in tonite after a tough, grindy week and these comments made me smile!

I'm still planning to take this thing in my SUV down to Vista (San Diego County) to get it pinstriped, unless somebody can recommend a striper in the Bay Area?

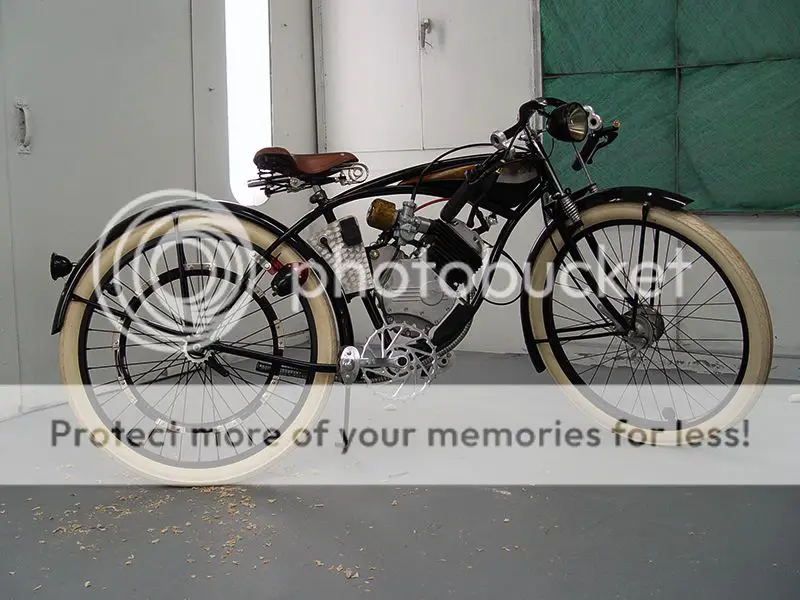
It's still got a full day of assembly left, and then, after I start it, probably an afternoon of dialing it in. Then I can ride it...

The wood chips are from another project, not motorized bike-related.

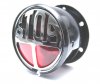
I found the taillight bezel (STOP) as part of a new Chinese taillight assembly on Ebay. The rest of the lighting setup is an NOS, completely unused 1946 Make-A-Light set that I also got on Ebay, in original boxes. The Make-A-Light taillight had a nice housing, which I used, and a glass lens, which I also used. I grafted the Chinese bezel and ring onto the Make-A-Light housing, which had that cool cloth-covered lead and the bracket for the fender attachment. The snap-ring from the Chinese light holds everything together.

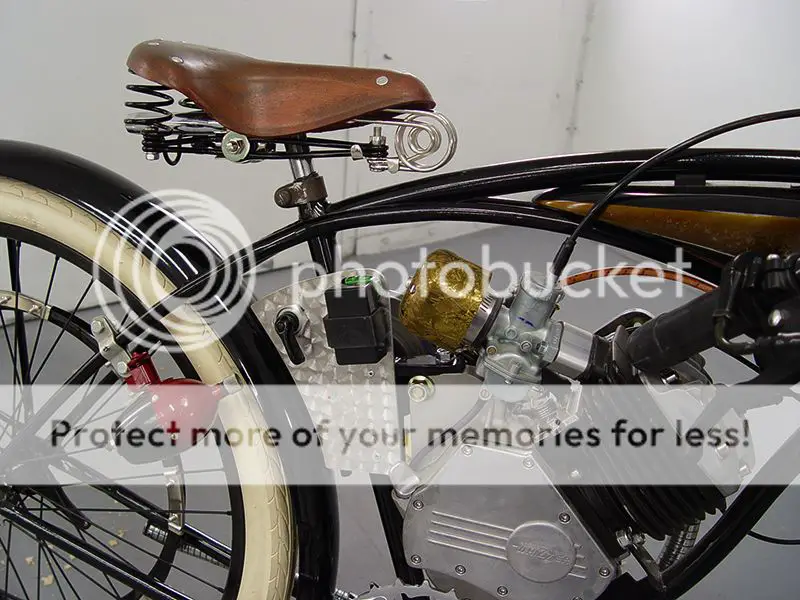
The headlight is the Make-A-Light unit, flipped upside down and mounted to the handlebar stem. The headlight lens is vacuum-formed acetate butyrate (original part) which has shrunken over the years, but still fits OK. It has a cork gasket. I still have not wired the lights up yet; I made up some matching cloth-covered wire to connect the 3 parts. I have not seen any more NOS Make-A-Light sets, though the individual parts come up on Ebay, usually in lousy condition, and at silly prices. The engine-turned panel for the electrics is .060" T6 aluminum plate that I found in my scrap bin. I made an engine-turning mandrel from a piece of broomstick with some sandpaper glued to the end, and I chucked it into my drill press and freehanded the swirls. The weird finish on the air cleaner, clutch/belt cover(not mounted yet) and chain guard (also not mounted yet) is crystallizing lacquer that I mix from nitro and moth crystals. It goes on clear and dries crackly like you see it.

Gas tank is handmade from foam patterns, vacuum-formed mold halves, and composite laid up tank halves into the molds, cleaned up and bonded together. The bungs were bonded in before joining the halves. Everything was smoothed and painted. I did the tank sides in a fake "worn brass" paint finish. It's coated inside with gas tank sealer.

Haven't ridden it yet, of course, but I did start it and it's torquey and sounds like half a small Harley. I suppose it'll be fun--I have a China Girl I built and it's too buzzy.

I am getting antsy to take it for a spin.

Hasn't anyone noticed that thew front wheel is mounted backwards in these shots, LOL?

It's the first thing on my ever-growing punch list...
 

atombikes

New Member
Feb 14, 2010
525
2
0
Northern VA
Hasn't anyone noticed that thew front wheel is mounted backwards in these shots, LOL?
I did, but I also noticed that you don't have the P-clamp on the fork blade that holds the brake's torque arm in place, so I figured the front wheel was just on there for appearances.

What a great build with meticulous details.
 

truckd

Well-Known Member
Oct 19, 2010
2,837
134
63
palmdale calif
Can you shed a little info on the actual tail & the light cup/housing you used, more specific the measurements/sizes of both, I'd like to purchase the STOP light through EBay but don't want to spend the 30 yrs. looking for the light cup/housing.
Thanks! for any and all info.
 

itchybird

Member
Nov 4, 2009
316
6
18
SF Bay Area.
I'm still planning to take this thing in my SUV down to Vista (San Diego County) to get it pinstriped, unless somebody can recommend a striper in the Bay Area?

...
I used a guy named Herb Martinez in Livermore to do the pinstripes on my bike and I plan to use him again. You might want to give him a call before taking everything down to southern Cal.
 

rickenbiker

New Member
Aug 30, 2011
29
0
0
Bay Area, CA
Thanks so much for Herb's and the others' info! I'll be talking to Herb first.

OK, the STOP light that is on Ebay UK is the correct one. You can use their entire housing, which comes with bulbs and pigtail, but you'll have to make up your own bracket. It comes with a weird flat-square bracket that can be cut down and/or added to at your option.

I used the housing from the Make-A-Lite taillight, which has that cool fender bracket already in place. The Make-A-Lite also has a nice glass lens--the UK light has a cheezy plastic one. However, the Make-A-Lite only has a single bulb socket, so a baffle and second socket needs to be added.
 

truckd

Well-Known Member
Oct 19, 2010
2,837
134
63
palmdale calif
rickenbiker.........
Thanks! for the info on the tail light, my biggest question (and I don't mean to bug) what is the circular diameter measurements of where the lens and light bucket join together and I have never heard of "Make A Light"

Again Sorry! to bug but I am really trying not to waist my $$ on experiment components I already have a pretty big plastic container of stuff I purchased and just didn't work out for one reason or another so I'd like to avoid topping the box off.
Thanks!