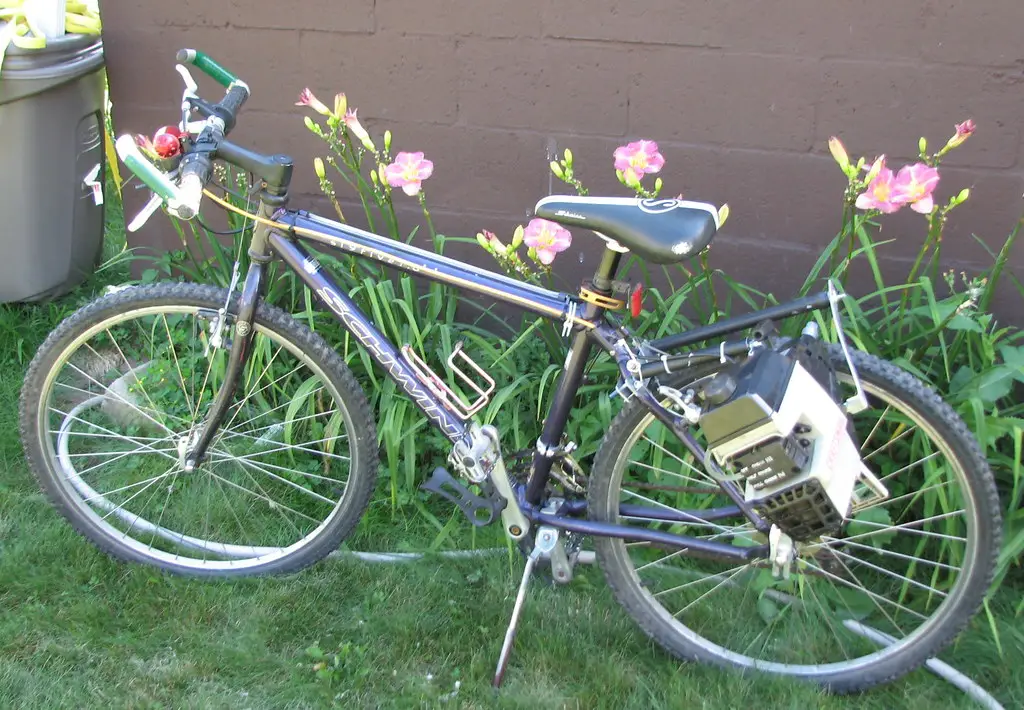
I could wait no longer and I happened upon a free weed wacker on craigslist so... I decided to make a friction drive.
The main goal of this build- cheap, build it out of as much stuff I had around the garage as possible. I've sunk very little cash into this but see how I could.
The engine had very little wrong with it, just needed a new gas line, fixed that quick and easy.
I had tried to make the mounts out of the steel from a broken box fan... Which I think would work if my bike were bigger and I tried a different sort of mount. Anyway. I had plenty of 1/4 all-thread the tubing from the weed wacker and some 1/8th aluminum all left over from other projects.
I bent and shaped a mounting bracket from the aluminum and used the all thread inside the wacker tube to support the all thread and maintain a little stiffness. all in all it works pretty well. It can't haul my fat butt from a standstill but if I get it up to speed it will accelerate, and keep me going at a good clip. I put the speedo on it today and made a mount for a video camera with the last of the wacker tube.
I'll be looking into getting some slick tires for it and a registration.
pics:

It's mounted on a 1996 schwinn S95.6 a sweet ride I've spent hundreds of hours on. I call it the ScwinnWacker now.. I'm looking for another bike to mount this set up on, I'm not too found of the possible damage that the vibrations could do to my precious bike.

Here you can see the old craftsman weedwacker engine on the side of this thing. The mount isn't that visible, but you can see some of it.
It if ever stops raining here I'll get more pictures.
The main goal of this build- cheap, build it out of as much stuff I had around the garage as possible. I've sunk very little cash into this but see how I could.
The engine had very little wrong with it, just needed a new gas line, fixed that quick and easy.
I had tried to make the mounts out of the steel from a broken box fan... Which I think would work if my bike were bigger and I tried a different sort of mount. Anyway. I had plenty of 1/4 all-thread the tubing from the weed wacker and some 1/8th aluminum all left over from other projects.
I bent and shaped a mounting bracket from the aluminum and used the all thread inside the wacker tube to support the all thread and maintain a little stiffness. all in all it works pretty well. It can't haul my fat butt from a standstill but if I get it up to speed it will accelerate, and keep me going at a good clip. I put the speedo on it today and made a mount for a video camera with the last of the wacker tube.
I'll be looking into getting some slick tires for it and a registration.
pics:

It's mounted on a 1996 schwinn S95.6 a sweet ride I've spent hundreds of hours on. I call it the ScwinnWacker now.. I'm looking for another bike to mount this set up on, I'm not too found of the possible damage that the vibrations could do to my precious bike.

Here you can see the old craftsman weedwacker engine on the side of this thing. The mount isn't that visible, but you can see some of it.
It if ever stops raining here I'll get more pictures.


