Schwinn Swindler Project Update!

GoldenMotor.com

Yankee John

New Member
May 11, 2015
15
0
0
MN
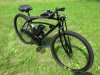
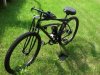
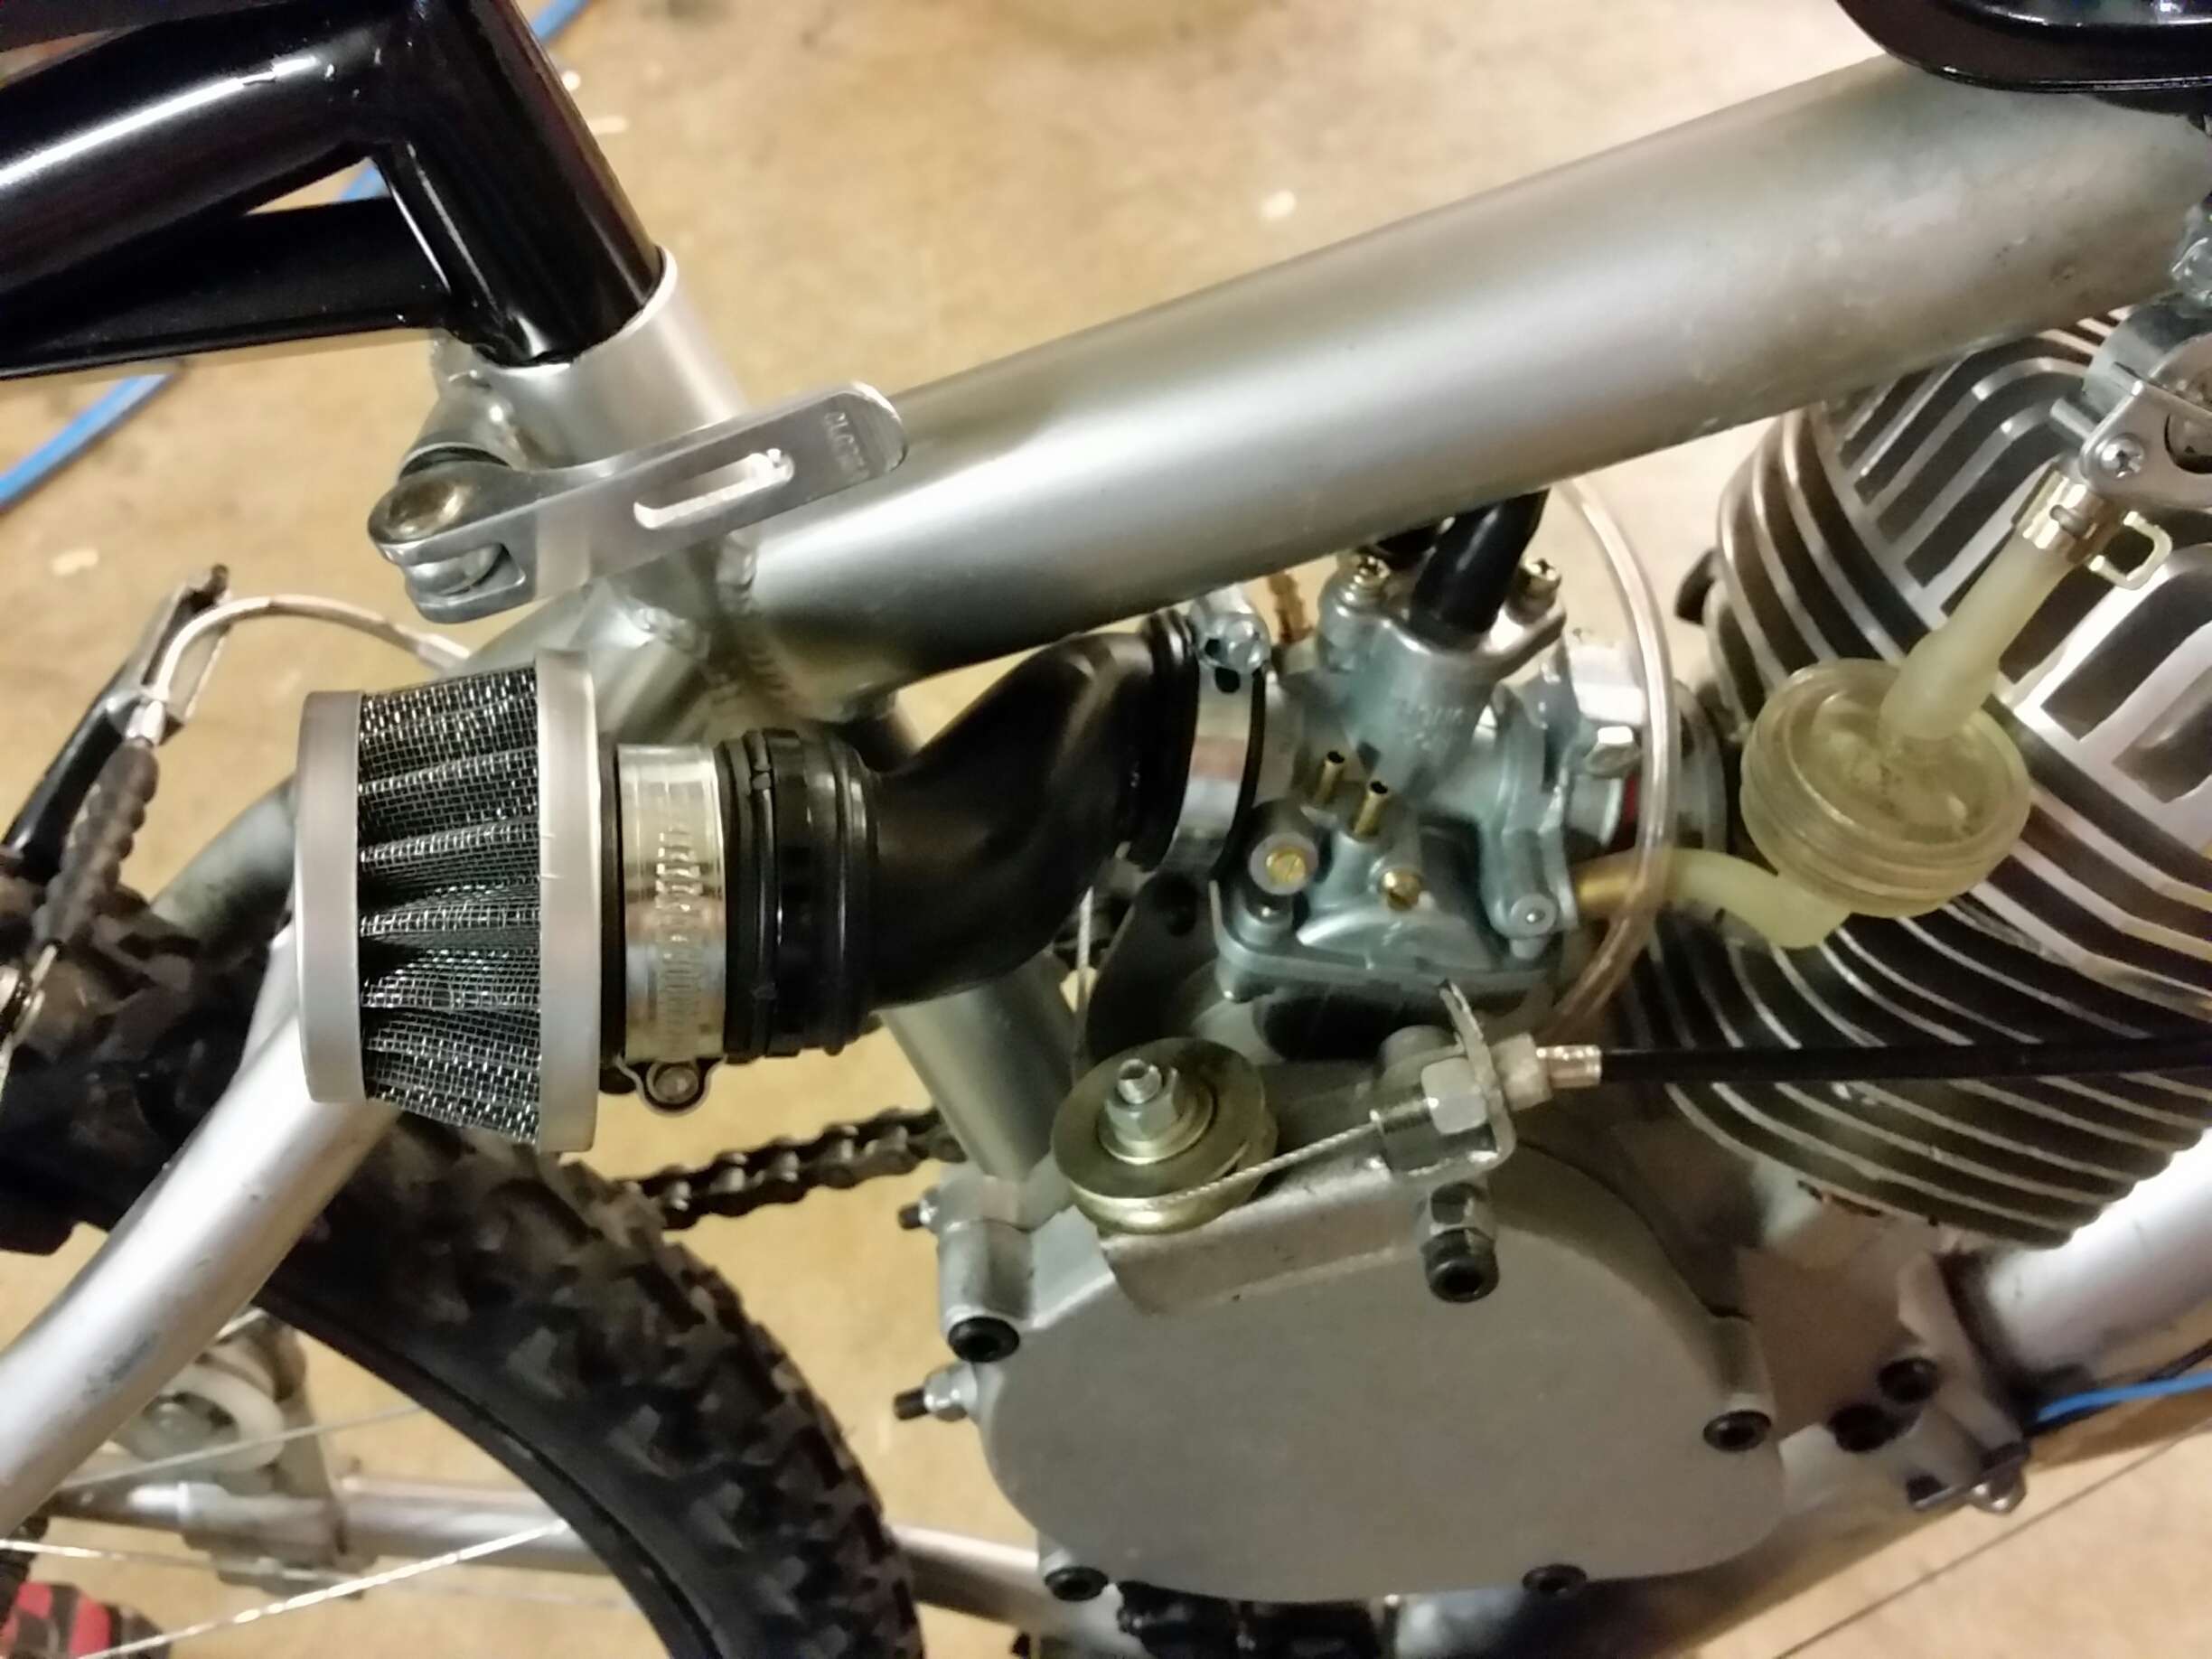
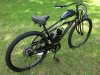
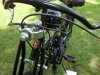
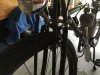
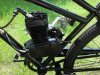
I have the engine, tank, rear sprocket, and ignition coil all mounted up. Removed all decals except for the emblem on the head and a single chain guard decal. Offset intake manifold came in today's mail :)

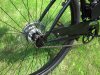
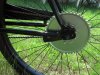
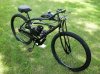
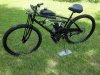
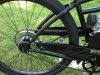
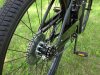
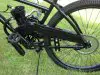
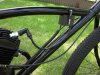
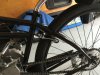
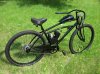
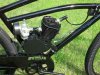
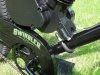
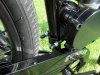
I rattle canned the parts of the kit that weren't already black, and rubber mounted the engine to the frame using heater hose bits and rubber tubing. I had to slightly bend the coaster brake arm for sprocket bolt clearance. I will have to slightly bend the muffler pipe for pedal arm clearance.

Hopefully have it up and running by weeks end!

John
 

Attachments

Davezilla

New Member
Mar 15, 2014
2,705
10
0
San Antonio Texas
Very nice looking build, but do yourself and your bike frame a favor and get rid of all the rubber between the frame and the engine, the rubber will cause a lot more vibration than it will prevent. It's also even been known to saw thru the frame tubing. Check the other posts in here and ask around, the best way to mount these is directly to the frame as solidly as possible, you'll feel a lot less vibration and it'll save your frame from an early death.
I did the same on my first build and it made a huge difference when I got rid of all the rubber, the vibration went completely away.
What you can do if you still feel a buzz on your hand grips is either get a set of weighted bar ends or fill the bar with steel or lead shot, and you can also use a solid steel seat post or cap off the end and fill with lead or steel shot.

Otherwise, your bike looks great.
 

Chaz

Well-Known Member
Jun 3, 2012
1,004
72
48
Vancouver, British Columbia
Very nice looking bike, John. I completely agree with Davezilla and you should lose the rubber mounting before it gives you headaches. I know it kind of seems counter-intuitive but the rubber actually amplifies the vibrations. What the rubber does is allow the motor to vibrate, whereas direct metal to metal mounting will transmit the motor vibration throughout the frame and help to dissipate them. I had to learn the hard way.

happy riding,
 

Yankee John

New Member
May 11, 2015
15
0
0
MN
Wow, I never would have guessed that adding rubber insulators would increase vibration. I took them out and it dropped the engine down a bit. I bolted on the muffer and the crank arm interference is much less. Two quick raps with my dead blow hammer, and no more hitting the crank arms!

Since the pics earlier, I have mounted all the controls and cables. All I have left to do is the chain and idler, then bundle everything up all nice and pretty.

I bought the engine kit off Amazon. I dont remember the sellers store name. With a Swindler, you will definately need the offset intake manifold.

John
 

Yankee John

New Member
May 11, 2015
15
0
0
MN
Oh quick question: My kill switch wires are black and red, not green and yellow/red stripe wires like in the BikeBerry YouTube how-to vid.

I assume the black wire goes with the black wires for the ignition/coil, and the red wire goes with the blue wires??

Also, What should I gap my NGK B5HS spark plug to?

Thanks in advance!!
John
 

Chaz

Well-Known Member
Jun 3, 2012
1,004
72
48
Vancouver, British Columbia
Glad to hear it's coming together nicely. Like I said, that is a really nice looking bike. I had not heard of that frame before and it's a real looker. Love the drop bars too. I just flipped my cruiser bars upside down (like we used to do in the old cafe days) and bent them in a bit. I like that riding position.

just noticed your ignition question. I've only built one bike so far but I think you are correct. It's a kill switch so I think you just have to connect one wire to the each of the engine-cdi box. I don't think it matters which is which because it just shorts out the electricity and kills the engine. It's not like sticking a fork into a wall socket or anything. But do a little searching on this site and you will get the answer. I'm not 100% sure so please double check. Perhaps a more experienced member will confirm or deny my advice. Lots of great guys here willing to share their knowledge. You've come to the right place.

cheers
 

Chaz

Well-Known Member
Jun 3, 2012
1,004
72
48
Vancouver, British Columbia
oops, I missed the spark gap. Common gap is about 025 to 028
I just regapped down to 024 to make it a bit easier to start but i'm impatient and do a few tweeks at the same time. Very un-scientific.

I would say start at 025 and see how it goes.
 

Slogger

Member
Sep 8, 2014
544
4
18
nohio
Hi YJ, Your bike looks pretty sinister all black like that. I like it.
The wiring is really simple once you realize what it does.
Connect red to blue and black to black on the kill button wires. Solder the connections for permanent reliable hookups.
The kill button is a momentary switch that is normally open. When you press and hold it, it connects the blue wire (hot from magneto coil) to black (ground).
Shorting it across to ground deprives the CDI of juice and the engine dies.

Nice looking bike!
 

Davezilla

New Member
Mar 15, 2014
2,705
10
0
San Antonio Texas
Yup... that frame is like my mountainbike's frame that there's no room for the carb with a regular intake manifold... You can use the offset intake if you like a lot of bottom end grunt, but these intakes tend to really limit your engine's top end power and rpm. I went with a shorty intake that puts the carb right behind the cylinder and bored it out to match the stock carb, it loses a little bit of that strong bottom end grunt, but really comes alive at higher rpm.
If you prefer the strong low end torque, the offset intake definitely delivers, but if you're looking for all out speed you might be happier with the shorty intake. I had to notch the air filter to get mine to all fit inside the frame, and I've also used an intake tube from a Yamaha Pw80 so the carb is as close to the engine as possible but it's the air filter that's offset...
Here's a pic of mine with a CNS carb and PW80 intake tube with a free flowing air filter... I really liked the way this looked and fit, but didn't like the CNS carb at all so I switched back to the stock NT carb and was still able to hit 42mph...


I ended up going back to the stock NT carb because even tho the performance of the CNS was good, it was very high maintenance so I spent more time tuning and fixing air leaks, the stock carb fit better and the stock air filter worked but I did have to notch the top of the filter housing so it would fit in the frame.
 
Last edited:

Yankee John

New Member
May 11, 2015
15
0
0
MN
Hi YJ, Your bike looks pretty sinister all black like that. I like it.
The wiring is really simple once you realize what it does.
Connect red to blue and black to black on the kill button wires. Solder the connections for permanent reliable hookups.
The kill button is a momentary switch that is normally open. When you press and hold it, it connects the blue wire (hot from magneto coil) to black (ground).
Shorting it across to ground deprives the CDI of juice and the engine dies.

Nice looking bike!
Thank you! I'm quite a fan of all black, as my daily summer driver is all black too. My baby, an 87 Buick Grand National :D
 

Attachments

Yankee John

New Member
May 11, 2015
15
0
0
MN
Put the finishing touches on my bike today (Except for the front and rear caliper brakes- they are in the mail). Have the gas and oil mixed up (24:1) and will take her on the maiden voyage a bit later today!

John
 

Attachments

Yankee John

New Member
May 11, 2015
15
0
0
MN
Well, Went to start this project for the 1st time tonight and ran into a snag. As soon as I put some gas in, it started leaking. So I quickly removed the tank and emptied the gas back into the jug.

Looking closely, I see that the weld at the base of the leaking stud is not complete. I have contacted the seller from Amazon and am waiting for them to send me a new fuel tank.

Dang, I was so hyped to get this running tonight!!

John
 

Attachments

dob1385

New Member
Sep 9, 2015
38
0
0
new mexico
hello, Im new, been lurking a little. I have a problem that I think you might know how to fix.
I hav)e a schwin swindler: 1st I cant get the left nut off the brake arm. So im thinking about just geting a new coaster brake, but from what iv'e gathered(read here) coaster brakes are considered inadequate on thier own. I see you are adding caliper brakes, how are you attaching them? Also with the 27.5 inch wheels being a little uncommon( im worried about finding thicker tubes and other accesories) am I just better off geting a pair of 26 or 27 inch wheels? thank you for any imout
 

flbikejunkie

New Member
Jun 7, 2015
17
0
1
Ft Myers, FL
I just recently finished my build with this bike and added caliper brakes. You have to remove the fenders and the hole in the fork and rear stays will hold the caliper. In order for the brake pads to reach the rim I had to mount the brake on the inside, see photo. Hope this helps. I also upgraded the pads to quality road bike pads as the ones that came with the calipers did not have much stopping power and wore out quickly. I used the rims that came with the bike. 27.5 inches is becoming more common for mountain bikes and I had no trouble finding a backup inner tube on Amazon.
[/ATTACH]
 

Attachments

dob1385

New Member
Sep 9, 2015
38
0
0
new mexico
thanks for the advise, I thought the fender mounts might be a solution. did it require any other modifications to out the brakes? also what kind of brakes did you get? I would like to order something that I know will work. your bike looks great.