2nd Build - Schwinn Clairmont with EZ Motorbike kit

GoldenMotor.com

abikerider

New Member
Jul 7, 2008
219
0
0
Sacramento, CA
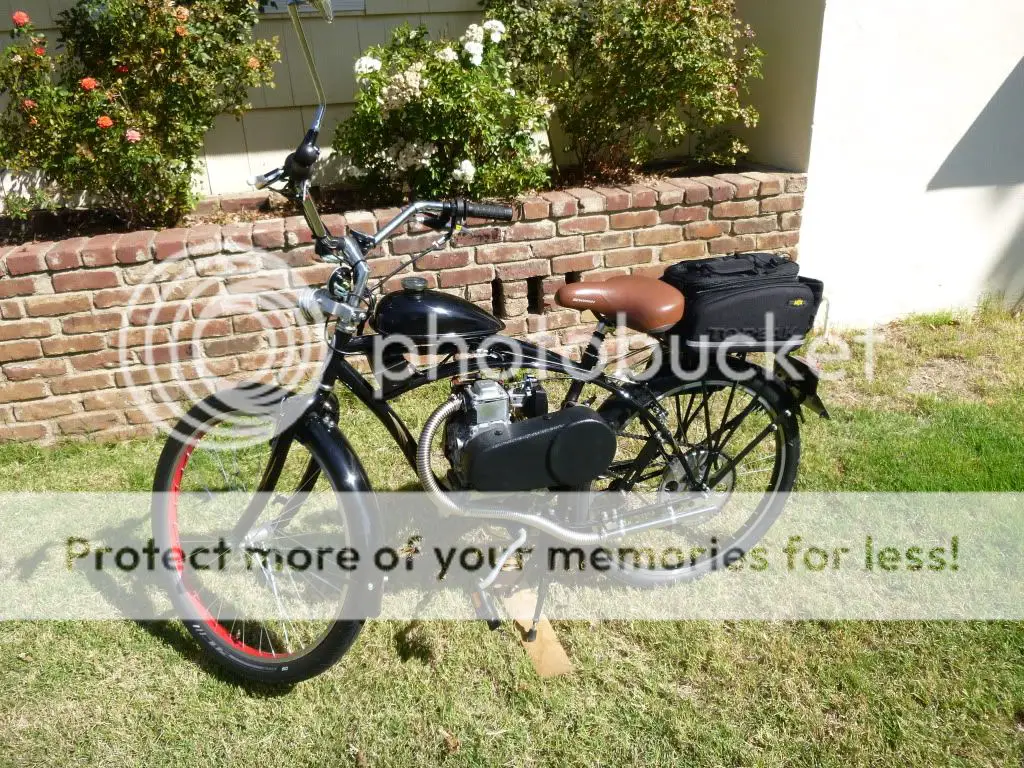
Just thought I'd share my bike build and the ideas that came out of it. Here's a picture of the completed bike.


It has my new alternator


that powers the LED headlight


and taillight.


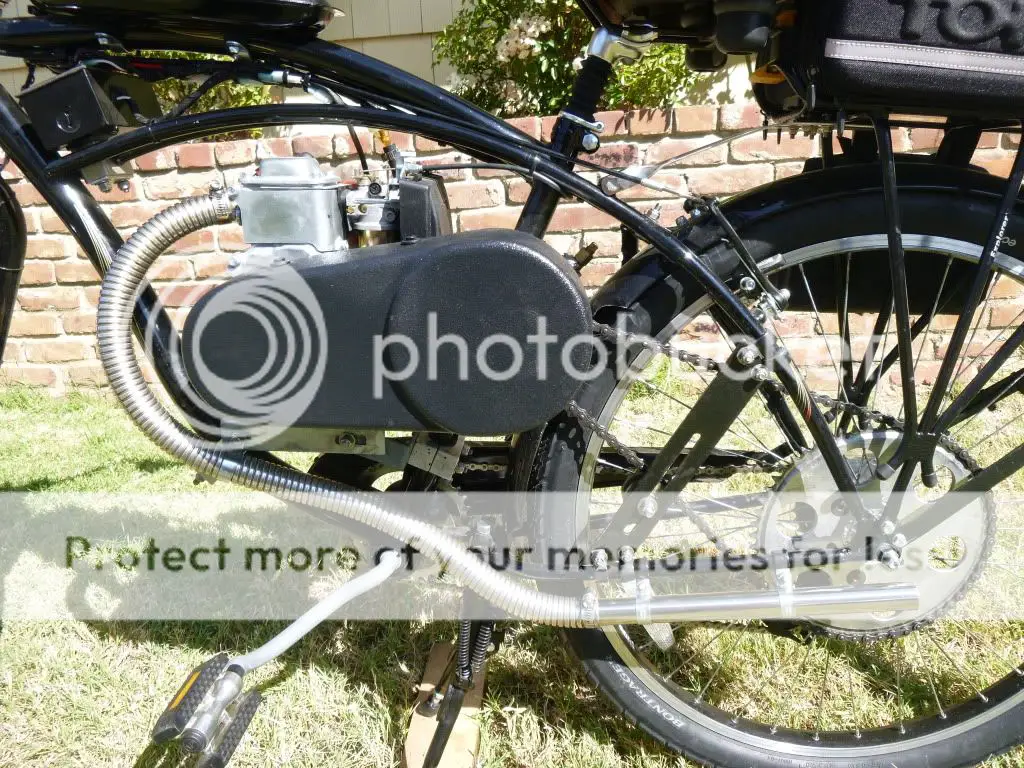
As you can see, I made a custom taillight/license plate bracket for it. It also has my custom engine mount.


Continued...
 

abikerider

New Member
Jul 7, 2008
219
0
0
Sacramento, CA
Here is a pic of my moddified brake lever that now has a brake switch.


I'm going to post how to do this soon. A functioning brake light at last!
Here's a pic of my custom chain tensioner and heavy duty rack and fender struts.


You can also see that it has a manic mechanic sprocket adapter bolted to the steel sprocket that has been drilled to accept it. The original v-brakes have been swapped with standard length v-brakes in black. The original v-brakes had extra long arms that made the brakes feel squishy and hard to adjust - too much leverage. I think they did this to make more room for the fenders but I think it's a mistake to compromise braking for any reason.

Since it has a horn, bright headlight and a functioning taillight and brakelight combo it is totally legal as a moped in California and it will be registered as one. The lights are on all the time and this makes it very visible during the day. What do you think of the bike?
 

abikerider

New Member
Jul 7, 2008
219
0
0
Sacramento, CA
Thanks for the complements. Yes the tensioner is pretty fail proof. It's simple to make with 3/16" thick aluminum and the idler from the kit. I have to give credit to Tyreslider for showing me how to do this. I've never used those tensioners that come with the kits, they are way too scary.
 
Last edited:

abikerider

New Member
Jul 7, 2008
219
0
0
Sacramento, CA
I couldn't get that stock steel sprocket to behave. It had too much side to side warping so I broke down and put a Pirate Cycles sprocket on it.


You can also see in the picture that I removed the paint from the sides of the rims. It was preventing the brakes from working properly. They feel much stronger now. I would recommend that anyone with rim brakes and painted rims be sure to remove the paint from the sides of the rims. The easiest way to do this is with a wire wheel with the tires off. There is a big trend right now for painted rims so it's definitely something to look out for.

I also swapped the mirror with a larger reproduction mirror for a Honda CB750 for better function.


F_Rod81

Dealer
Jan 1, 2011
1,031
2
0
Denver, CO
Looks good. Nice job, keep the pictures coming. Let us know the performance results as well (acceleration, top speed, hills, ect.) (^)
 

abikerider

New Member
Jul 7, 2008
219
0
0
Sacramento, CA
Here's an update to the build. I added a 1" stainless flex exhaust with a stainless tail pipe (piece of a shower curtain rod). Looks and sounds great and boosts the top speed from 34mph to 36mph. You can also see a new rear rack and bag and updated tail light/ licence plate holder.

 
Last edited:

abikerider

New Member
Jul 7, 2008
219
0
0
Sacramento, CA
Also, in the previous photos, there's an electrical box visible below the gas tank and a scooter horn by the headlight. The electrical box contains a rectifier/regulator and a bank of supercapacitors. This stores a charge big enough to power the horn for several seconds. Here's a better picture of the tail light bracket.
 

abikerider

New Member
Jul 7, 2008
219
0
0
Sacramento, CA
What did u use to make the long cutout on the tensioner??
On my first one I drilled a hole at each end of the slot. Then I used an awl and straight edge to scribe two lines between the holes where I would cut. Then I used a sabre saw to cut the slot between the holes. Then I used a file to smooth the saw cut. On the following ones I used a friend's vertical mill to do a much cleaner job. It's not too dificult to do it the first way.
 

WightBoy

Member
Aug 30, 2012
271
0
16
Michigan, USA
I saw that you have a custom made engine mount. What kinds of issues did you have with the EZM one? I am asking because I am building a Clairmont with the Qmatic kit. I am in the process of grinding away some of the material in order to get the mount level but havent been able to level it side to side yet. I am hoping with a few more passes with the grinder wheel that I will get it right though.
 

abikerider

New Member
Jul 7, 2008
219
0
0
Sacramento, CA
I made my own mount because I don't like the mounts that come with any of the kits. My first kit (a Grubee) had a similar mount. It never fit well and the studs on one end were at the wrong angle. They should be perpendical to the tube they are clamping. They fit so poorly around the tube I was worried about ovalizing the tube. They scraped up the paint and kept loosening on me. This motivated me to make my own . I've used them on four bike builds so far with excellent results.
 

abikerider

New Member
Jul 7, 2008
219
0
0
Sacramento, CA
It looks like it'll work fine. With the fine-tuning you are doing you should have a nice bike. Just a thought, since you have a frame with vertical rear drop-outs for the axle, how do you plan on tensioning the rightside chain? I left my derailleur on for this purpose.

I ended up elongating the mount holes on my mount as well as grinding the mounting surface to make it sit level. I then used muffler brackets clamp it to the frame. If that doesn't work I think I will use something like your system. Here is a link to my thread http://motorbicycling.com/showthread.php?p=431812#post431812. Do you think something like this will work? I got the muffler clamp idea from SBP.