Easy Rider 116cc chopper

GoldenMotor.com
Jan 20, 2013
33
0
6
VA
Hey Tom, it’s a Paughco 2.2 gallon tank, unpainted. I got it off ebay, but it’s listed elsewhere, too:

http://www.amazon.com/PAUGHCO-GAS-T...8&qid=1432854499&sr=8-1&keywords=paughco+tank

http://www.paughco.com/2008-catalog...anks For Universal Applications (page 1).html

I’m a little shocked by those prices; mine was WAY cheaper than the current prices on those sites. Guess it was a good move to get it back then, even if I do have to sand the rust off before I paint it.


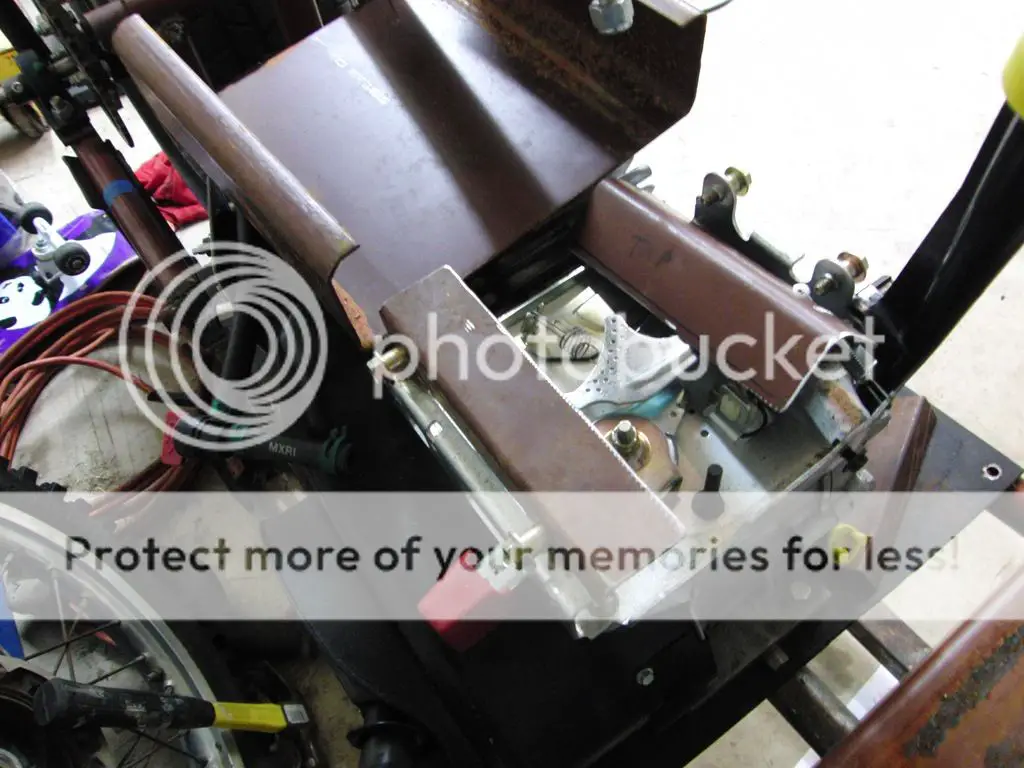
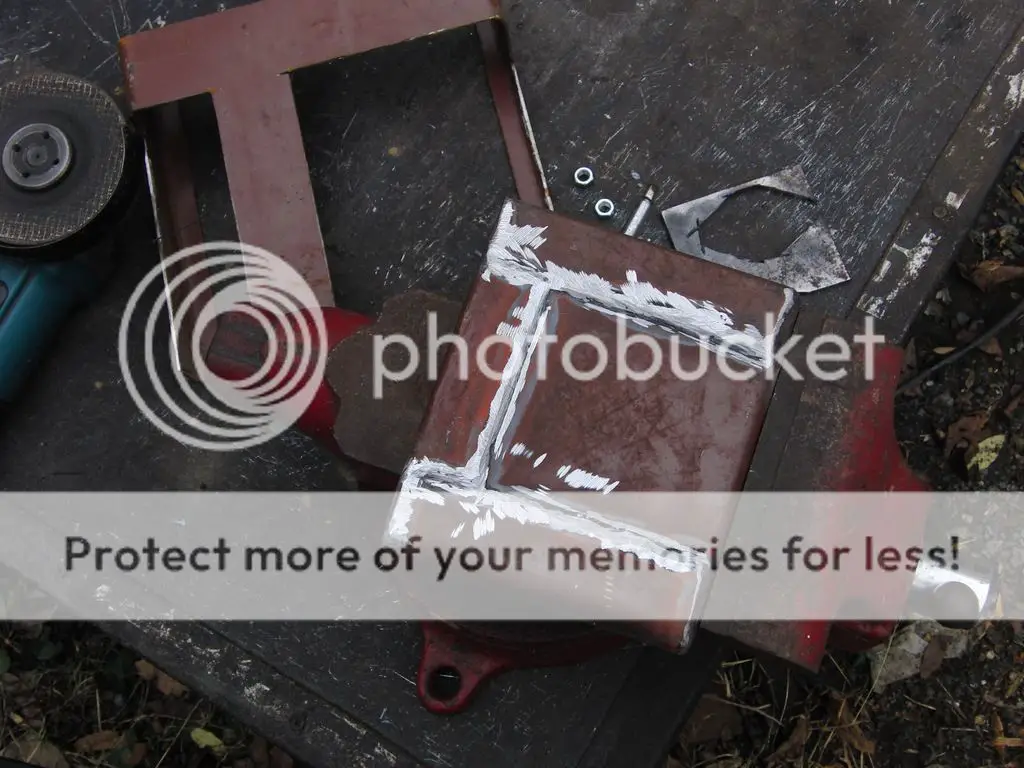
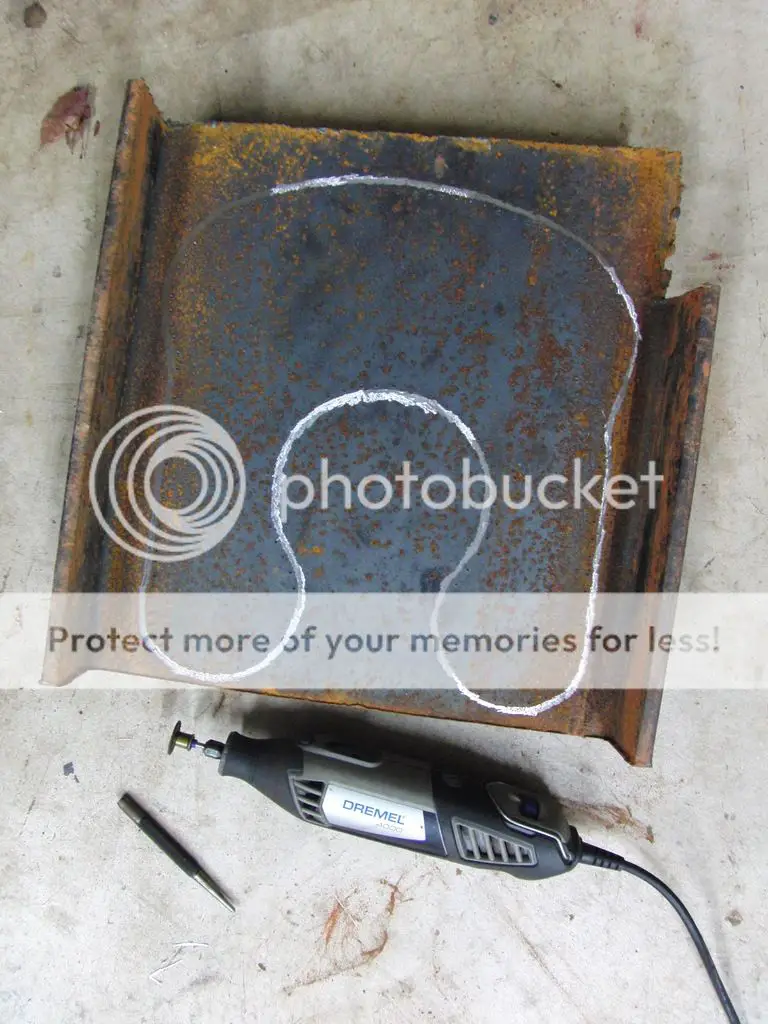
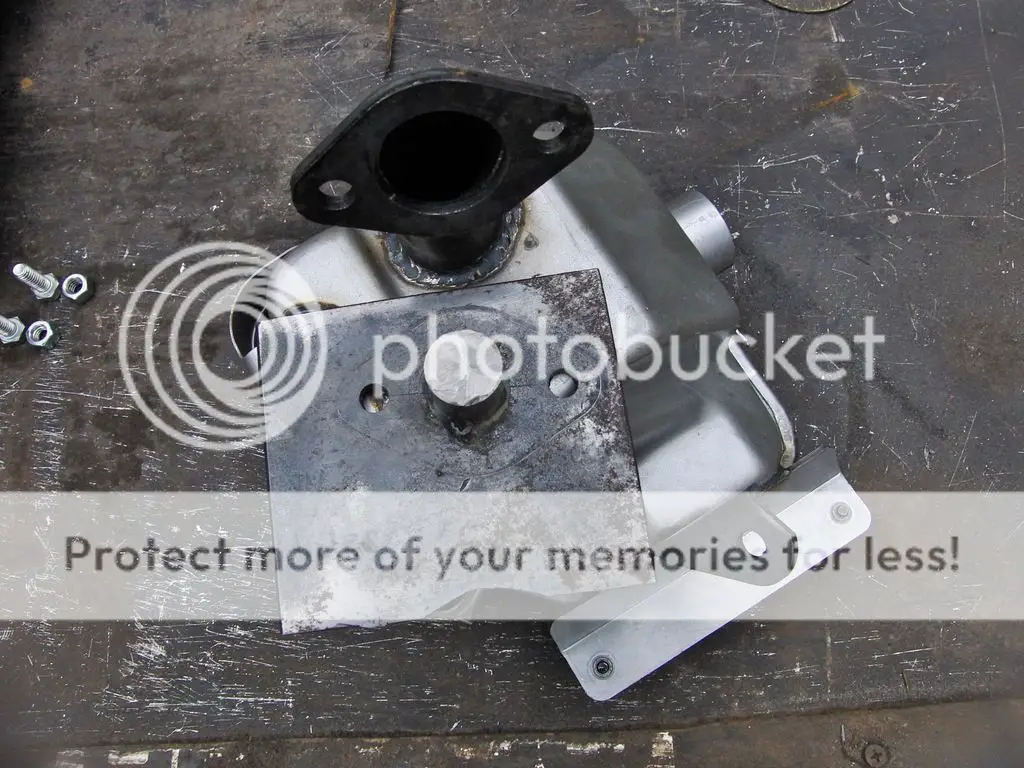
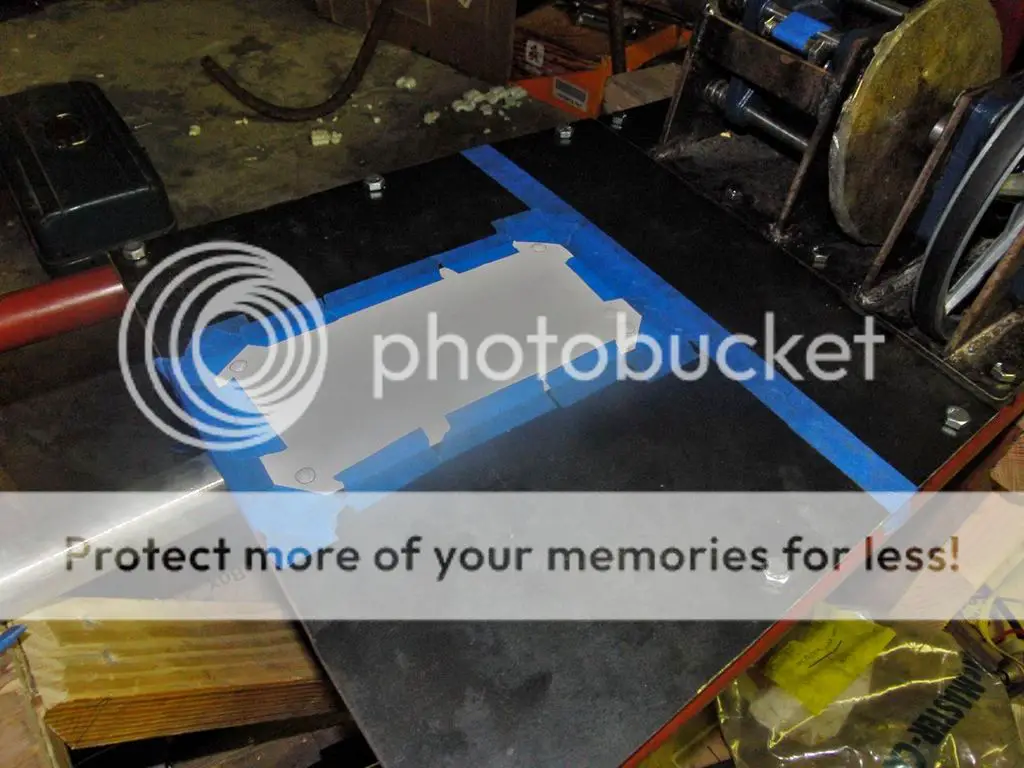
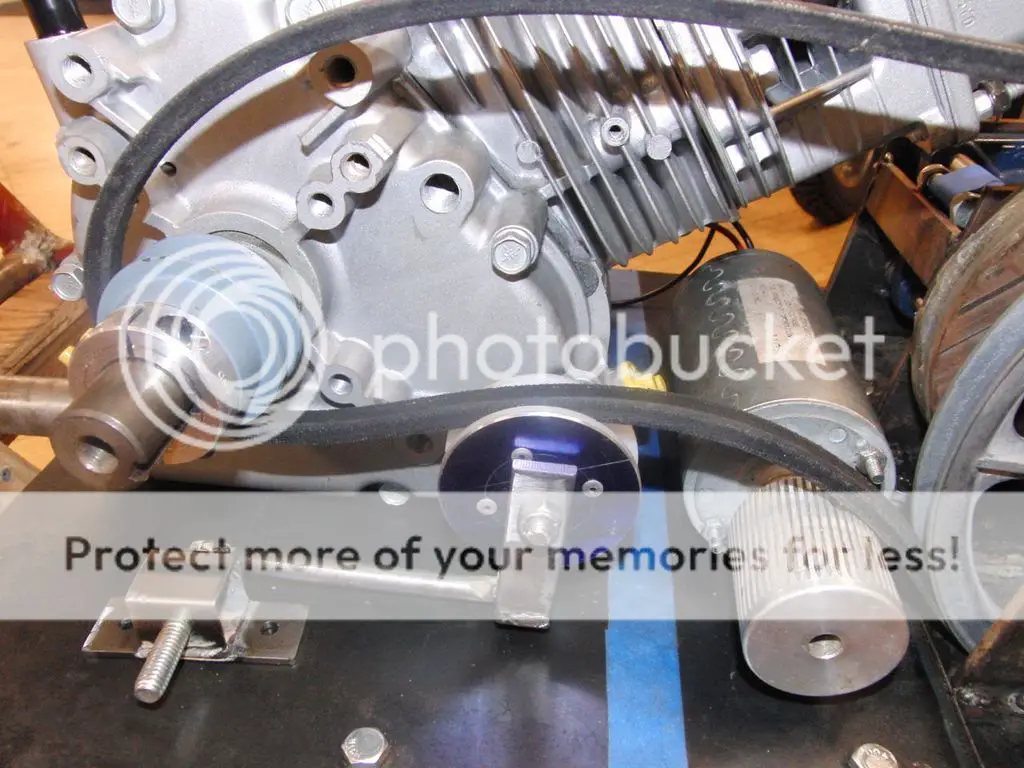
Put yesterday towards welding the freewheel roller ramp to the back axle, welding the roller ramp tube to the hub, and then welding the new lips onto the front forks. So the front wheel is on. It spins nicely, but the bearings rattle a little, so if an opportunity presents itself I might try to replace them. Also welded the extra steel rods into place inside the forks. Then marked out where I want to mount the engine on the skidplate (wiggling it around and judging by eye, which will probably come back to haunt me) and then made a paper template of the bolt pattern. Cut out the template and taped it into the footprint I’d marked on the skidplate, so the holes are ready to center-punch and drill out. I’ll lathe a little jig to center the punch on the template’s circle outline, and then onwards to drilling out the holes and finally mounting the engine!


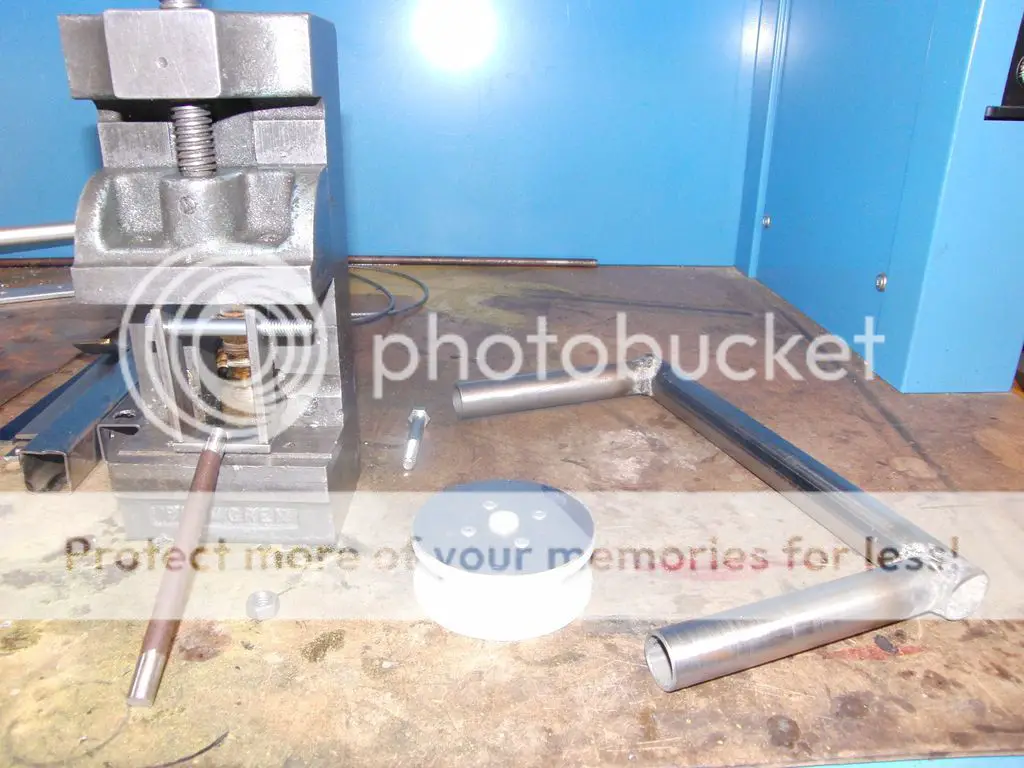
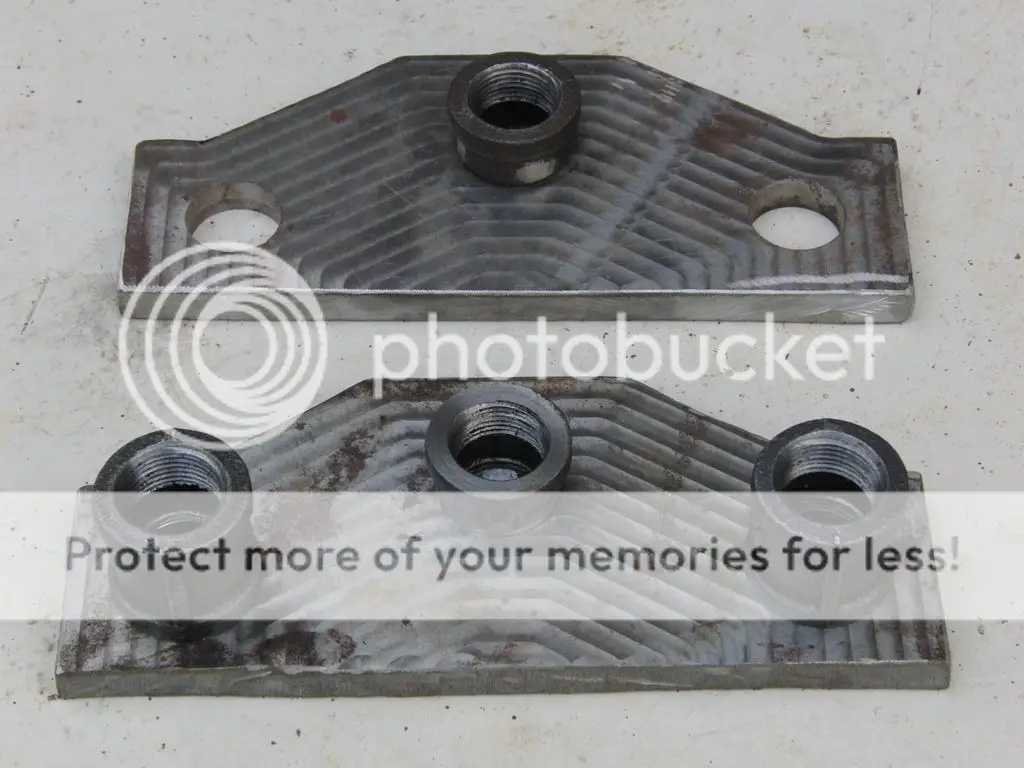
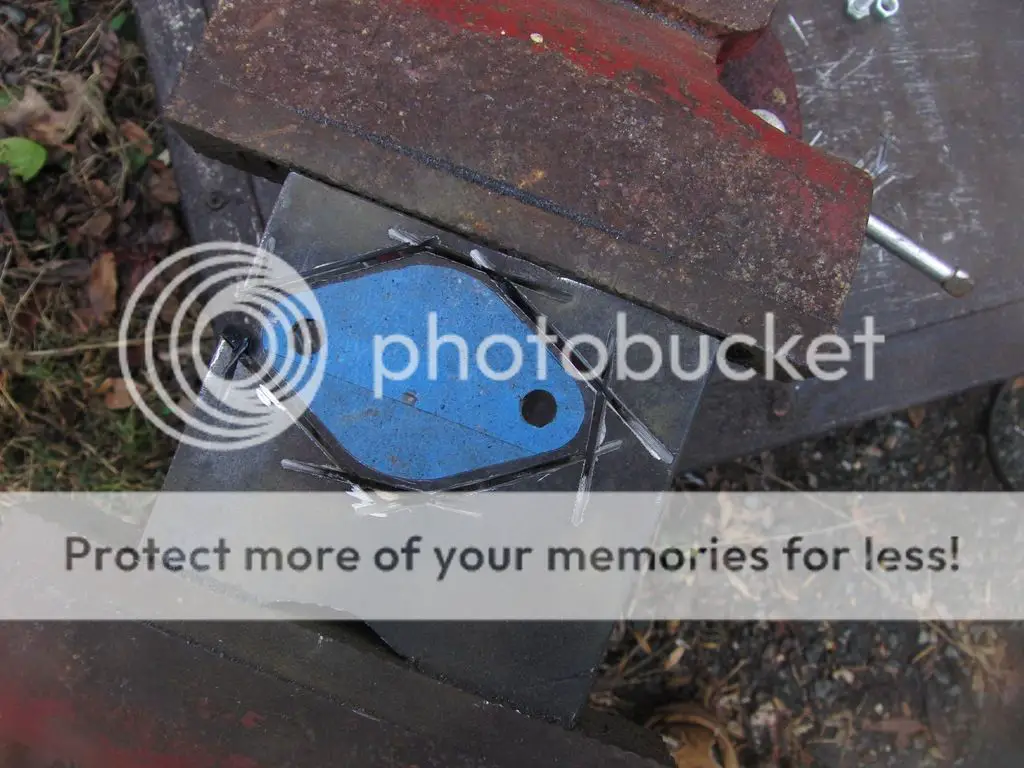
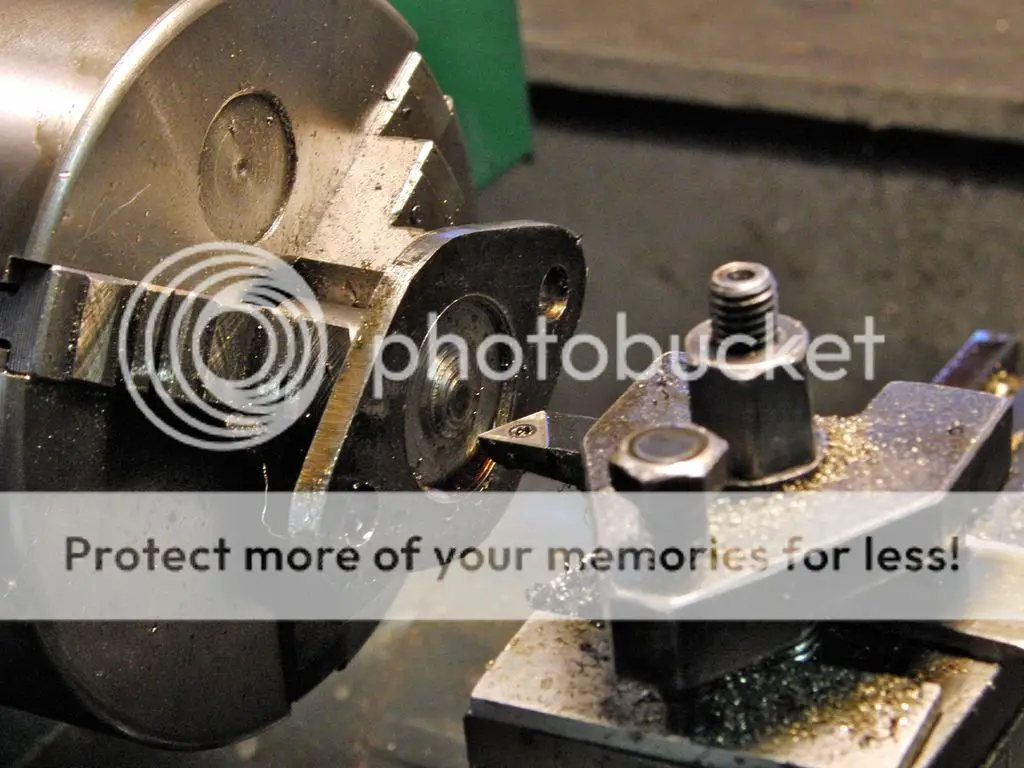
Today I made a new cap for the thin side of the front axle, and machined bolt holes in the caps for the front and back axles. Assembled the freewheel to make sure it all fit together. Just need to lengthen the spacing collar between the hub and the roller by about 0.2” and then everything should spin freely. Dandy.

Still don’t know if the freewheel even works yet, since I haven’t cut the rollers from the rod stock. Could do that with my angle grinder, but can do it properly on the lathe tomorrow so that’s better.

There’s a wobble on the rear 51T sprocket. I think the sprocket itself is warped, because I cut out the mount for it on a water jet saw— so it should be perfect. I’ll have to look very closely at the sprocket to be sure, but I might be in the market for a new one… How much wobble can I tolerate? I know a chain can bend a little sideways, but I don’t want to make it do any more stretching than it has to, considering that the sprockets probably won’t be perfectly aligned anyhow. Either way, I’ll use the slightest of tack-welds to connect the sprocket mount to the freewheel roller in case I need to make a new one!

Gonna be a short day in the shop tomorrow, maybe just two hours, so it will be tough to get everything done. Shop’s closed on the weekends, so the transmission isn’t going to be done until next week. The jackshaft clutch is the weak link in the whole system now, plenty could go wrong there. But at least a clutch is something that can be purchased off the shelf ready to go, if it comes to that.


rig
 
Last edited:
Jan 20, 2013
33
0
6
VA
Got the engine mounted on the skidplate. Looks fairly straight.

Made the freewheel rollers on the lathe.

Lathed a new spacing collar for the rear axle, at the correct length.

Finished the last welds on the freewheel hub and between the freewheel roller and the rear axle.

Assembled the whole freewheel for the first time, and it works. The rollers clatter audibly, but the response time when it engages and disengages is excellent. I'm very pleased with myself.

Now I just need to get the rest of the transmission finished to test it under drive power.

Oh, by the way, I graduated.

rig
 
Jan 20, 2013
33
0
6
VA
Decided today to move the bike from where it was into the machine shop. First time the wheels bore the bike's weight and rolled with the frame. Learned a few things.


1. Without handlebars, the steering torque is ridiculous. Pushing it up a hill in the heat and humidity was fun.

2. The front end alignment is so horrible I think I'm going to tear it apart and start over. I built the shocks without using a lathe, and eyeing "about right" in my backyard just doesn't cut it. The "slight" deviations from straight really make a difference across three and a half feet, and the front wheel is crooked and makes steering even worse.

3. The bike is super heavy, and all it wants to do is tip over.

4. Everything looks pretty solid in the back wheel and freewheel, just need to adjust a spacer a bit to center the wheel on the frame.

So, back end rox, front end sux. And I was a bad engineer back then.

rig
 

Tinsmith

Well-Known Member
May 15, 2009
1,056
259
83
Maryland
What a beast!! I might have missed the discussion, but is it going to be a motorbike W/pedals or a motorcycle? Either way you should be proud of what you have created from scratch.

Dan
 
Jan 20, 2013
33
0
6
VA
So, having the bike in the machine shop makes some things much easier, but it also provides some complications. The shop is open only between 9am and 4pm on weekdays, so that's somewhat limiting. But other than that, it's a lot better.

So far this week, tack welded the sprocket bracket to the freewheel— turns out the wobble was mostly just due to being loosely attached. Now that everything is stuck together, it turns quite nicely. Drilled out one side of the rear axle pin bolts on the mill, and it turned out perfect. Still have to do the pin on the other side of the rear axle and the one on the front axle. Also got the belt tensioner idler pulley done on the lathe, and then milled some steel rod and welded together a hinged arm for it. Haven't decided how to spring it, though. Maybe just weld on a curved leg of spring steel underneath?


Been working on the chain tensioner, but it's not done. I'm sort of last in line to use the welding station, because other people are doing real work and I feel bad getting in their way.

But, it's coming along. And Dan, I was originally debating whether or not to have pedals, but then I pretty quickly concluded that it would just complicate things for me. So I guess it sort of doesn't belong on this forum, but heck, my thread title is even wrong, so oh well.

rig
 
Last edited:

2door

Moderator
Staff member
Sep 15, 2008
16,302
175
63
Littleton, Colorado
Rig,
It might not have pedals but still an interesting project that many of us are watching. Don't worry, you're still welcome here, pedals or no pedals. :)

Tom
 
Jan 20, 2013
33
0
6
VA
Drilled the second rear axle pin bolt-hole on the mill yesterday. Then the best thing ever happened. Was pushing it from the machine shop to the Batcave, and both the front fork anchors snapped off. So, other than the short term pain of having to drag it rather than roll it to a place where I could take off the forks dangling from the triple-tree, this is actually great, for two reasons:

1) If I'd finished the transmission and ridden the bike without this having happened yet, I'd certainly would have crashed and might have died or gotten seriously injured.

2) This is the perfect opportunity to fix the misalignment in the front wheel.

The reason the anchors snapped off is that the welds adhering them to the triple tree were total garbage. Absolute crap. Not nearly hot enough, so the beads were super globby and didn't penetrate into the plate steel much at all. And, I didn't do any welding prep for the rusty surface of the steel, so that didn't help either. Nice to know I've gotten better at welding since starting this project.


So, I'm going to take apart the whole triple tree assembly next week and re-weld all of the joints. That means that this weekend is just going to be spent grinding away the old welds and thinking about how to properly align the forks. But hey, no complaints.


It's also a nice opportunity to take a picture of the inside of the headset, since I don't have any pictures from fabrication. Takes a big pipe wrench to get the headset apart (going to fix that by welding on a nut to each cap so in the future I can thread in a bolt and then use a breaker bar to unscrew the caps instead).


And here's the chain tensioner arm I was gonna weld together before this other stuff came up, and part of the skid-brake assembly.


rig
 
Jan 20, 2013
33
0
6
VA
To fix the front fork alignment, I decided to CNC new triple tree plates. Didn't snap a picture of the mill buzzing away, but here is the finished product (still need to cut out the perimeter):


Wish I had a fancy way to cut it out, but I'll just use an angle grinder.

rig
 
Jan 20, 2013
33
0
6
VA
The generator that runs off of the pulley side of the drivetrain needed some sort of mount to attach it (a cylinder) to the skidplate (a plane).

After a whole lot of scrounging around, talked to the facilities folks at school and they found a steam pipe with an inside diameter close to (but under) the diameter of the motor case. So I put it in the lathe and bored it out to exactly the right diameter, and then cut two half-inch wide pieces off of it to hold the motor. This was a while ago.


Drew up a plate mount template on cardboard to get an idea of the size and bolt pattern.


Cut the mount template out of plate steel, and welded the pieces of pipe to the plate. Cut and drilled tabs to hold tightening bolts, welded them on, and then used a reciprocating saw to slice through the pipe sections between the tabs. This resulted in the ability to tighten the pipe sections securely around the motor.


Then I tack-welded the motor mount into position and used it as a guide to drill holes in the skidplate.

Been messing with a few other things. Gas tank has been truly frustrating. Got bolts and drilled holes to mount the tank to the frame, but the petcocks I purchased off-brand on ebay didn't fit. Figured it was my fault for getting the cheap ones, so I payed nearly twice again as much for the official Paugcho ones and they didn't fit either. And, they were identical to the off-brand ones!! No returns. Giving the benefit of the doubt, maybe the tank I've got is an inferior Paughco clone, and the threads in the bungs are bad. So maybe tapping them will fix it, or something.


rig
 
Jan 20, 2013
33
0
6
VA
To get the new triple tree assembled, needed a lathe. Had some difficulty finding one locally (the machine shop at school had me really spoiled!). But, at last I was able to find somebody that had one. The goal was to turn the ends of the pipe fittings so that they would fit exactly into the indentations I put in the new triple tree design.


When I'd turned all the pipe fittings to spec, welded them in place (the recessed fit should also make the joints stronger, in addition to the welds) and reassembled the triple tree and front forks. Not sure if it's perfectly straight, but it is pretty close now! Very grateful for precise machining, and for being able to use the lathe.

Also, took the gas tank to a radiator shop and got them to re-tap the petcock threads. That helped a bunch and now the tank is usable, so the next thing to do there will be to paint it.

Working on making a seat out of hard foam insulation, plywood, and fake leather. Should work; first attempt ruined a bit of plywood, but that's not the end of the world. More careful the second time around, for sure!

Some transmission work is also slowly happening. Getting to the final details after that, like brakes. This thing will get done!

rig
 
Jan 20, 2013
33
0
6
VA
Ok, so not much progress, but some.

Bought an old Yamaha 400 Special that wasn't running and parted it out. Barely made a profit, but got a pair of handlebars for free with the throttle and clutch cables. The clutch cable will become the front brake cable and the throttle will stay the throttle, although messing with the governor might be confusing (think I got it figured out, but time will tell). One side of the handlebars is a little bent, but can't argue with free.


For the first time other than the purchased parts, paid somebody else to do my machining since I don't have machine shop access any more. (Despite the machining fees quickly adding up to a down payment on an older lathe, there's no place to put one even then...) So, got a friend to make some spacers for the handlebar clamps and got a guy who works at a machine shop to throw the top of the triple tree into the milling machine over a lunch break and put two holes in.

On my own time, cut out and welded together a stand for the bike with locking casters. Makes it so much easier to work on!


Front axle is at yet another machine shop getting threaded for a 9/16-12 nut. Figured pinning it in like the rear axle wouldn't be as safe due to the massive rake and all the steering torque. But, that should be done Monday, and then it should be ready for a roll around the neighborhood!


rig
 
Last edited:
Jan 20, 2013
33
0
6
VA
Lots of little things, and with more pictures along the way than usual. This will take a few posts.

Halfway through connecting the throttle grip on the handlebars to the engine. Fortunately the throttle cable from the parts bike was long enough to reach the governor. But, the throttle cable pulls in the opposite direction of the throttle opening lever in the engine's governor box.

So, there are multiple ways around this but since the goal is to avoid actually altering the engine (the dream is to put it all back together at some point and sell it to help fund an upgrade to a gas V-twin or a single cylinder diesel), decided to build a new cover for the governor box. The cover will have a sprung lever in it that will reverse the pull direction and provide the return pull for the handlebar throttle grip.


Used some 12 or 14 gauge structural steel for the box. Flux core welded it together. Spent a lot of time figuring out the lever positions, but haven't gone ahead with that yet.


Welds were ok, but not great. Hadn't used the wire welder in a few months. There was also a bit of warping from the heat. Ground the welds smooth so it will look better painted, and it's plenty strong.


rig
 
Last edited:
Jan 20, 2013
33
0
6
VA
Some of the welds on the front forks were garbage, and some joints were just tacked together. Since the forks are probably the most stressed part of the frame, ground all the joints and stick welded them together with 7018 at lunch break during my last week working on a construction crew in Oklahoma.


Never had done stick welding before working out there, but was decent by the end of it. Stops and starts are still a little ugly. This is the prettiest bead on the forks, although had to grind some of the smoothest section out for the axle end clearance.


rig
 
Jan 20, 2013
33
0
6
VA
Process of making a plate bridging the front forks below the suspension. This plate will keep both sides of the forks moving together so the axle will stay straight. It also will provide a surface to mount the front brake levers.


First, drew up the plan for the plate.


Used a piece of paper to make a template for transferring the pattern to plate steel. Advantage of doing only half is that it will automatically make the plate symmetrical.


Taped the template to a piece of scrap I-beam from the construction site, and used a center punch to create a dotted line around the edge. Flipped the template over the tape to do the other side.


Used a dremel tool to make a very visible line for where to cut with an oxy-acetylene torch.


The torch cut on the bare metal outline left about a 1/16" of steel outside the center punch marks. Ground down the perimeter to the punch marks. Took forever but the result is nice.

rig
 
Jan 20, 2013
33
0
6
VA
And yet more.

Tailpipe work began with making a new bracket based on the one on the original muffler for the engine. Could have saved a lot of time by just sawing off the muffler pipe, but that would make it tough to put the engine back together and sell it.

So, started off by marking two holes in a piece of 1/4" plate steel that lined up with the muffler bolt pattern. Center punched a point for the center, and then used the sharp tips of my cheap Chinese dial calipers as a compass to scribe arcs for the two outer holes. Bolted the plate to the muffler bracket to line up the holes and marked the outline of the bracket onto the plate. Also marked three circles in the center: the OD of a plug for putting the place in a lathe, the ID of the tailpipe tube, and the OD of the tailpipe tube. Had a bit of rod stock with a faced end, so cut off that faced end and tack welded it inside the circle for the lathe plug.


Then covered the other side of the steel plate in blue masking tape and bolted it to the muffler bracket again, and cut the masking tape around the perimeter with a razor to make a template. Using that template, roughed out the outline with a cutoff wheel.


Cleaned up the perimeter of the template with a grinding wheel and a bastard file. Didn't have to be this good, but why not?


Then threw the plate in the lathe and cut out the center. There was probably a more elegant way of doing it, but this worked perfectly.


Waiting on a mandrel-bent J tube to show up in the mail, but then it's time to figure out where the tailpipe is going to go. What's the best way to secure the tailpipe to the frame? Is there a high-temperature rubberized vibration mount available, or is it better to just weld on a flange and bolt it super tightly to the frame? Also still debating whether to add one of the mufflers from the Yamaha parts bike onto the end of the tailpipe...

rig
 

curtisfox

Well-Known Member
Dec 29, 2008
6,048
3,959
113
minesota
KOOL stuff, a lot of guys get a washer with the right size center hole, then drill and trim the excess off. Then weld it on ................Curt
 

MEASURE TWICE

Well-Known Member
Jul 13, 2010
2,744
1,221
113
CA
Like seeing this going together!

I have question about the size belt used. I am using on my bike (also no pedal off road legal only), 4L belt. It only has enough grab to not slip if not too steep a hill. 4L or A section is fairly narrow, B section etc are successively wider. What belt / pulley type do you have on this build.

MT