Adjustable Front Motor Mount

GoldenMotor.com

KCvale

Well-Known Member
Feb 28, 2010
3,966
57
48
Phoenix,AZ
I wish I had metal shop.

It is hard to take a new design idea to test having to pay someone else to do the cutting and and bending for a prototype, but if you are lucky like me you have a metal shop literally right around the corner.

I have really grown tired of customizing a front mount for most every bike because the motor mounts 'won't play nice' with the frame so I set out to make a mount that should fit most anything I ever build again, and I am starting with this existing direct drive bike someone else built and converting it to Jackshaft Shift Kit bike so the customer can use his 7-speed derailer gears.

Considering JS kits dual great motor mounts and 3rd 'height keeper' clap and shaft I could have just used what was laying around and use the existing frame hole bolt to secure it to hold the front...


But that is a frame hole mount and I hate those.
I would rater squeeze the frame a bit and use standard parts than compromise the frame by drilling a hole in it.

This first version will work dandy for this build, it just a custom 'L' bracket with a secure muffler clap to attach it to the frame on the side.
I will get to why that is important in a bit, but here are the test fit pics.


Note the grove to slide the motor up and down, important for a JS bike.


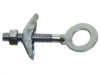
Nothing to it really, just a prefect fitting $1.50 muffler clamp and custom 'L' bracket. The rub with the bracket is not having the tools to do it yourself, that sucker cost me $35 to have made today!

It does the job though, and it doesn't get in the way on the left side of the bike where the tailpipe comes down and leaves space to get to most anything you want to adjust.


More tomorrow when I wrap this up, it's been a long day.
 

corgi1

New Member
Aug 13, 2009
2,272
3
0
KCMO
2 hindges bolted togeather in a s-shape w/locking bolts through the hindge pin holes and held to the frame w/a muffler clamp w/half cut pipe to protect the frame,,,,,,,,,,your design w/two muffler clamp bottoms and pipe half pieces and all thread and two of your L brakets ,one from each side,or a combo of both of these for extra high,,,,,,,,,,,a longer piece of the heavy steel (used for swhinn chopper mounts)wood beam support so there would be two front clamps(on half pipes) and build off of that base for a mount
 

corgi1

New Member
Aug 13, 2009
2,272
3
0
KCMO
tall from the frame,,make a box over piece from the heavy metal Lows beam support w/the two muffler clamp bottoms(remember half pipes so the clamps dont crush the frame) and a double hindge w/the lock bolts in the hindge pin holes ,on top to reach the motor mount at any angle
 

KCvale

Well-Known Member
Feb 28, 2010
3,966
57
48
Phoenix,AZ
nice idea. you should make the bracket out of 3/16th and put a gusset in the 90* bend. looks promising.
I agree. For a regular direct drive motor setup 3/16" or even 1/4" will be used, that was the thickest the sheet metal shop had and this is not a direct drive, it is a Jackshaft drive.

There is no side lateral pull, all the pull is directed down.
Besides the 2 muffler clamps 6.5" inches apart securing the JS to the seat post, there is also an adjustable vertical stud holder keeping the motor from moving down.

I do think this design would be perfect for left direct drive mounts as well, besides putting some meat where you need it, against the right side downtube, and you get the added bonus of no pesky left mounting blocks that tend to get in the way of tailpipes. Heck, even the new 2010 muffler with the heat shield fit with room to spare.


I think she turned out quite nice and an absolute pleasure to ride.
It goes through the gears smooth, and flat hauls a$$.
And vibration? Pffttt, all I felt was the that front tires imperfections at 40.


I took her for hard 20 some mile run up and down hills to get the new chains broke in, now is when I will really appreciate that adjustable front mount as the motor needs to go up a bit ;-}
 

Venice Motor Bikes

Custom Builder / Dealer/Los Angeles
Mar 20, 2008
7,271
1,810
113
Los Angeles, CA.
The general wisdom among the people here who are really good at building these bikes is that the mounts need to be as 'solid & stout' as possible... The mount you have there just doesn't fit that description.

Think about what would happen to a customer if that mount eventually failed & the rear mounting bolts quickly followed while riding that bike going 'flat out at 40 MPH'. Just think about it for a minute.... :(
 
Last edited:

Goat Herder

Gutter Rider
Apr 28, 2008
6,237
20
38
N.M.
I was Googling Chain adjusters for old school B.M.X bikes. KCvale gave me a great Idea! I might just want to copy your approach but have the L bracket done twice over. Have it on both sides. With stays made out of all thread and tack welded nuts..Just like the SBP rear adjuster..but have identical adjusters in the front.
to incorporate sorta this approach ! bmx chain adjusters - Google Search
The Idea I am thinking here is the stays help make it a tighter mount plus hinders the hardware from working its way and rattling loose.
I have the thought of tack welding in flat strap steel inside the muffler clamps too so's the round ridge that muffler clamps were designed to do holding [exhaust pipes together] does not happen to my bikes tubing.. Which I kind of hated on my first go around..
 

Attachments

Last edited:

KCvale

Well-Known Member
Feb 28, 2010
3,966
57
48
Phoenix,AZ
Think about what would happen to a customer if that mount eventually failed & the rear mounting bolts quickly followed while riding that bike going 'flat out at 40 MPH'. Just think about it for a minute.... :(
I agree, 3/16th or 1/4" steel needs to be used for stock rear mount and direct drive, but hey it's a forum and where we share so let's think about This Particular Mount.

"What would happen if the front mount failed.."

Better yet, what would happen if there was NO Front Mount At All on this bike?

The main direction the motor will want to move is almost straight down, but with a very slight tendency to want to twist to the right.


Heck, take the Jackshaft portion completely out of the picture and look at the upper and lower main mounts themselves. Just that dual mount with a flat piece to the motor with it's bracket removed is way better than stock.

In this case there is even a 3rd mount to combat that downward force!
The front mount has no downward load.

Now for the sake of argument the rider beats it to heck and never tightens a single thing and all three of those muffler clamps get loose enough to move, which is really loose to even slide one...
The motor will move down and slightly right under power.

OK, the motor has about ~3/8" twist before the muffler hits the frame to the right, about the same before it hits the pedals to the left. The chain from the JS to the Freewheel Chainring will be loose and jump, and the rider will feel like an idiot for not doing any basic maintenance.

But please, tell me again how that 1"x1"x1/16" area of unsupported galvanized steel of my bracket can fail, and why this was the worst solution to This Mount when it does exactly what I needed it to do?
 

Goat Herder

Gutter Rider
Apr 28, 2008
6,237
20
38
N.M.
I did much the same..and while I hated this bike so I never cared to do it right it was my proving grounds. I cracked the engine block casing where the J Shaft plates go on this bike.I let something else loose get though...[rattling did it ] The rattling motor stole horse power too. Why I never cracked the frame where I did the cheesy front mount is beyond me but I will never do it that way again I guess I live and learn
 
Last edited:

corgi1

New Member
Aug 13, 2009
2,272
3
0
KCMO
the rotation of the gear in the pic would pull the motor to the left,there are 2 clamps on the seat tube yes, and if the one bolt that looks different is bolted to the steel plate then the motor should remain in the up-right position but the rear pull on the chain will torque left,
 
Last edited:

Goat Herder

Gutter Rider
Apr 28, 2008
6,237
20
38
N.M.
Also with my own experience with the Same J shaft. My all thread adjuster tended to to twist letting the motor sink down on the tube as it rattled