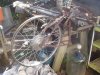
Lacing your own wheel can save you a lot of money over having it done in a bike shop and is a satisfying thing to be able to say, "I built my wheels". It also gives you a lot of latitude in components. At the moment I'm in the middle of lacing up a pair of 1950's Schwinn rims to Atom drum brake hubs using 11 gauge spokes. When I'm done I'll have heavy duty wheels that look good and cost me less than $50.00 for the pair. The spokes are for a Whizzer and were purchased on ebay for $45.00 for a pair of wheels including shipping. I had the rims from a donor and the Atom drums came from a rusty old moped, now cleaned up and looking almost like new.
Learning to lace a wheel was a daunting undertaking for me. I'm not at all good at visualizing how to do something from instructions, don't like puzzles and get lost in math. I also have a traumatic brain injury from being struck by lightning about twenty years ago. (Lightning entered my left ear and came out between my eyes, forehead and crown... ouch!) I have dyslexia now and am a lot slower learning new things. I tell you this not because I'm looking for sympathy, but to convince you that if someone like me can learn to lace a wheel, then so can you. No genius required, but patience and perseverance will win the day.
Even now after having laced a number of wheels I like to review in my mind or through a tutorial how to go about it. There are tutorials on U tube which is where I learned how to do my first wheel, but this morning I was looking at the newsletter from Atomic Zombie and noticed they had a link to a tutorial they've done on lacing a 36 hole wheel in a 3 cross pattern. I looked at it and it is a good one. You can either look at the pictures and read the text or click on a link for video and spoken dialogue with no extra chatter, attempts at humor or such. Right to the how to point of what to do. As a former teacher, I like that. Give it a look and see what you think.
http://www.atomiczombie.com/Tutorial - 3 Cross Wheel Lacing - Page 1.aspx
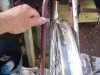
If you are using extra thick spokes in 11 or 10 gauge you may wish to skip tucking the spoke under the last cross as they do not want to bend. I notice on my Worksman wheel that there is no tucking under. So that's what I do on mine. If I'm using 12 gauge spokes then I do the tuck under as in this tutorial. Good information here on truing your wheel as well. Good luck! If you have a favorite tutorial, then share it! Same with building tips... pass them along.
SB
Learning to lace a wheel was a daunting undertaking for me. I'm not at all good at visualizing how to do something from instructions, don't like puzzles and get lost in math. I also have a traumatic brain injury from being struck by lightning about twenty years ago. (Lightning entered my left ear and came out between my eyes, forehead and crown... ouch!) I have dyslexia now and am a lot slower learning new things. I tell you this not because I'm looking for sympathy, but to convince you that if someone like me can learn to lace a wheel, then so can you. No genius required, but patience and perseverance will win the day.
Even now after having laced a number of wheels I like to review in my mind or through a tutorial how to go about it. There are tutorials on U tube which is where I learned how to do my first wheel, but this morning I was looking at the newsletter from Atomic Zombie and noticed they had a link to a tutorial they've done on lacing a 36 hole wheel in a 3 cross pattern. I looked at it and it is a good one. You can either look at the pictures and read the text or click on a link for video and spoken dialogue with no extra chatter, attempts at humor or such. Right to the how to point of what to do. As a former teacher, I like that. Give it a look and see what you think.
http://www.atomiczombie.com/Tutorial - 3 Cross Wheel Lacing - Page 1.aspx
If you are using extra thick spokes in 11 or 10 gauge you may wish to skip tucking the spoke under the last cross as they do not want to bend. I notice on my Worksman wheel that there is no tucking under. So that's what I do on mine. If I'm using 12 gauge spokes then I do the tuck under as in this tutorial. Good information here on truing your wheel as well. Good luck! If you have a favorite tutorial, then share it! Same with building tips... pass them along.
SB
Last edited:
")