WOW ! I thought I was on my own...

GoldenMotor.com

dougy

New Member
Jan 17, 2011
147
0
0
54
Southport, England
I've took the week off to try make a bit of progress, theres been loads of time in me shed making brackets an on the lathe making tiny bits an bobs that been taking all me time up and theres loads more to do so the next few pics are all abit smoke an mirrors.
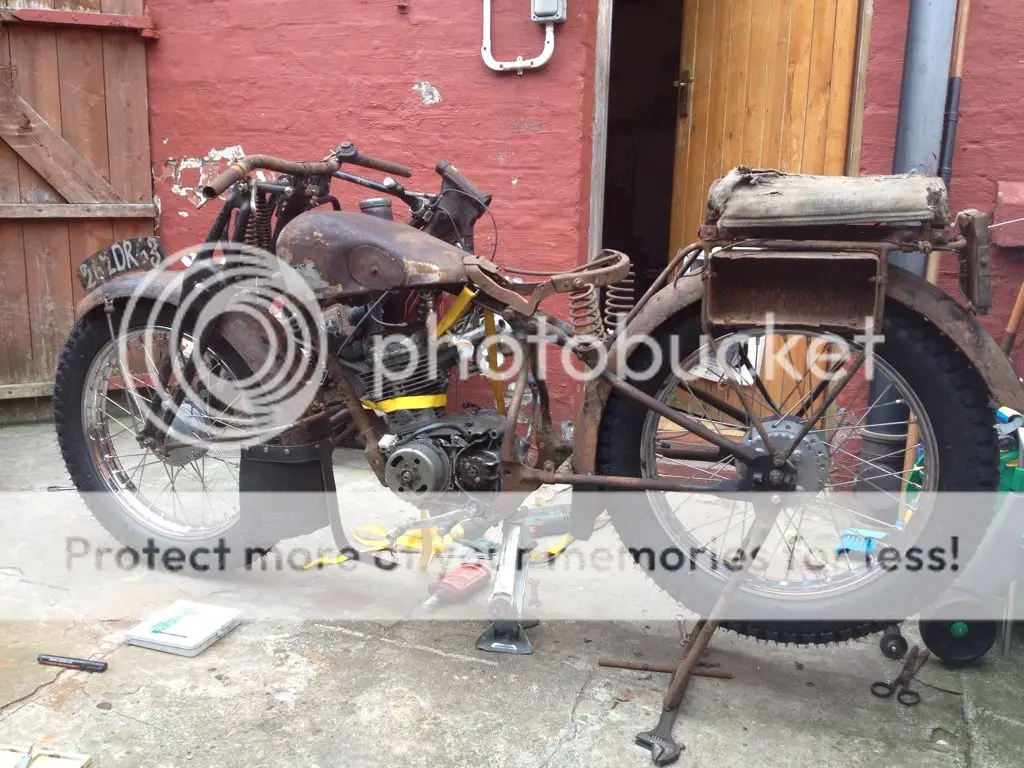
I've now fitted the wheels, mudflaps, front stand, rear stand, an its officially a rolling chassis again which pleases the Mrs no end as shes kicked me out of the living room an into the yard :doh:
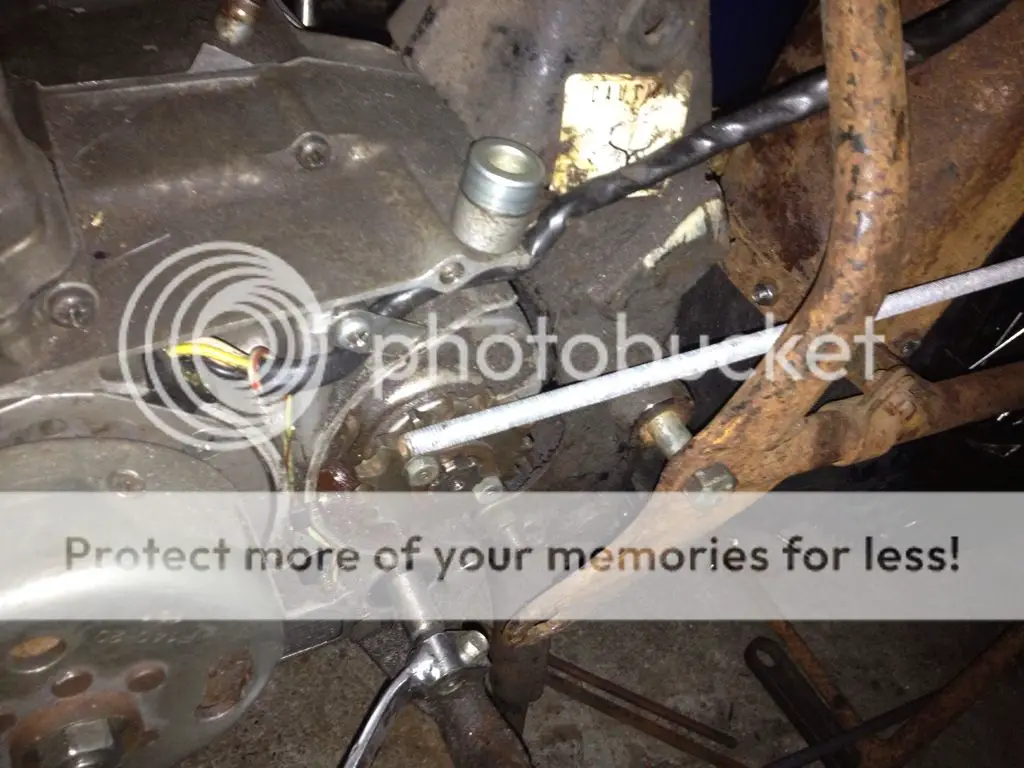
I've today started to try and fit the engine, theres been lots of thinking and just looking at it after hoisting it up in place, in the end I hacked off the original engine mount and put that back on, by sheer luck the original CG swing arm bolt is the same size as the holes in the frame and also line up perfectly and also give perfect chain alignment, I just need to make spaces for everything and two more engine brackets and its in :D .
Again an by pure ahem coinsidence those mudflaps are made out of the exact same colour an type as we have in work...go figure !


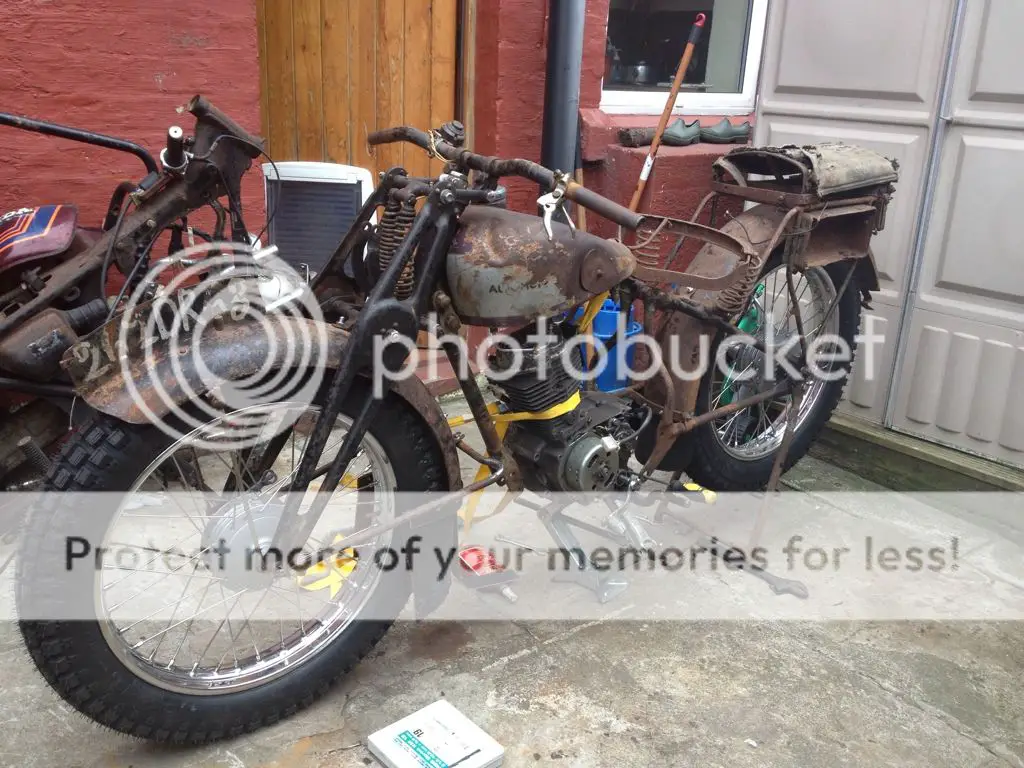
In this pic you can see the engine in place, by sheer luck the original front wheel spacer which is seen on the engine fits perfectly, I just need another one for the other side...
 

dougy

New Member
Jan 17, 2011
147
0
0
54
Southport, England
I've had a great day on it today where everything has just gone right, heres a pic of the simplest frame jig in the world, I chopped the front frame off the doner bike but it was too straight so I lined it up with a bit of card and drew on the where the frame needed to go an it worked a treat. I then filled the frame with sand to stop it kinking, heated it up and bent it so it lined up with the original--simples.


I then made a couple of spacers fit the back engine mount, chopped the end of the original 1932 bracket and welded it onto the CG front tube, and used a bit of 2.5mm steel for the top bracket, and thats the engine fitted and the sprockets line up lovely.
By using the back of the original frame I've still got the exhaust hanger and also retained the center stand ( I've now got three working stands :) front, middle and rear !) and the rear brake peddle which saves a load of hassle, I just need a longer brake and torque arm an I've got back brakes, but somehow I dont think that bits going to be as easy as fitting the engine...


Ludwig II

Well-Known Member
Jul 17, 2012
5,071
783
113
UK
No reasonable offer for the twin refused. But it has to be reasonable. It's all there except the key, tank has a minor dent, and faded paint. Sold as seen as an artwork with no warranty of any sort.
 

dougy

New Member
Jan 17, 2011
147
0
0
54
Southport, England
I started fixing on some brakes this morning starting with the back first, it quickly became apparent that the brake rod was too small by about five inches, a quick search at the local breakers and I found what I needed in a Virago 125 box, agian I had luck on my side as it was the right size and only needed a little bit of fettling and went on great, I made a new torque arm out of angle iron an hey presto I've got back brakes.

Here you can see how small the original brake rod was.


The front brake however was not to be so easy, to lock up the brake plate I've basicaly shaped a great lump of metal to fit in the slot and it will be welded to two small bars which lock into the forks and are bolted through (or will be) with 10 mm high tensile bolts .

After looking at the pics it doesnt look very clear but believe me its big, heavy and solid.


Last edited:

Ludwig II

Well-Known Member
Jul 17, 2012
5,071
783
113
UK
Have you ever felt any affinity with primeval steam engines? The thought comes to me upon seeing your front anchor block.
 

Ludwig II

Well-Known Member
Jul 17, 2012
5,071
783
113
UK
I remember the Ogri carton when he put the snowplough on the front of the bike. That's one of the few benefits I can see in these elephantine cruisers like the Rocket 3, don't bother slowing down, it's the blind man's problem for pulling out without looking.
 

dougy

New Member
Jan 17, 2011
147
0
0
54
Southport, England
Back over to this one for a bit.
I'm upgrading the lekky bikes range, I dont know if it will work in practise but the theory seems soundish to me, I'm going to bolt on a 24 volt altinator I have to a little honda generator to continually charge the batterys on a long run (if neccesary), I'll have to fix the engine on sidecar style an fit a wheel to it which will also solve the problem of the bike being to big for them plus I can fit a seat on it so they can go two's up :)
I've orded a vee pully for the engine today an I'll get the vee belt when I've figured out the centers after the altinator is fitted.

heres a little vid of the engine, I'm really pleased with it as I got it for nothing and just needed a pull start cord, a plug and a change of oil and basically started right up.


And today I chopped up an old wheel chair which gives me a good sized wheel AND a hand brake.


dougy

New Member
Jan 17, 2011
147
0
0
54
Southport, England
And swap bikes again...
Mmmm dropped a great big bollock, I blame me mate Ronnie who's in his 60's and to old to have sex come down for a visit an sit in the yard on the left side of the bike as I was just about to fix the brake, he then waffled on about sex sex sex for about two hours as I tried to fit the front brake and shut me ears at the same time.... That was one of the last jobs I had done and today I just had a little bit of finishing off to do on the brake, I started off fitting the speedo drive which I couldn't get going, after much head scratching I finally sussed it... Me bloody wheel was on the wrong way around ! Ronnie is defo getting the blame for that :doh:

Anyway it's taken me all day but its now on the right way, the brakes adjusted up ok and the speedo works, I've used the CG handle bars for now as the originals are 25 mm and won't fit me switchgear without chopping an welding 22mm ends on, it's a shame because I know Bren really liked them but another problem with them was they were so low they hit me knees on full lock so they had to go.


Other little jobs I've boxed off today are I've had to remove (for now ) the original number plate holder and fit the CG rear light mounting plate an number plate bracket and I welded the speedo bracket in the middle of the bars.
I've ordered a few things I need like the back light, front brake light switch and a K&N type shorty air filter.
The next job is one of my least favourite things, fitting the electrics :oops: ...
 
Last edited:

dougy

New Member
Jan 17, 2011
147
0
0
54
Southport, England
I love getting parcels from abroad, the little differences in how there packed ect so when posty brought me this one before wrapped in some kind of linen that was sewed together and the stitches sealed with red wax... I new my seat springs from India had arrived :D fantastic attention to detail !


Springs all fitted an the seat handed in to the saddler, brown leather, two weeks !

 
Last edited:

dougy

New Member
Jan 17, 2011
147
0
0
54
Southport, England
I got into the electric side a bit more the last couple of days, one problem was the headlight shell being quite a nice shape but just too small to fit the CG loom into and also being a bit too big for the glass, so I've had to make a new rim, I went on a aborigine style walkabout till I found something the rightish shape,as usuall for me these days I found it in Tescos in the form of one of there value pans !


I've fitted the front indicators but I'm sure they need need widening to meet The regs, I just can't remember what they are ?!
The back light and rear indicators went on ok though, I just needs some wires an *** style bullet connectors to get them going.
 
Last edited:

dougy

New Member
Jan 17, 2011
147
0
0
54
Southport, England
Front wheel rim+ spokes+ building £205.
Front tyre £55.
Rim tape £1.50
Frame straightening £40
Front wheel spindle £30.
Split pins £1.50
12mm drill bit £7.00
Pie tax to use manworlds piller drill, 2 x mince beef & onion 1 x meat & potatoe (Hollands)
Drill stand £31
Blacksmith Drill bits £30
Drill sharpener £8x
Vice for drill £8
Cutting disks £9
Alloy £8
12mm 1.25 Pitch die, & holder £15
6mm die & holder £13
Cutting oil £6
Rear tyre £55.
Rear wheel rim+spokes+ building £205
Glass fiber repair kit £17.99
Rear innertube £9.00
Halfords Silver wheel trim paint £6.99
locktight gasket seal£5.50
Haynes manuel £18.99
Rear wheel crush spacer £7.00
Rear wheel bearing £5.50
Headlight, indicator, clock bulbs £3.00
Gear shift plate £14.21
Indicator lens x 2 £9.95
Front brake light switch £6.75
Nuts & bolts £7.30
Rear light £13.78
Pans ! £8.00
Welding wire £11.00
Air filter £7.00
Wire & connectors £20.00
Fishtail silencer £26.00

I fitted the new gear change plate yesterday and its working :) I've only had it going on the stand in the yard but I went up an down the gearbox with no problems.... Well not exactly no problems as I cracked the original CG exhaust in half, the neutral light dont work an the main lights don't work, but another upside was that I found a new chain an front sprocket in a box of bits and there's a new rear sprocket on the way, me next day off I can work on it is Thursday, I cant wait so you just know that this week is gonna drag !