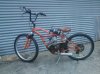
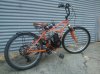
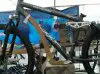
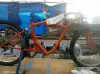
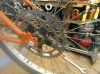
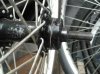
If I could just comment on one small detail here, the only thing about this build that seems off aesthetically to me, and this is purely an aesthetic preference of mine, is that the down tube does not connect to the bottom bracket. If this were my bike, which I know it is not, I'd have made a section of tube to go from the motor mount to the bottom bracket. The way it is now, that angle where the down tube meets the bottom bracket just kind of....throws my eyes off a bit. That is the only critical comment ivhabe to make. The rest of the bike looks great, and I especially like your welded on sprocket. Keep an eye on those rivets though. I would personally be a bit worried that they might not take the torque of the motor. Fortunately, it's an easy fix if you want to get out in front of it, just drill the rivets out and use bolts instead. But, that's up to you, just a suggestion on my part. Welding the sprocket on is great as long as the welds are solid, which your welds appear to be. I chose to use a moped hub on my build for two reasons, the first being the fact that the sprocket bolts directly to the hub via six drilled and tapped mounting holes, IMHO opinion far superior to any rag joint or adapter, you simply took it a step further and welded yours on, yet if you drill out those rivets you can still remove the sprocket for replacement or a gearing change if so desired. Overall, excellent job in my opinion.


 431.2 KB Views: 533
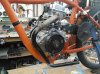
 Hey thanks guys. My builds are crude, but from down the block they look good...lol. Just a hf 90 amp.flux core welder. The ideas are first time attempts. Not being sure they will work i just throw the whole thing together.