Hello everyone!
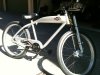
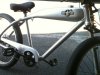
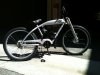
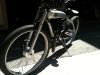
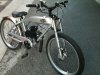
I'm in the process of building up a Felt kit bike (Felt calls it the "Canvas")
I am trying to keep it simple...but my retentiveness keeps getting the better of me!
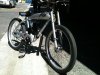
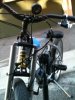
I should have started posting earlier. The bike is now a full "roller", no motor, just a bike, no motor yet. I will try to post the pictures in sequence tho.
I am having trouble resizing the pics (is this a Mac issue? I figure it's probably me...) so here is a link (I hope this works) to a pic before I had the frame and forks powder coated:
http://motorbicycling.com/picture.php?albumid=825&pictureid=4275
I'm in the process of building up a Felt kit bike (Felt calls it the "Canvas")
I am trying to keep it simple...but my retentiveness keeps getting the better of me!
I should have started posting earlier. The bike is now a full "roller", no motor, just a bike, no motor yet. I will try to post the pictures in sequence tho.
I am having trouble resizing the pics (is this a Mac issue? I figure it's probably me...) so here is a link (I hope this works) to a pic before I had the frame and forks powder coated:
http://motorbicycling.com/picture.php?albumid=825&pictureid=4275
Last edited:
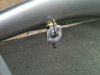
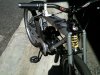
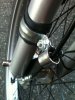
") I'm assuming you epoxied the bung to the tank rather than welding? Keep the pics coming, looks great so far!
I'm assuming you epoxied the bung to the tank rather than welding? Keep the pics coming, looks great so far!
 That thing is nuts!!!!
")