1913 BSA copy

GoldenMotor.com

Dan

Staff
May 25, 2008
12,765
115
48
59
Moosylvania
Really well done Goldy. Your bike has cool, old world lines with the chain set ups.


Thanks for that link Discon. Was looking for that!
 

Goldy

Member
Oct 3, 2010
196
15
18
Nova Scotia
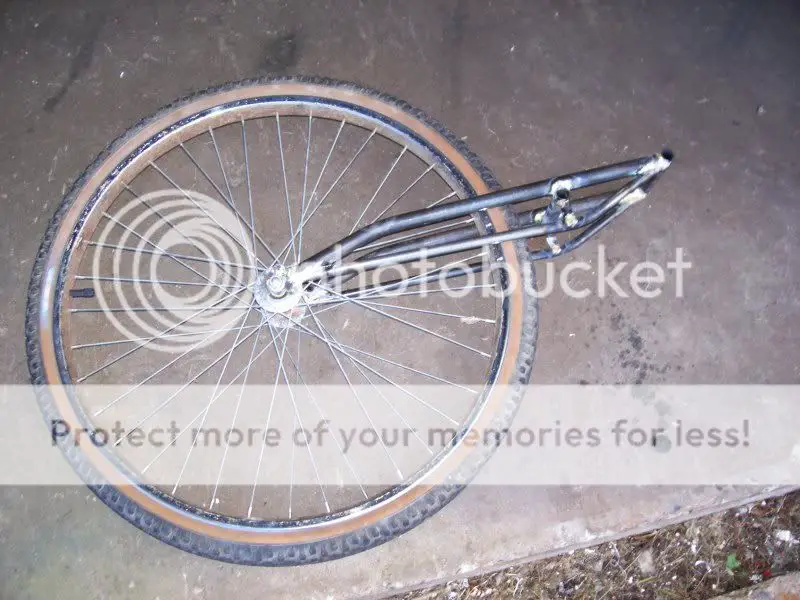
I guess I ought to answer some of these questions...yes curtis, the sprocket is welded on...but it was a little more complicated than that, as the hole in the sprocket was quite a bit larger than the hub, so I machined up a weld-on flange to fit the hub that is stepped to fit inside the sprocket. I was going to drill and bolt the sprocket to the flange, making it easily removable, but knowing I'm never going to wear it out, I got lazy and just welded it to the flange instead. The bottom mount was fabricated from 1" ID steel pipe...I don't have access to a hydraulic pipe bender anymore, so I enlisted the aid of my acetylene torch to soften the pipe and bent it very gradually until it fit nicely in place.
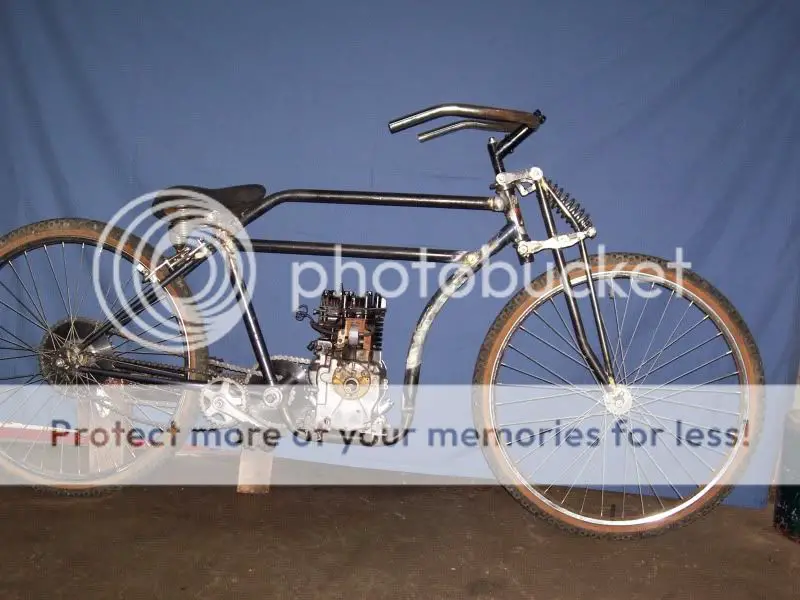
Discont...as far as machining the shaft for the pedals is concerned, what you see is pretty much what you get. Its 3/4" stainless, the square tapered ends are hand filed and fitted to the aluminum cranks using machinist bluing along the way to make sure the taper and fit are correct. The ends are machined and threaded 3/8"unf. When I welded it in place, I made sure the drive sprocket was as close to the frame as I could get it...this puts in such a location as to keep it in line with the driven sprocket on the rear wheel. The overall length is 8", this will allow for clearance between the cranks and the primary drive on the left side and the end of the primary drive support shaft on the right.
 

curtisfox

Well-Known Member
Dec 29, 2008
6,046
3,949
113
minesota
AWESOME thanks very much. As soon as I get a couple of bikes done I will be build ing a briggs powerd bike. Kinda sorta like I did 50 years ago. All the good ideas to inprove it..........Curt
 

Goldy

Member
Oct 3, 2010
196
15
18
Nova Scotia
I found some time over the past couple of weeks to pick away at some girder forks for the front end. Every time I do something like this, I am amazed at the number of bits and pieces that have to be fabricated, machined and welded or brazed together (30 in this case, not counting the nuts and bolts)...small wonder most of the motorcycle manufacturers went with telescopic forks in the '40's, they are a whole lot simpler to build. Anyhow, I am happy with the results, rake and trail have not been altered form the original set up; it feels good and sturdy and moves like it should. I will leave everything looking 'scruffy' until it is all ready for paint, that way if I decide to change anything it won't cost more time to paint it over again.


Last edited:

curtisfox

Well-Known Member
Dec 29, 2008
6,046
3,949
113
minesota
LOVE IT
That is the first welder was a torch so brazed everything. Now I plan on doing it again only with nickel silver I have had for years. I have a small body mans torch for years it needs fixing and will get tit fixed and do. With the new water cleanup flux it should be even better.
One awesome bike coming along good.........Curt
 
  • Like
Reactions: Nightster

Goldy

Member
Oct 3, 2010
196
15
18
Nova Scotia
Yeah...I like the ol' acetylene gear, it's the first thing I learned to weld with, but for the areas requiring a little more strength, I resort to the electric welder. Took it outside a few days ago (in the middle of a north east gale) and peddled it around just to make sure it would ride alright, it was fine except for no brakes yet :) Thanks for the encouragement.
 

curtisfox

Well-Known Member
Dec 29, 2008
6,046
3,949
113
minesota
Have you used nickel silver brazing rod? It is supose to be a lot stronger,Thats what they used on older race cars with tube chasses before the tig come along.....Curt
 
  • Like
Reactions: Nightster

atombikes

New Member
Feb 14, 2010
525
2
0
Northern VA
Your clearances between joined items have to be alot tighter when using silver. Bronze is alot more forgiving on the fit. And still stronger than the base material.
 

Goldy

Member
Oct 3, 2010
196
15
18
Nova Scotia
Yes I've used nickel silver, but as Atom said, the joints need to fit closely, more like soldering than brazing...results are much cleaner and can be just as strong as long as you get good flow into the joints...wouldn't really recommend it for butt welds though.
 

Goldy

Member
Oct 3, 2010
196
15
18
Nova Scotia
More fiddling around, the tires and fenders showed up the other day and I couldn't resist the urge to jump ahead and clean up the front rim, paint it and see what it would look like with a new tire on it.


Goldy

Member
Oct 3, 2010
196
15
18
Nova Scotia
Thought I might as well put this together next. I have an aversion to having my ankles and toes removed by a rotary plainer, so this is how I get around that issue with B&S flywheels...shave down the fins on the lathe, machine out a nice aluminum cover to fit over it (nothing more than a giant 1/4" thick washer). I decided to turn down the old recoil start thing-a ma-jig to make an emergency rope-start pulley. It looks sort of period correct, as a lot of the very ancient motorcycles had open flywheels (not BSA though), but most important, if my foot or any other part of my carcass comes into contact with the rotating flywheel it won't hurt...very much :)


Last edited:

mmmmudd

New Member
Dec 31, 2010
41
0
0
california
SWEEET! In following this thread, I wondered how you were gonna get those classic lines with the sheet metal cowling on. This is a great, and very period solution.
 

Goldy

Member
Oct 3, 2010
196
15
18
Nova Scotia
Finally, after a very stressful/ difficult time dealing with illness in the family I have some progress to report on. It isn't much, just the front fender, but it sure seemed to suck up a good amount of time. First shot shows the side panels and mud guard brazed in place. The whole lot is edged with heavy gauge wire for strength...in hindsight I could have skipped that step by simply using heavier gauge sheet metal and rounding over the edges; live and learn I guess. Final shot is after applying filler/ sanding and priming...all set to be mounted. Body work is not my favorite pastime and I have been avoiding it, but I guess I have to get my hands into building the fuel tank next...got a deadline of mid April to try to achieve.