Frame Repairs on My First Build...

GoldenMotor.com

Davezilla

New Member
Mar 15, 2014
2,705
10
0
San Antonio Texas
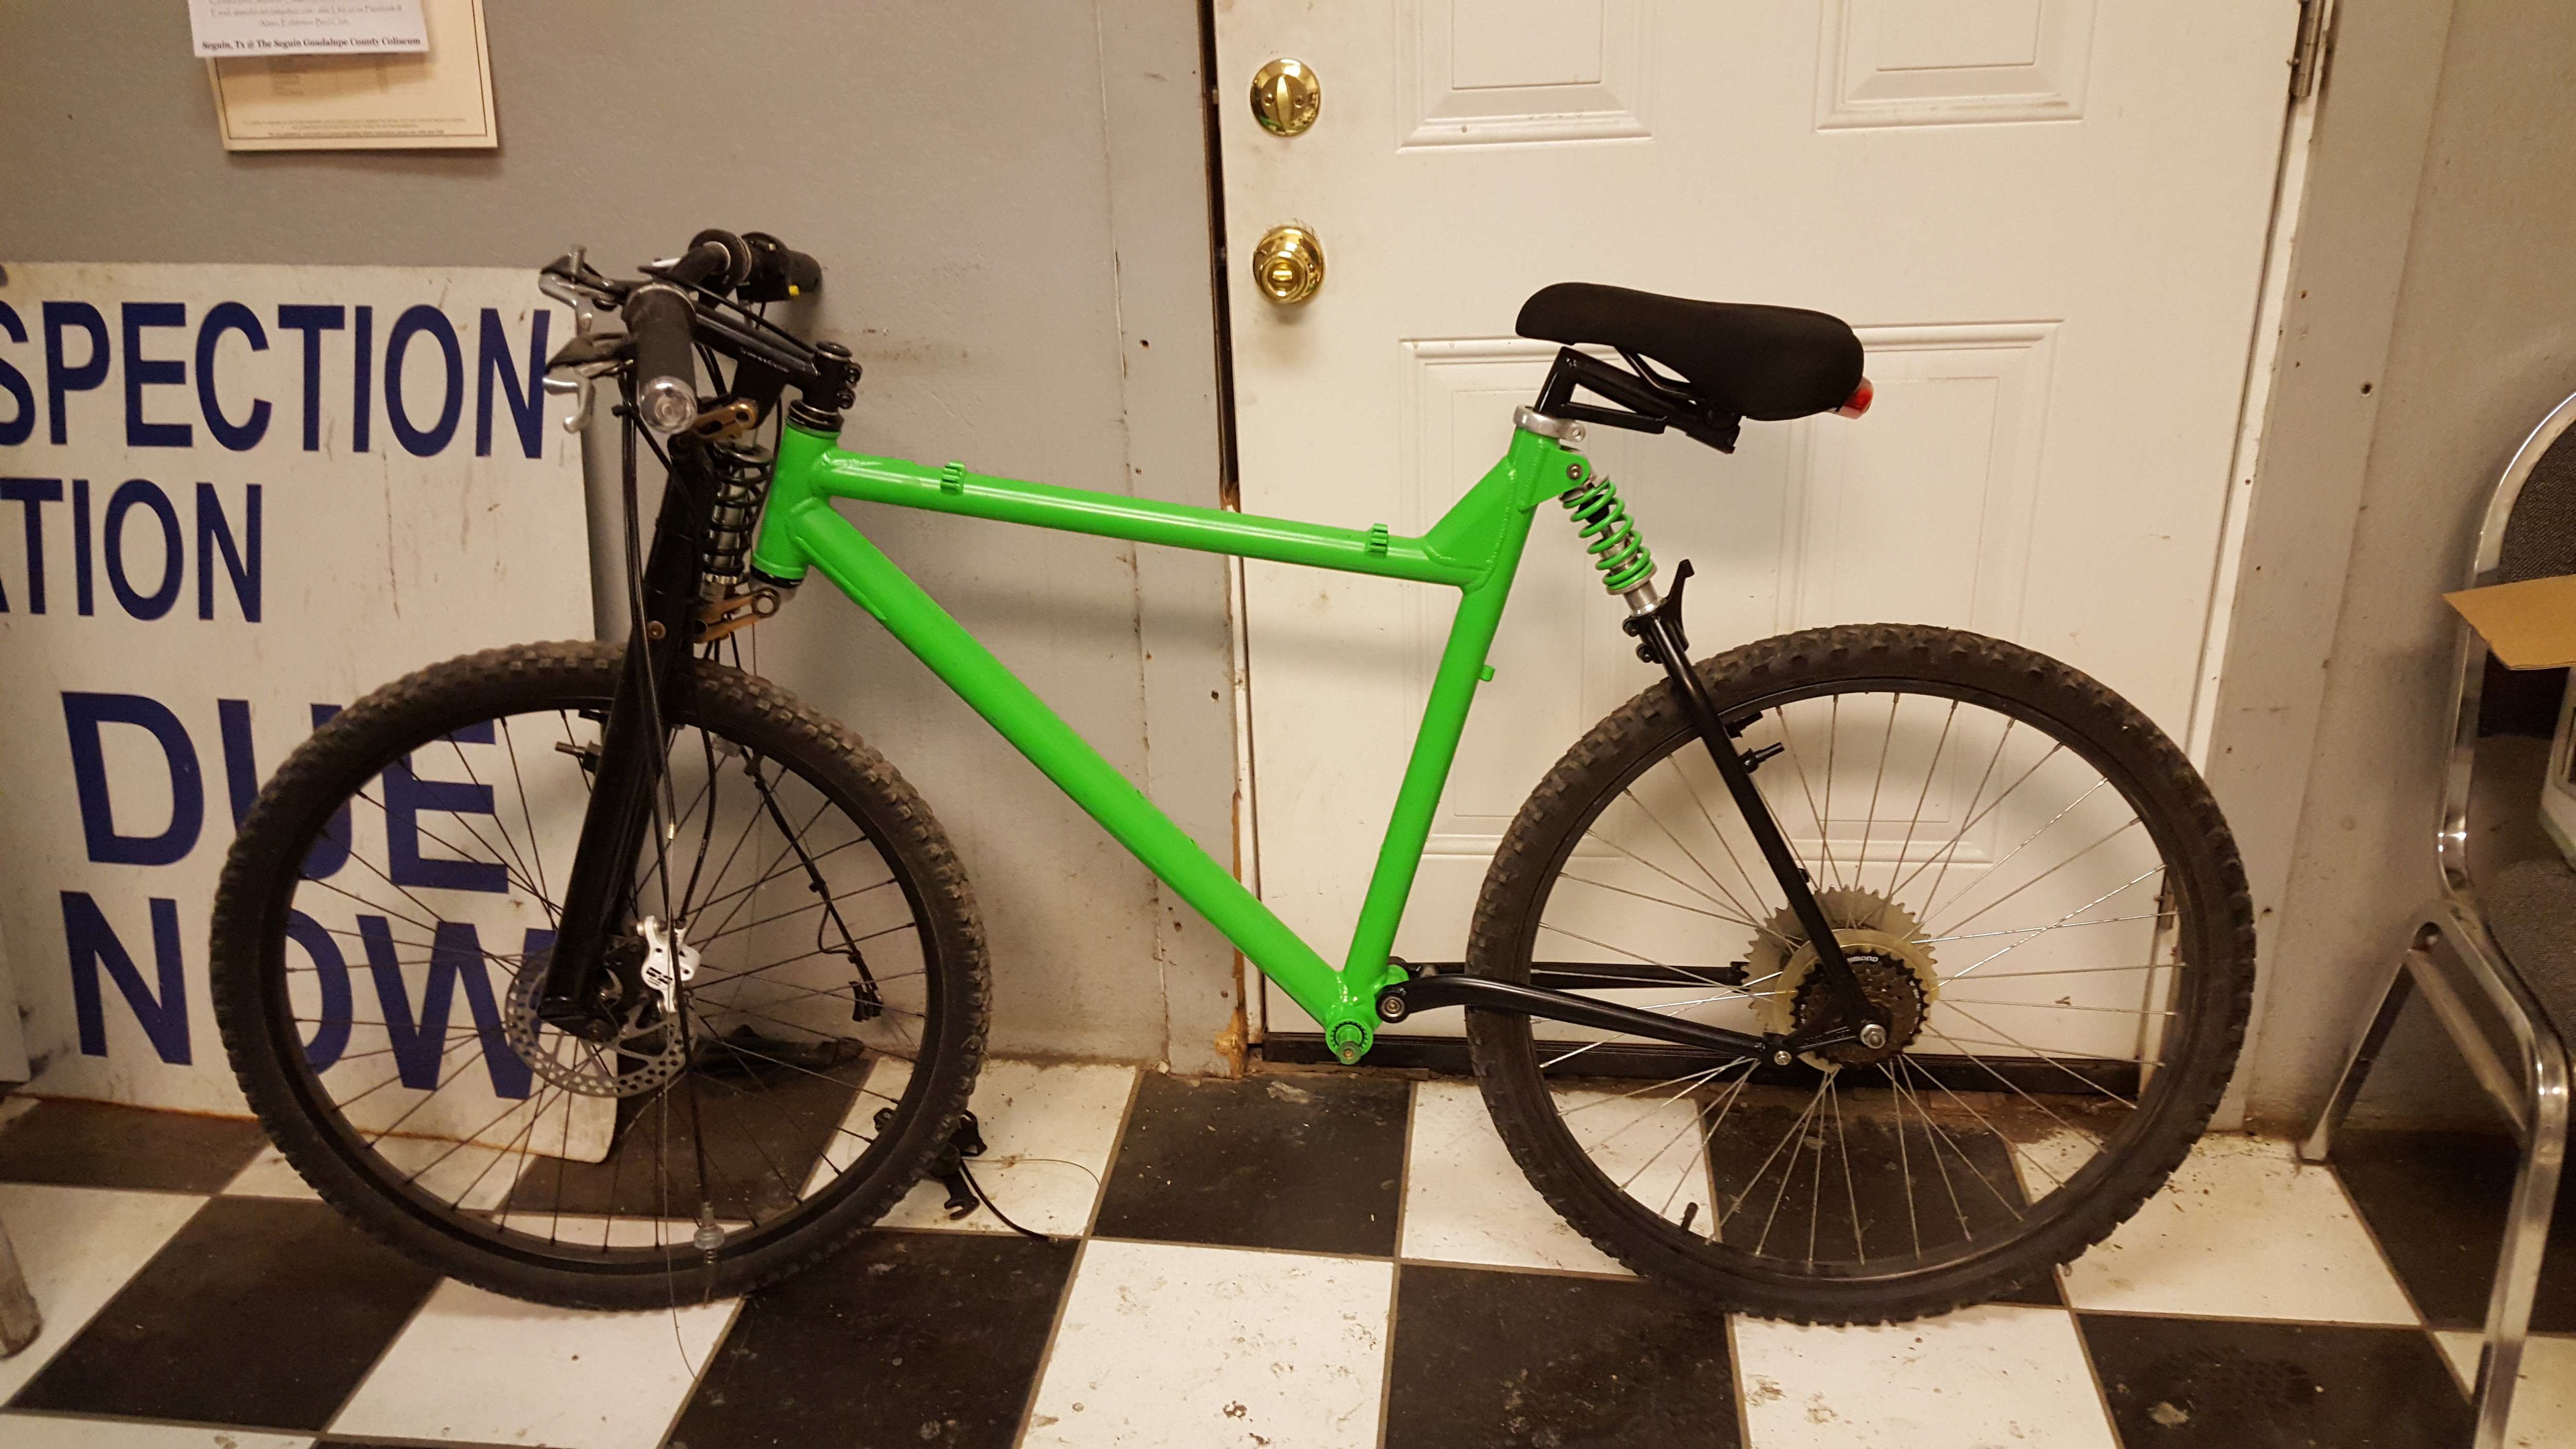
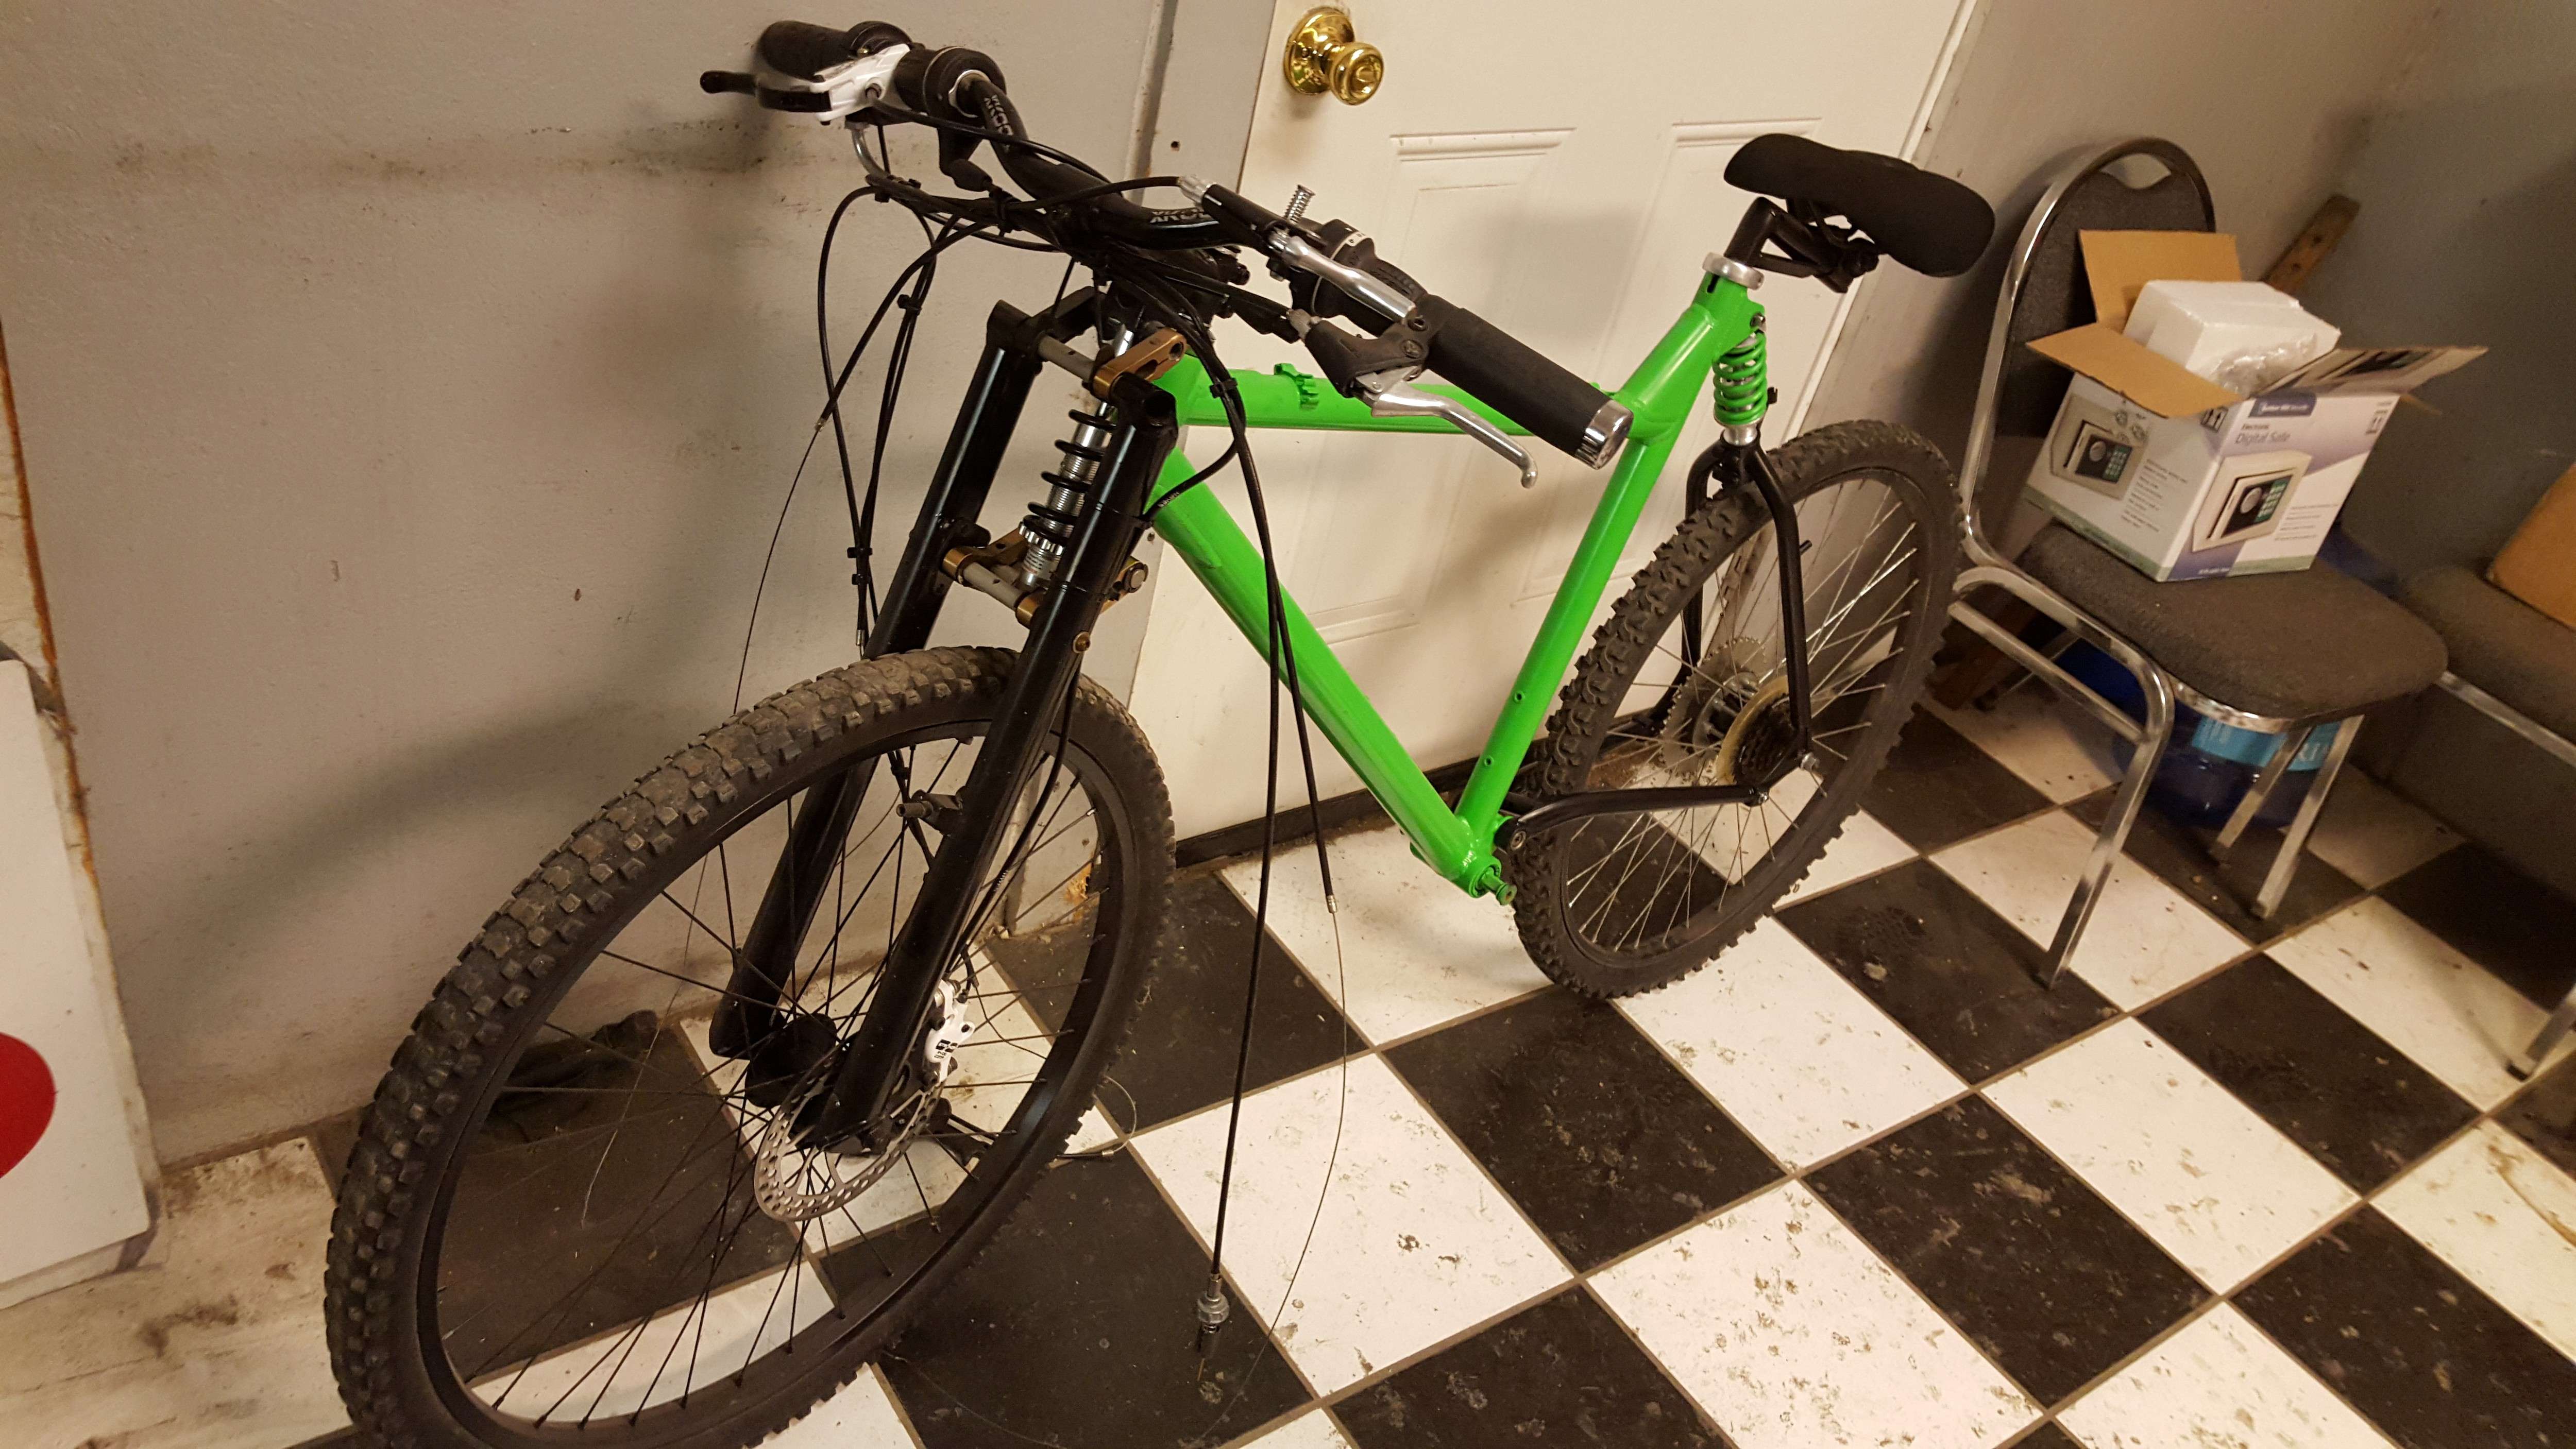
Just thought I'd make a post to record my frame repair job in progress... This all stemmed from last weekend when I was at the shop and wanted to do a few last minute welds, then the intention was to take everything off the frame, clean it up, strip off the paint and give it a real paint job... So much for that idea...

i got the engine out and wanted to finish welding up my bottom forward mount setup I came up with when I first put the engine on the bike... The lower tube is oval shaped and needed some extra long mount studs going to a flimsy kit bracket and this wasn't working so well... it bent the studs after a few short rides and the engine would not sit rigid in the frame... Totally unacceptable... Sooo... I came up with the idea to sit the engine directly on the frame, then mark where it was sitting and cut a slot at each mark, then I slid a 1" wide 1/8" thick piece of steel thru the slots and bolted the engine to this. This worked great and made the engine very rigid once all bolts were bolted down. I liked it, but needed to weld it to the frame. I just tack welded it during the assembly process and it held so well I didn't bother going back to weld this in. i was planning to take the bike all the way apart anyway for paint and was gonna weld it then... And it worked so well during testing that I just left it as is until I had the time to take the bike apart again.

Anyway... I reached that point last weekend and found a crack starting to grow at one of the corners of one of the slots... I remove the stud and jam nuts from the mount, move the wiring out of the way, and grab my little Mig welder with the amps set on low and wire speed set at about 3... pull the trigger, and blew a hole in the frame... WTF??!! How did That happen so easy?? Now I'm forced to pull the engine, the wiring, and grind out the tack welds that held my mount in the frame, remove the steel mount bracket, and decide how to fix this...

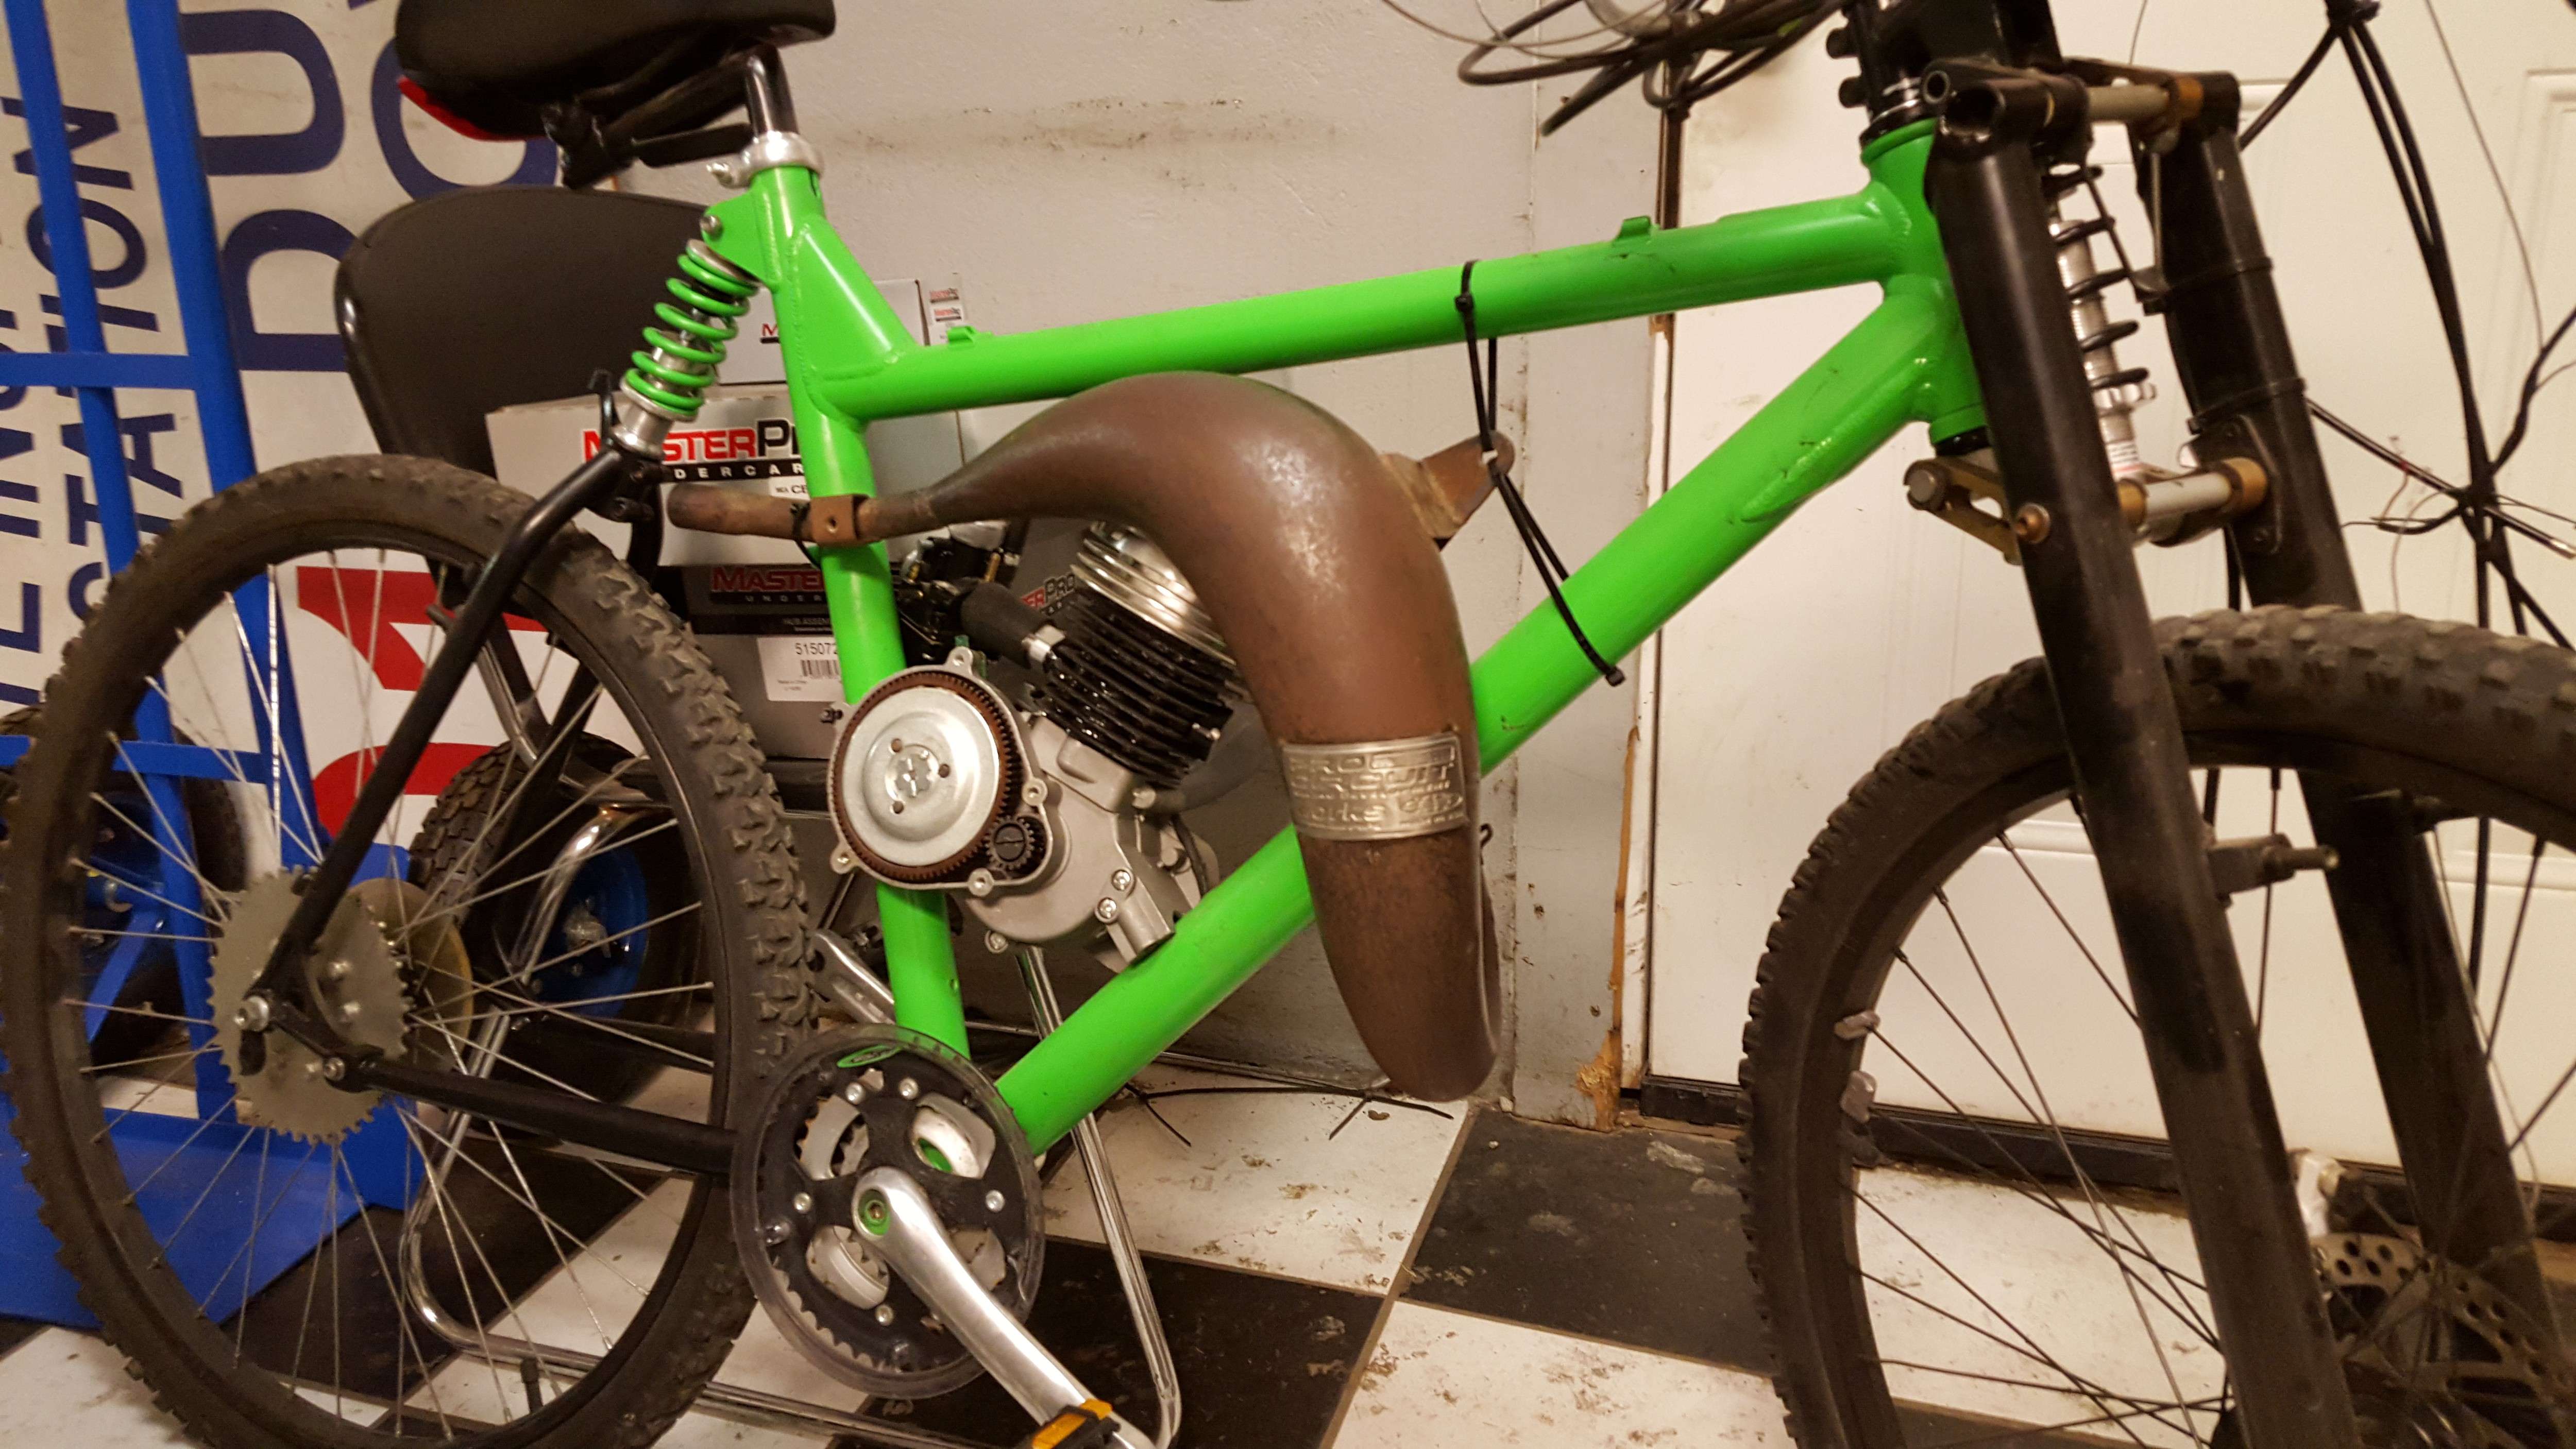
Here's how it looked after some of the damage was cut out... I was gonna just put in some fresh metal, reenforce the area, and weld it all up... but... when cutting into the tubing I notice it's only about .040" thick... Now THAT explains why the welder blew a hole so easily...


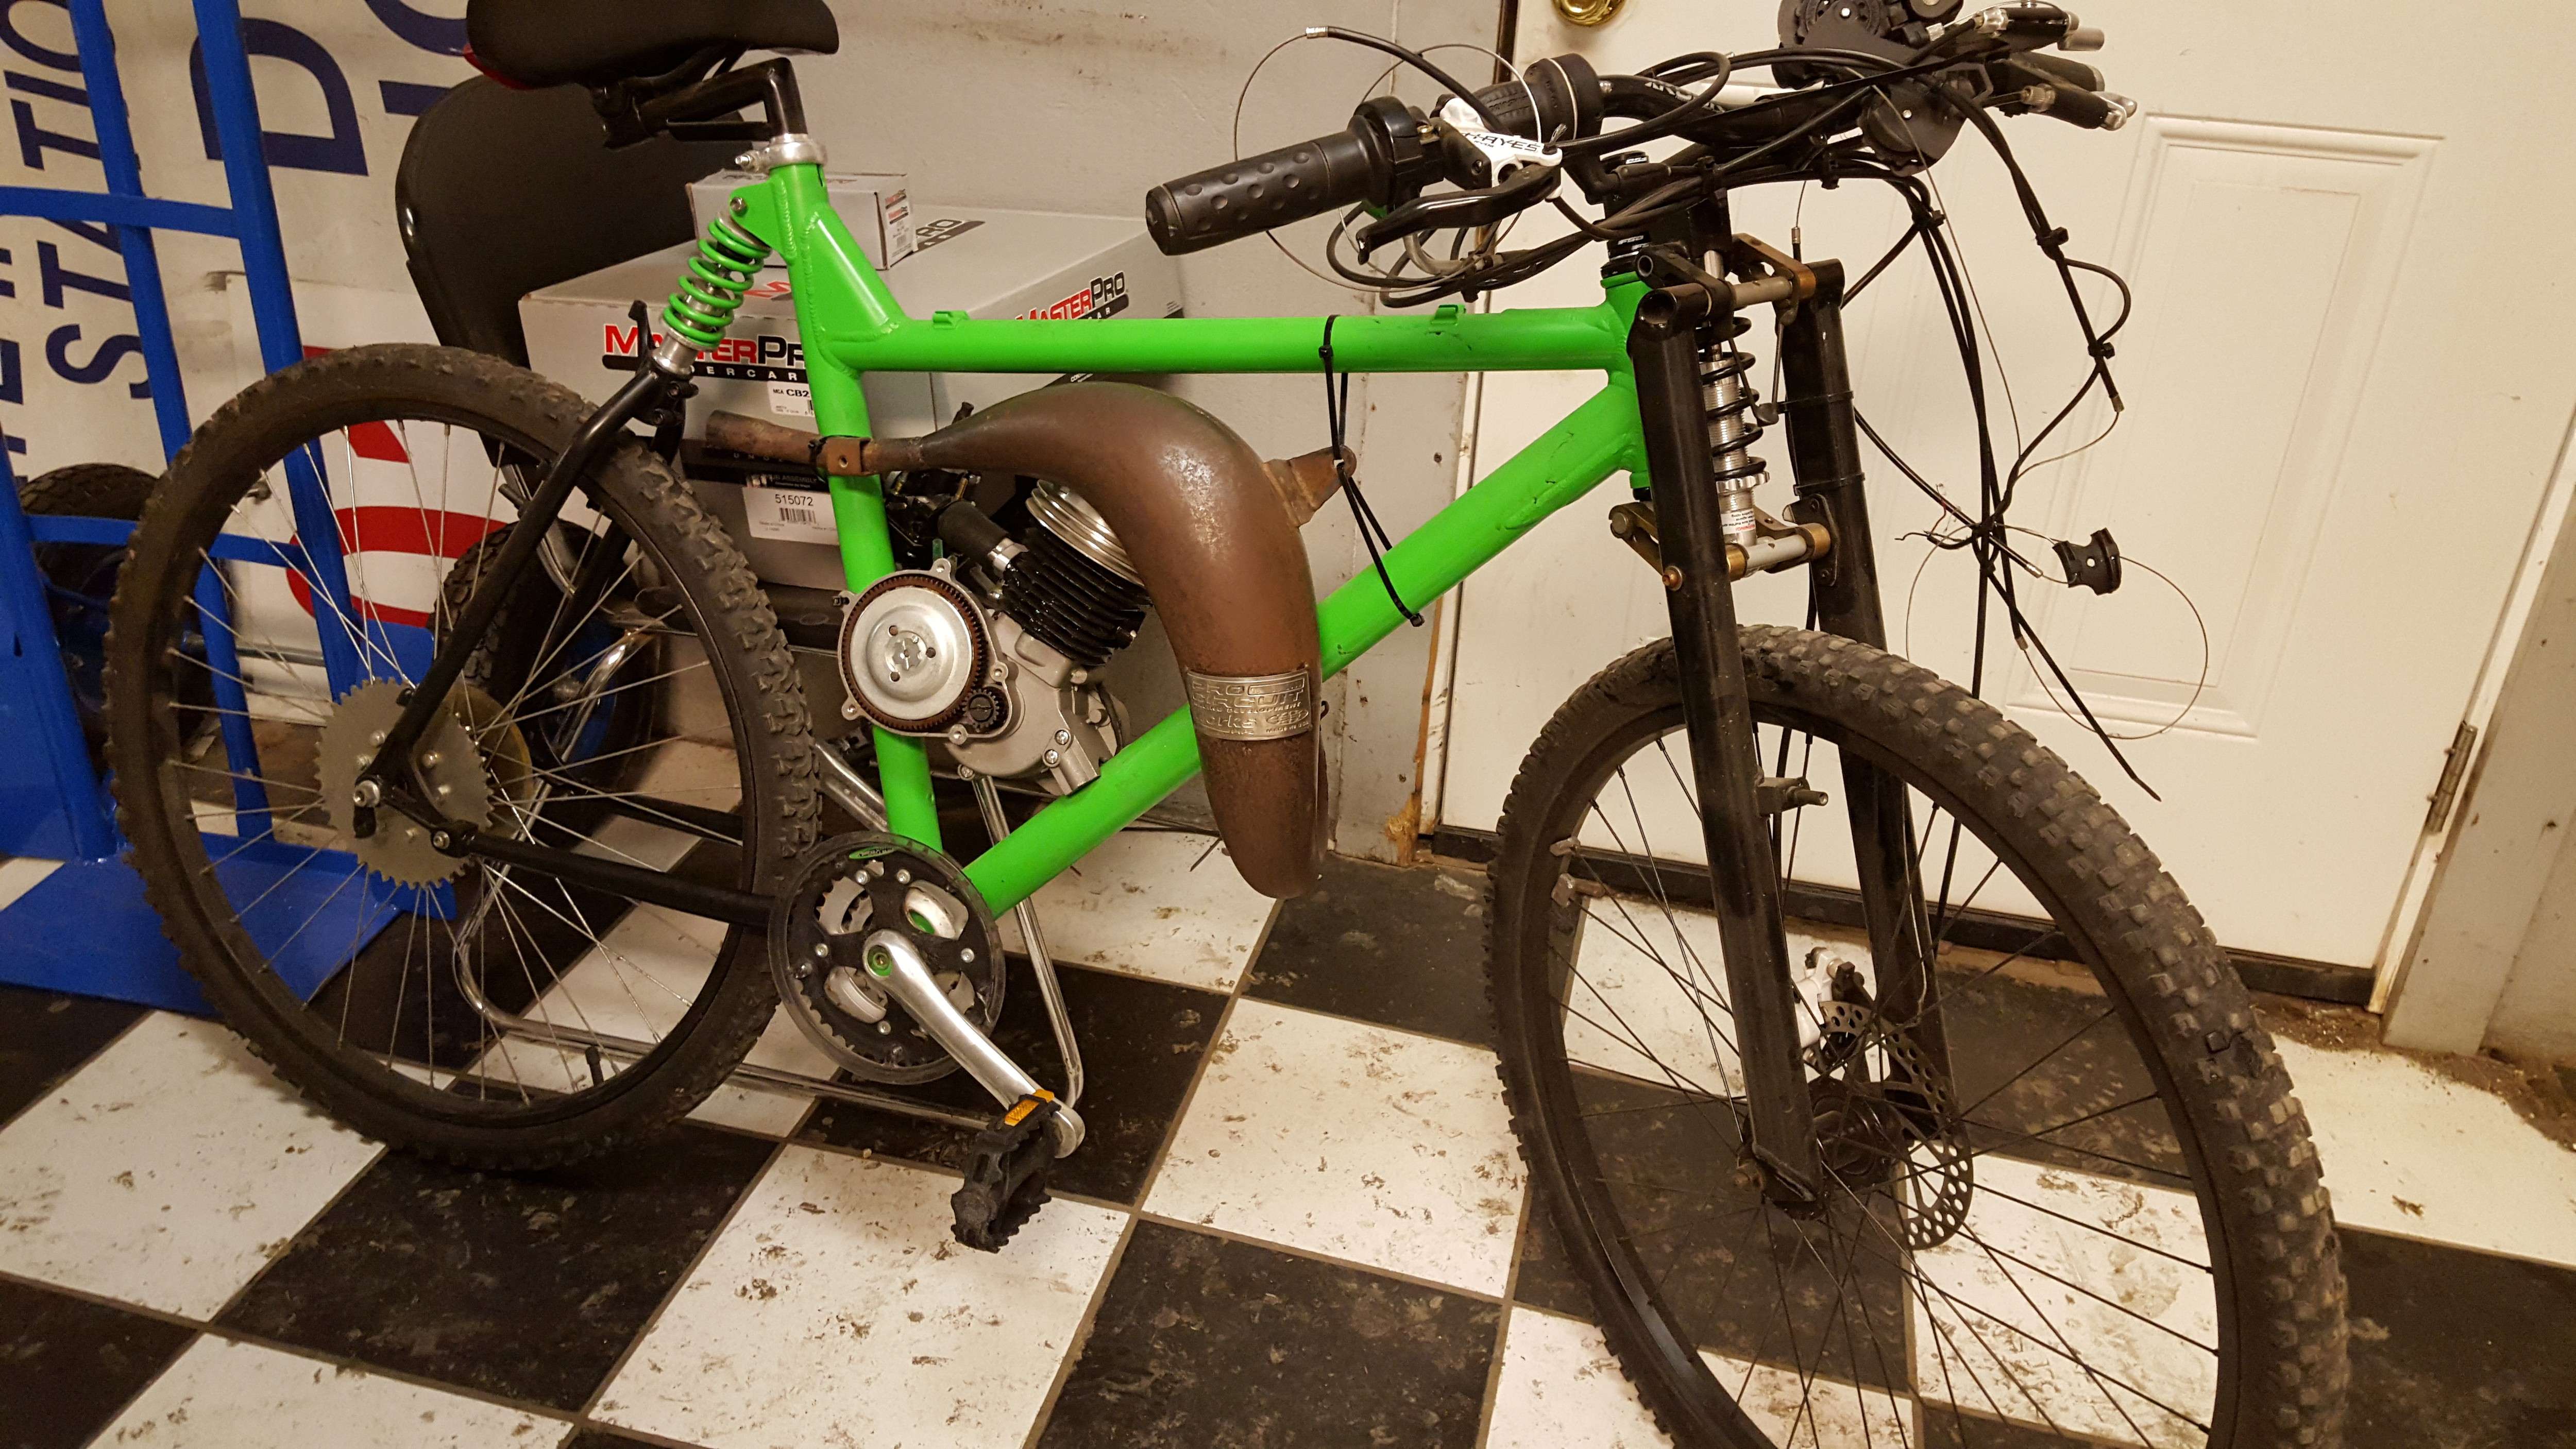
Here are a few other pics taken last week...


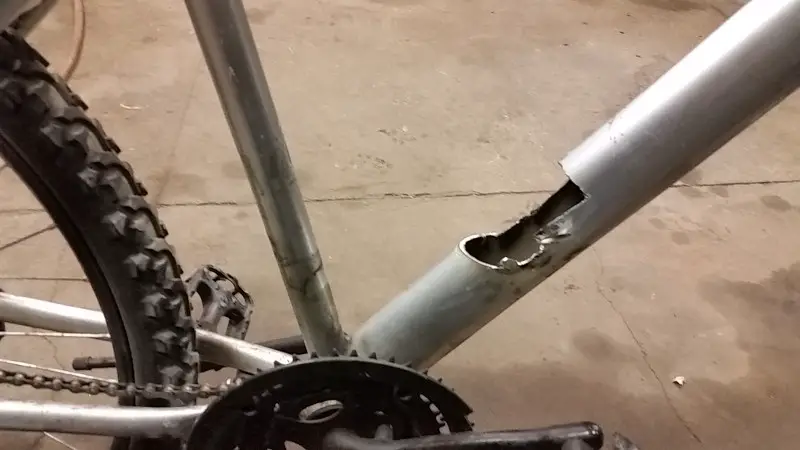
As you can see, the wall thickness is really thin on this tube... I decided to cut it out and weld in some fresh metal... Of course, this also gives me an excuse to buy a tubing notcher to go with my new pipe bender... I did cut out the bad section of frame today, but need to do some more trimming but leave a little behind to give me some more surface to weld on... I'll definitely be using the TIG welder for this part, I want as much control as possible here...

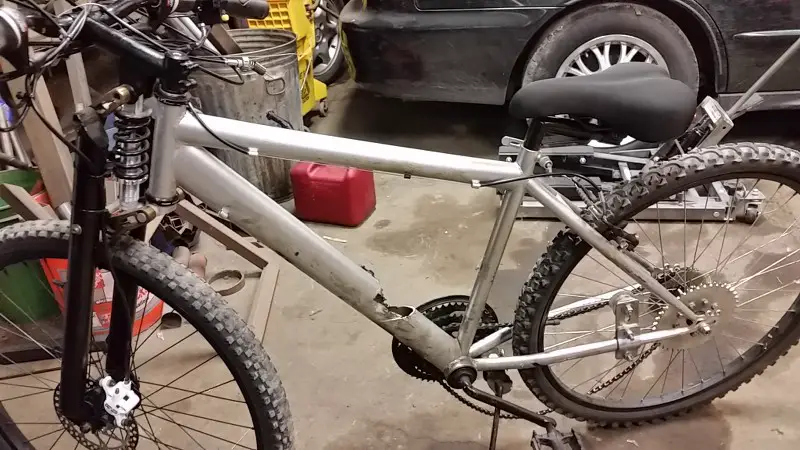
Here's the bike with the lower tube cut out... for the most part, I'll be cutting the rest of it back even further before any welding will take place... And I need to make time to get to the welder's supply place and refill my argon bottle again... Nothing worse than starting a job and running out of gas in the middle of a weld...


Davezilla

New Member
Mar 15, 2014
2,705
10
0
San Antonio Texas
That fork is a Girvin / Noleen that I put on the bike last summer, I modified it slightly by putting a modified go kart shock on it using a mountain bike spring so I could set the ride where it was soft enough but not too soft, the disc brake was added afterward as I was wearing out the V brake pads too quickly, I had a cable operated caliper on it at first but wasn't happy with the stopping power so I got the hydraulic setup which is a lot stronger and operates considerably smoother.
I ended up getting a dual suspension specialized frame that I'm transferring all the parts off this bike to, but I will complete the repairs on this one for a future build.
Right now I'm in the process of building another bike so I'll have something to ride while I'm rebuilding this one. I'm also in the process of building up an occ stingray so I'll be welding up both frames real soon.
 

Davezilla

New Member
Mar 15, 2014
2,705
10
0
San Antonio Texas
The frame is steel so easily re welded with the tig welder, metal is pretty thin so I didn't even try to repair it with the Flux core welder... I got the gas refilled for the tig but not the time to weld the fresh metal in so I decided to replace the frame with a specialized full suspension frame with the rear shock behind the seat post so plenty enough room for the engine, this frame is aluminum so I'm going to cnc cut new mount brackets for an exact fit out of some 1/2" plate stock (I will most likely buy a piece of 1" stock to make both mounts out of) so there's no risk of sawing thru the frame or stress cracking. I'm in no hurry on this one either since I'm building a new bike to get me around on until I can fix this one the right way.
I'm still going to repair this frame when I get time to since it's a nice size other than lacking room for the engine, I will fix this issue when I replace the lower tube by bending it so the engine can sit lower and further forward.
 
Dec 11, 2014
628
14
18
Tucson
I love that fork on this bike. I keep having delusions of building one from scratch. If I find the right pivots I guess you would call them I may try it. The creative side of me wants to modify the design, maybe cantilever the shock out at an angle or something but logic says leave it alone, it looks incredible and functions well.
 

Davezilla

New Member
Mar 15, 2014
2,705
10
0
San Antonio Texas
Opportunity knocks!
You could be the only guy on your block with a mountain bike- drop loop frame.
Just sayin...
Man you just gave me an idea... I do have a nice Morini engine that needs a bike to put it in... I could use smaller diameter tubing and do a double cradle to mount this engine instead of just bending a single down tube to accommodate another China girl engine... I'm gonna take a few measurements in the morning when I get to the shop, if it looks like I can fit it in there this would be a good bike to put it in after a few more mods are done and I can always keep my eyes out for another Noleen front end since I'm putting this one on the specialized frame...
 

Davezilla

New Member
Mar 15, 2014
2,705
10
0
San Antonio Texas
I love that fork on this bike. I keep having delusions of building one from scratch. If I find the right pivots I guess you would call them I may try it. The creative side of me wants to modify the design, maybe cantilever the shock out at an angle or something but logic says leave it alone, it looks incredible and functions well.
Thanks LSR... yeah, I really like the girder type front ends since they work really well and don't really change geometry like rake or trail as the suspension moves up and down. Before I knew these front ends even existed I wanted to design and build a girder for the bike, my idea was pretty easy because I was going to use the stem tube from one of those springer front ends then make a set of lower arms and bushings to mount where the original fork pivots, then make a top mount above the head tube for the top set of arms and make the fork legs out of 3/4" square tubing to for a set of triangular fork legs as this is a very strong design then use either a single or dual mountain bike shocks up between the control arms then weld in the dropouts and a disc caliper tab. I got blueprints for a girder front end to fit a Harley that I was going to down scale to fit a bicycle but that's about the time I saw the Girvin/Noleen front ends on ebay and bought one, after installing and seeing how well these perform this is the only type of front end I would want on a bicycle that can easily exceed 40mph...
 
Dec 11, 2014
628
14
18
Tucson
Thanks for the design ideas. The tube from the Springer crossed my mind also and they are available as separate pieces so it might make sense. Good to hear how you like it at speed. I am currently building a simple 4 stroke beach cruiser to sell and hopefully build one after another as a side business. My personal cruiser/commuter should be ready to finish right when the first for sale bike sells so getting a fork together is running low on time.
 

Trey

$50 Cruiser
Jan 17, 2013
1,432
5
0
Where cattle outnumber people 3 to 1.
I could use smaller diameter tubing and do a double cradle to mount this engine instead of just bending a single down tube to accommodate another China girl engine...
That sounds cool. I'm looking forward to seeing what you come up with.

What model Noleen is that in the pics? I tried to do some pricing, but they were anywhere from $79 to $250.
 

Davezilla

New Member
Mar 15, 2014
2,705
10
0
San Antonio Texas
Long time no post, but long time no progress...
I got the specialized frame painted and ready then I had some free time at the shop and awaiting a few of the final pieces to finish the road bike I finally had some time to dedicate to the old mountain bike...
I took the wheels and front end off the old frame and transferred them to the new frame, I still need to get some headset adapters since this frame uses the 1 1/8" head sets and the Noleen front end uses a 1"so I got some adapters on order for the head set, then this frame uses the 31.9mm seat post so I got the seat post shims on order, as well as the head set shims to take up the dead space between the stem and the bearings. Just a few minor setbacks, but at least I can see the bike assembled now...
For the engine it's going to need special sized mounts both front and back, but I can make a set of billet mounts for this one, this frame is aluminum so I want to be sure the load is spread nice and wide to prevent chafe thru from the smaller more conventional mount brackets that can eventually saw thru the frame tubing. This frame is welded really nice with doublers and extra metal in all the critical areas. It uses a 3 piece bottom bracket and I'm going to get a wider crank set for this one so I can use a pull starter again.
With the rear suspension I will need to use a spring type tensioner to keep the chain tension so I will get one from turbobuick.
I'm still thinking about using a tank off a Suzuki Jr50 since it's small but has a nice dirt bike shape and look to it, the extra fuel capacity will be nice too.

I got a few other plans for this one and will use the super rat engine I built a few months ago since that engine didn't fit the road bike and I need to make special mounts anyway... that engine has a nice solid bottom end and I got a few really nicely ported jug's with the standard 32mm intake bolt spacing, I was going to get a 40mm intake space cylinder but decided on the 32 since I can get the flat transfers and want to keep parts as easy to get as possible. I got one of those round top heads for this engine but may put another fred head since these are proven performers. I got a cr80 pipe on the way and a 21mm Dellorto clone carb so this engine will rip as well as the last one if not better. The last engine got me up to 43mph with a 44T rear sprocket and the stock nt carb so this one should be at least as fast if not even faster. I'm shooting for really strong acceleration again as well as a respectable top speed so this engine got a massive port job to be more compatible with the pipe and carb I got for it.
Here's how it looks with the new frame... I still got a way to go on this one but I'm getting a little more free time as the summer rush at the shop is slowing down some. I won't be selling this one, but I do hope it attracts some good attention so I can build a few more to sell this fall...


And to answer the question, this Noleen front end is the Vector, there's another one called the Cross Link that's really nice, but a little more pricy, the cross link is really nice because you can use any stem you want, and the Vector the stem is integrated with the shock mount so it would require some mods, or a cross link shock mount in order to use a different stem. None of them come with disc brake mounts so I had to modify a disc brake bracket so it would work, and this is a hydraulic disc setup which is light years better than the cable operated setup I was using before. I would like to put a hydraulic rear disc on this one as well if I can make up a different rear wheel.
 

Davezilla

New Member
Mar 15, 2014
2,705
10
0
San Antonio Texas
Unfortunately this one is still in the same stage of progress since it's been so busy at the shop, one of my customers is one of the biggest used car dealerships in the area so I'll give him back 2 cars and he brings 2 or 3 more to me for the next day... right now I think I got 6 of his cars on my lot not to mention a few more from other dealers and private customers. I think I counted 11 cars waiting to be fixed when I closed up shop tonight...
So yup... the summer rush is still going strong, and all these small dealerships are buying up cars like there's no tomorrow right now in preparation for next year's tax return season... then when these cars are sold and their warranties run out, these guys recommend me to their customers so that's really good for business, but not so good for having free time. I'm hoping I can hire a full time mechanic that's got some skills so I can keep up with this increasing demand and get some of my free time back. It's just hard to find good help that's dependable these days, but hopefully I can find one or 2 decent mechanics soon, I got enough work for sure....

I'm also working the road bike hard and heavy when I do get a few hours of free time but that one is getting the best of everything so progress is really slow on that one too... it's real close to ready to start the engine, but I need to free up about 3 or 4 hours to do all the finishing touches. This one will need some custom billet mounts too since it has an aluminum frame and I'm not going to take any chances with it cracking like the other one did. I still have the other frame and I'm still going to fix it but after I get the 3 bikes I'm working on road worthy first.
 

Davezilla

New Member
Mar 15, 2014
2,705
10
0
San Antonio Texas
Still moving slow on both bikes, still crazy busy at the shop but I did assemble an engine and took the measurements to get it into the frame solidly. I also got a really nice Pro Circuit pipe for it and it's going to need a slight re clocking at the header section to fit. I'm not going to cut or weld on the pipe tho until I get the engine mounted.
After measuring out one of those billet mounts I got sitting at the shop I saw it wasn't wide enough and there wasn't going to be enough metal left if I opened up the hole to the required 1.73" to go over the front down tube so I ordered some 1" thick aluminum bar stock that I can make a custom mount out of. The rear mount will also be custom as the seat post tube won't fit between the rear studs either.

After I took all the measurements and ordered the aluminum it's going to take to make the mounts as well as a crank set that'll fit the bike, I took the engine and pipe and zip tie mounted them into the frame to get an idea of what it's going to look like... I'm planning on painting the whole engine black and may add some green accents to it here and there, but I'm really liking what it's looking like...


Davezilla

New Member
Mar 15, 2014
2,705
10
0
San Antonio Texas
Thanks... now I'm just waiting on some aluminum bar stock so I can make the mounts but when I checked the tracking it says the package has been here in San Antonio for over a week so I asked the vendor to re send and I will pay again until we can resolve the issue with the first package, from the looks of it ups probably lost the package after it got to the San Antonio facility, but he can get his money back then refund me if that's the case.
I recently hired a new mechanic at the shop and this guy is working out well enough that I can break off and work on the bikes a little when things slow down during the day so as soon as I get some bar stock I will be firing up the cnc and making a set of mounts... I could probably make my own exhaust header adapter but I'll buy another one from Fred since his setup worked out so well on the other bike.

I just checked my ebay messages and the seller said they will contact ups and if the package is lost they can just file a claim but they will re send me the metal I ordered and I told them that if the bar stock comes in after they re send I will pay for the other package too since I can always use the aluminum for other projects...
 
Last edited:
Dec 11, 2014
628
14
18
Tucson
U.P.S. has a talent for losing shipments when they arrive at the final hub. Good luck on getting the bar stock and I would love some pics of what your making when it gets there.
 

Davezilla

New Member
Mar 15, 2014
2,705
10
0
San Antonio Texas
Yeah, last time I ordered an 80 cubic foot argon bottle and they lost it... I had to go to their hub and practically make them look for it when I got there because they just kept trying to shrug me off, then I was the one who saw the box sitting by it's self kind of set aside so I asked one of them to check if that was mine, one guy said no, but I talked to another who actually looked at the shipping label and told me that was it.
this time I don't have the time to get to the other side of town and check for myself tho, but the seller is looking into it for me, I told the seller that I would gladly pay for another package if the lost package shows up at my door after the replacement comes... can just never have enough bar stock on hand...

My idea for the mounts is to cut 2 3" pieces out and clamp them together then bore the hole thru both pieces simultaneously, then countersink and counterbore for the allen screws to put the mount on the engine, then drill and tap the blocks so they can be rejoined over the frame. This will also allow me to get the perfect angle with the frame and seat post so it will have full contact and won't be able to move once clamped down.
If this works out as planned I would be able to make these for any frame size or shape, making oval or other odd shaped tubing a non issue for mounting...